
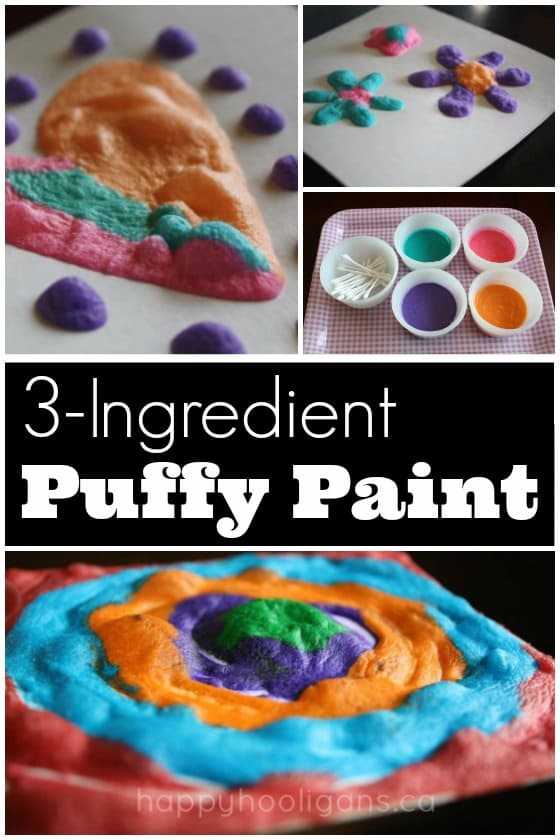
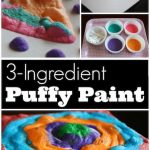
This HOMEMADE PUFFY PAINT recipe is easy to make with just 3 ingredients: self-rising flour, salt and water. Paint your picture, put it in the microwave, and it puffs right up! Your kids will love it!
Homemade puffy paint is fun and easy to make, and it doubles as a wonderful art process for kids AND a cool science experiment. You just need a microwave and a few kitchen ingredients to make it.
You know I LOVE homemade paint recipes and easy science activities. Homemade puffy paint fits the bill perfectly!
Puffy paint is an easy and inexpensive alternative to buying storebought puffy paint for your preschoolers. It’s fun to paint and create with, and the best part is watching your artwork puff right up when you place it in the microwave!
See us making it here:
A printable recipe can be found at the bottom of this post.
Homemade Puffy Paint Ingredients:
For your conviencience, this post contains affiliate links. As an Amazon associate, I earn from qualifying purchases.
- 1 tbsp self-rising flour (see note below to make your own)
- food colouring in the colours of your choice (I used these Wilton icing gels)
- 1 tbsp salt
- little bit of water (start with 1/4 tsp per colour)
How to Make Self-Rising Flour
If you don’t have self-rising flour, you can make your own by mixing together the following ingredients.
- 1 cup all purpose flour
- 1 and 1/2 tsp baking powder
- 1/4 tsp salt
- Combine flour and salt in a small bowl.
- Add a bit of water and stir until you get a smooth, thin paste (about the same consistency of stirred yogurt).
- Add your food colouring, and mix well.

Our puff paint sat for a bit while we walked to the school bus, and it thickened up again, so I just added a few drops of water to thin it back to the yogurt consistency.
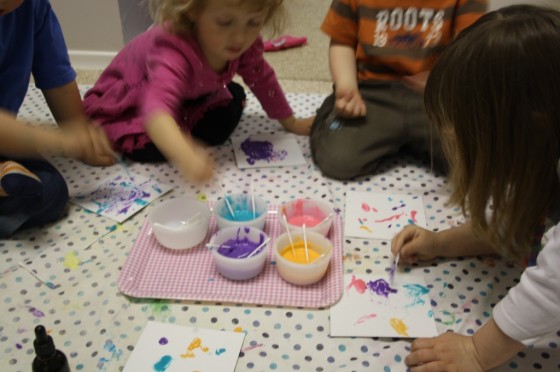
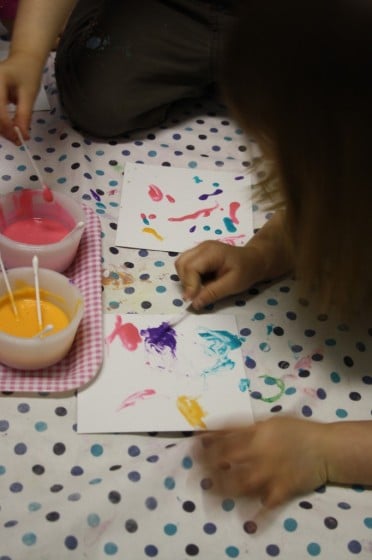
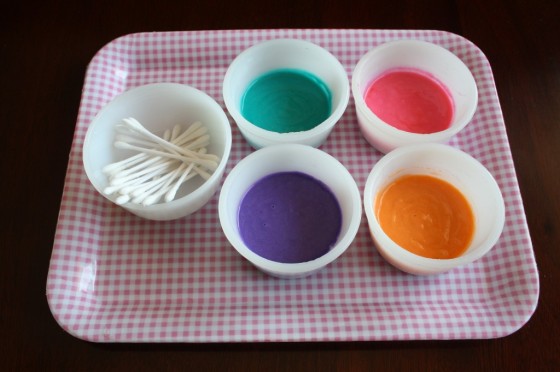
Get some sturdy cardstock or thin cardboard, and some paintbrushes or q-tips, and get creating!
Magically transform it in your microwave:
Now for the science!
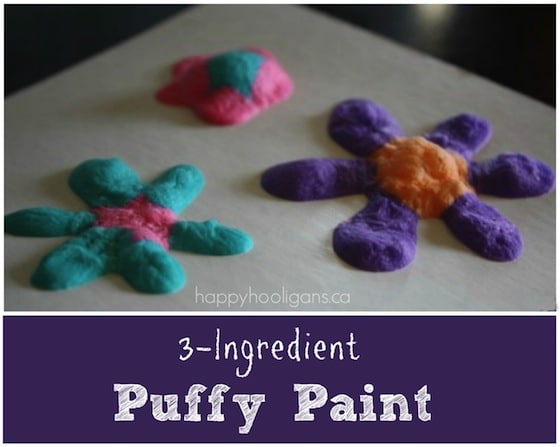
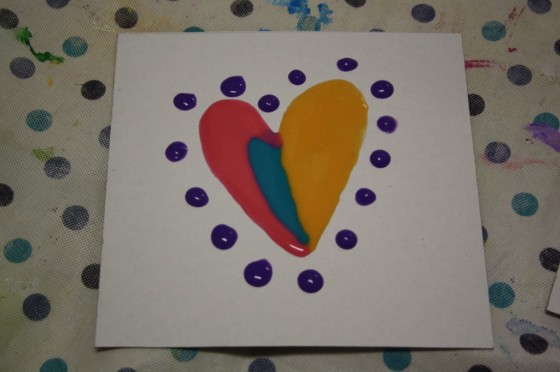
When you’re happy with your masterpiece, pop it into the microwave for 30 seconds and watch your painting puff up!
Your artwork will be warm when you remove it from the microwave, but it will be completely set.

Ta daaa…
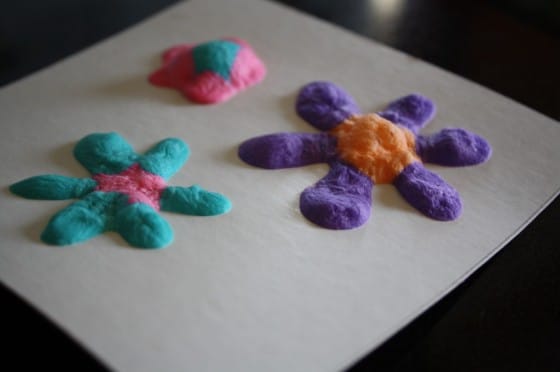
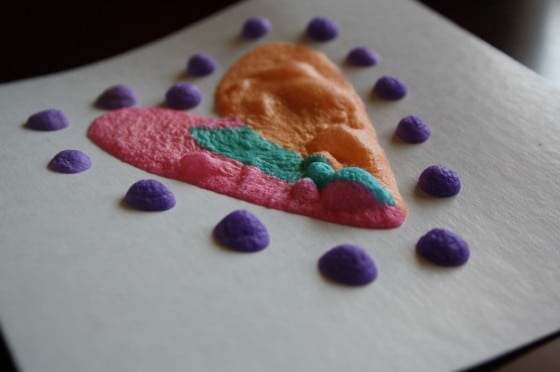
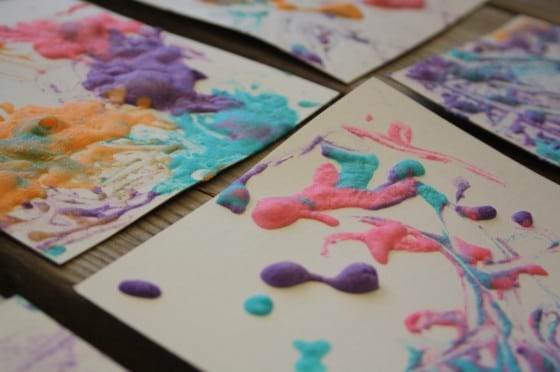
Aren’t these paints remarkable?
What a fun art/science activity to do with your kids!
See our Puffy Paint Valentines here and our Puffy Paint Earth Day craft here!
3-Ingredient Homemade Puffy Paint
Supplies
- 1 cup all purpose flour
- 1 and 1/2 tsp baking powder
- 1/4 tsp salt
Instructions
- Combine flour and salt in a small bowl.
- Add a bit of water and stir until you get a smooth, thin paste (about the same consistency of stirred yogurt).
- Add food colouring, and mix well.
- Put painting into microwave for 30 seconds and watch it puff up!
- Allow to cool before handling.

More cool art ideas for kids
Starry Night with Melted Crayons
Salt, Glue and Watercolour Art
Sharpies and Rubbing Alcohol Art
Puffy Finger Paint with Shaving Cream and Glue – Skip to my Lou
Get the 3-5 Playful Preschool e-Book!
25+preschool activities, 10 printables, 50 links to activities not featured in the book all for $8.99 until Download your copy today:


Jackie is a mom, wife, home daycare provider, and the creative spirit behind Happy Hooligans. She specializes in kids’ crafts and activities, easy recipes, and parenting. She began blogging in 2011, and today, Happy Hooligans inspires more than 2 million parents, caregivers and Early Years Professionals all over the globe.


preschooluniverse
I haven’t heard of doing puffy paint in the microwave. We did it with shaving cream and glue, but the colors weren’t as vibrant. Must try.
happyhooligans
I’ve seen the shaving cream and glue as well. I think we’ll have to try that too!
suzanne
ive done both puffy paints …kids loved it … i work in a pre school my boss calls me the mad scientist …. love itttttttt thank you so musch for the lovely ideas could not do it with out you !!!
happyhooligans
You’re so welcome, Suzanne! I’m so happy you’re getting inspiration from our crafts and activities! Can’t tell you how much that means to me. xx
Nicole
Great easy recipe. Will have to try . Do these dry rock hard?
Valerie @ Glittering Muffins
Those look awesome! Sometimes I think you have more fun than the kids doing all those crafts, lol. 🙂
Jana
Thanks for the tutorial! We have tried it with kids and it was really fun! And we’re going to try some more things from your great blog soon 🙂
happyhooligans
You’re welcome, Jana! I’m so glad you’ve been inspired to try some of our ideas yourself! Good luck with them, and have fun!
Gianne
We did this with space drawings a few weeks ago. So neat!!! Gianne at cowsgomooandducksgoquack.blogspot.com
Jacki
Thanks for this one. Just did it for a rainy day activity. My girls loved it when they realised they could also draw on the puffy paint with permanent markers when it was dry. Love your page.
happyhooligans
Well, that’s cool, Jacki! So we could leave the puffy paint white, and then the kids could colour their creations! Thanks for the tip!
So glad you like the blog! As much as I don’t want summer to end, I am eager to get back to the Hooligans and to blogging again. 🙂
Kellie Anderson
This is such a cute idea I think my kids will love doing this thanks for sharing!
Anonymous
Do you think that spraying hair spray or something would keep it from flaking?
happyhooligans
You could try. It might work, but then, it might break down the paint as well. I really don’t know. It is only flour and salt and water, so I’m not sure how it would react/hold up after being sprayed. Sorry I can’t be of more help there, but my advice would be, plan to do this as a fun activity, not for a project that you would want to keep for a great length of time.
debbie
I love all ! I teach art and am on a tight budget.
happyhooligans
I’m on a tight budget here too, Debbie, so all of the arts/crafts/activites we do here can be done at little or no expense. 🙂 I hope you find lots of inspiration here. 🙂
Majet
It’s so, so, so, so nice! Great!
But, I don’t know what is self-rising flour – can I use yeast with flour?
Thank You!
happyhooligans
I wouldn’t try it with yeast, Majet. S.R. flour has baking powder and salt in it. Here’s how you can make it yourself: http://www.food.com/recipe/homemade-self-rising-flour-substitute-29318
Majet
🙂 Thank You. Well, I will use flour with baking powder.
Can U tell me, is this picture solid, can I put it on the wall?
happyhooligans
It’s very hard once it has dried, Majet. ONe of ours kind of disintegrated, but the other one did not, so I would think you would be able to display it for a while. It might not last forever, but I suspect it would last for a bit.
Virginia
Thank you. I came to the comments to find just this. I have only all purpose flour in the house.
We are going to give this a go this afternoon after naps.
Majet
OK.
Best regards!
Trisha
I love this blog!! I have made this with regular flour with the same results:)
Trisha
Sorry…I did use baking powder as well:)
happyhooligans
Do you know what proportions you used, Trisha? I’d love to add that recipe to my post as an alternative.
Bettie Towner
To make your own self rising flour: 3/4 cup flour; 1 teaspoon baking powder; 1/4 teaspoon salt.
happyhooligans
Thanks, Bettie!
angelleighdesigns
omigourd, how fun! found you at @Funnermother!
t.ins
hello! i’m really interested in trying this one out. would you happen to know if the paint will become puffy if you will just let it dry? we don’t have a microwave in the classroom. Your reply will really be helpful. thank you 🙂
happyhooligans
No, much like when you bake a cake, heat is needed in order for the chemical reaction with the self-rising flour to occur. It might be possible to do the experiment in a conventional oven set to low heat, but I haven’t tried it. What about a toaster oven? Could you bring one of those into the classroom for the experiment?
chrystelle allan
Hi,I love puff paint and yesterday I decided to use 2 hair dryers we had for makeover week,it ws brilliant! Th toddlers (with help from a teacher) dried it themselves and wtchd it transform.you can always buy second hand hair dryers.give it a go 🙂
kris
We have a microwave in the staffroom, so we will take it in there. I may even be able to take small groups of the kids with me.
Lauren
What about using a hair dryer, would the school allow that?
Heather
My 2 year old had a blast with this! We painted mod podge over the finished protects to give them a nice seal and shine! It made the papers straighten out too. That worked out really nicely and looks great! Now they can happily be hung on her wall 🙂 By the way I love this page!
happyhooligans
Thanks, Heather! Great idea using the mod podge. So glad you gave this one a try!
http://valavanikid.blogspot.gr/
????? ???? ??????!!!!
maddie
great idea! am going to try it! quick question though does it matter what material you get the children to design it on
?
happyhooligans
I’ve only ever tried it on cardboard, Maddie, but I’m sure it would work on paper or a paper plate. It might even work on fabric, but I couldn’t say for sure.
aliya
Lovely idea I’m gonna try it with my kids at school. Simply loving ur blog, and getting really great ideas.
happyhooligans
Thank yoU! I’m so glad you’re enjoying our crafts and activities!
Deb
We done thistle at and Maisie loved it!!, we used eye droppers to put the paint onto the card and when we put it into the microwave Maisie talked about how it would be hot when it came out. Only problem is I don’t think the consistency was quite right as it came out cracked or maybe I put I too long?
happyhooligans
Maybe it was the length of time it was in there, or maybe your microwave is stronger than mine? I really can’t say for sure. Glad you had fun with it though!
Bre
I am so excited to try this with my kids today! We are FREEZING and on “lock down” due to terrible wind chills, so I’ve been looking for some fun activities. They will adore this. Thanks!
Jennifer DeMent
I know this is an unusual question… but I don’t own a microwave. Is there any safe alternative?
happyhooligans
I’m thinking it would work in a regular oven, Jennifer – after all, when you bake with self-rising flour, your cookies and cakes rise. I’m thinking it would just take longer than it would in the microwave, and you wouldn’t want your oven temp too high because of the paper/cardboard you’ve painted on. Totally guessing there though.
Crystal Smith
I don’t have self rising flour. Can I add a bit of baking powder?
happyhooligans
It might be baking powder and baking soda, Crystal. I’m not sure of that though, so google it, but yes, I believe you can make your own self-rising flour. I haven’t done it before though.
Kay
You can also add bi-carbonated soda to ‘plain’ flour to make it rise. If you add a few drops of cooking /olive/vegetable oil to the mixture it will stop it from flaking and will stay intact for longer.
Beth
This looks like an awesome project to try with my preschoolers… does anyone know if liquid water colors would work as well as the food coloring? Thanks for sharing this idea!
Rosario
I like, thank you for sharing
Ximara Peckham
Two thumbs up up!! Thank you!
'Auntie' Nikki
That’s cool! Maybe some hairspray, or a glue-water mixture would help keep them together for longer too.
Sandra T
Would this work for fingerpainting or handprinting too?
happyhooligans
I’ve never tried, Sandra. You’d just want to make sure you had a thick layer of paint going onto the paper so it would puff up.
Lindsey
Is there an alternative to rhe microwave? We don’t use one.
happyhooligans
You can do some googling to find out, Lindsey. You might be able to do it in a regular oven, but I’m not sure. I’ve had a follower tell me she’s done it with a hair dryer too.
Debra
I thought of using a bit of glue in the recipe. I wonder if that would help. Also, I might just try the mod podge for a shiny seal!
Little Bear
Can’t wait to try this with the children
clare khetab
just wondering if pva can be used instead of mod podge to seal being as it dries with a clear layer? thanks
happyhooligans
We don’t seal our puffy paint art, Clare. It looks great straight out of the microwave.
eileen staller
How do you get the colors so vibrant. One tube of wiltons icing colors doesn’t go very far. I tried it with my granddaughter. We had fun doing it, but didn’t get the vibrancy you got.
happyhooligans
When you say tube, do you mean “tub”, Eileen? I use Wilton tubs, and the colours go very far. They last me for years. Usually just a little dip in with a toothpick is enough to colour whatever project we’re doing. We used very little of the gel/paste to get the colours in this project.
Laura
Can I mix this up the night before?
happyhooligans
I really don’t know for sure, Laura, but something’s making me think it should be made just before using it.
Cleaninup Kate
We did this today and it worked wonderfully. I hadn’t heard of self-rising flour before so I googled how to make it. For anyone that needs it, here’s the recipe I used: 1 cup flour, 1/2 tsp salt, 1 1/2 tsp baking powder. Sift or stir together.
Nic
Great ideas
chantelle
We have just done puffy paint, my daughter loved it, will be doing it more often.. great idea.
Jenn
My daughter and I loved this craft… and my husband was able to brighten up his office with a puffy paint masterpiece 🙂 We used regular all-purpose flour and painted onto wax paper, it comes out a bit wrinkly but it looks great and keeps forever (it’s been several months and it still looks as good as new). Thanks for the great idea!
Johanna
Thank you so much for this idea ! My son had a ball helping making it and then painting. At his request we did hand prints and it worked, looked great. My only question is about the thickness of the paper as ours ended up all uneven and I can’t straighten it up to hang them or glue them to make cards ?
Stella
I would do puffy paint with my preschoolers but I used Shaving cream (Barbasol) works the best. Spray sone shaving cream in a bowl and put food coloring into bowl and gently fold it into the cream. Works well and stays puffy for and good long time
Janell
Self rising flour? Is that normal flour or is it a special kind of flour?
larissa
what if you shellac the picture? will it stay then?
happyhooligans
I really don’t know. The shellac could very well dissolve the painting. It’s only flour and water, after-all. Like I said, I’m not sure why the one picture flaked. The others were fine, for weeks, and we’ve done the project several times since, and we didn’t have any problems with the art work holding up for weeks afterwards.
Betty Albert
This is fantastic! This would be very cool for my middle school students!!
Christina
We don’t use microwaves, can I try this in oven on lowest temp instead? Hank you! 🙂
A
I wonder if adding a small amount of cream of tarter or glycerin would help with the flaking bit. I know it does in homemade play dough so maybe in this paint??? Have to try!
happyhooligans
We only had the flaking happen once, and we’ve done the experiment several times since. I’m not sure what caused it to happen on the one painting.
Amanda
Is self rising flour just regular white flour?
happyhooligans
No, it’s All Purpose flour, Amanda. Different than self-rising flour. SR flour has leavening agents added, which means you don’t need to add baking powder etc. to the recipe.
Eri
Thank you for the easy-to-follow tutorial! Can a blow dryer be used instead of the microwave? I am wanting to make a wall decoration for my son’s classroom using your recipe but it definitely won’t fit in a microwave!
Thanks, and happy holidays!
happyhooligans
You might be able to if you blow it from underneath so you don’t blow the actual paint around?
Chris' Mom
Thank you for the Puffy Paint Recipe. We are going to try it tomorrow! Last week we made spin art and it was so much fun. My son and I saw the spin art toy at Dollar Tree for only $1. It was creative and fun.
I can’t wait to see my son’s face when we make “Puffy Paint.”
happyhooligans
Have fun! I think your son is going to love it! I’m so glad you’re trying both activities!
Oneida Orona
Hi,
I want to know how long can i keep it in the container, made some today, but needed for Tuesday.
thank you for the great idea.
Oneida
happyhooligans
I’m not sure how long it will stay active in the container, Oneida. Sorry! We always make ours right before using it. Please let me know if it works after being stored for a couple of days.
Carol
My daughter was doing a painting and decided to leave it to finish later. It turned out like a sand painting and was very beautiful. We just let it air dry. I will use these paints both ways.
Ahmagrammy
Is it self rising flour, as stated at the top, or all purpose flour as written in the recipe?
Jackie Currie
Hi there! You can use self rising flour or you can make your own self rising flour like we do in the post with flour and the extra ingredients. I’ve edited the post to make the instructions a little more clear. Thanks so much!
Michelle
I love this Puffy Paint!!!
happyhooligans
Hi Helma, I’m glad you enjoyed my puffy paint enough to want to share it. You’re probably not aware of copyright infringement though. I wasn’t either when I started blogging. By law, you can’t copy and paste another website’s content into your own. It’s known as stealing (or scraping) content, and you can be charged for it, and google can remove your blog from the internet. I’d hate to see that happen to you. If you’d like to share, you can use one photo and a sentence or two to describe the activity i.e. “Here’s an easy way to make puffy paint at home in your own kitchen. See Happy Hooligans for the details” and provide the link to my site. You must provide one of MY pictures with the link though. You’ve used another bloggers, which again, is an infringement of copyright. Think of a blog or website as you would a book in a library. You can’t just copy a page out of a published book and print it in a book of your own. A website and blog is the copyrighted property of its owner, just as a published book is. I hope this helps you understand a little about blogging protocol. If you make the necessary corrections, you’re welcome to share my post. 🙂
Margaret
Can puff paint be used on fabric?
Jackie Currie
Some can be, but I wouldn’t imagine this would be the best kind for fabric. If you were to ever wash the item, the paint would likely dissolve and wash off as it’s made from flour and self-rising salt.