Kids can make these Marbleized Valentines using shaving cream and food colouring. It’s a fun, easy and fascinating art process that all ages will love!
We love experimenting with easy but really cool painting techniques here in my daycare. As a result, we’ve discovered a lot of really creative ways to create art using basic household ingredients and supplies (you can see 25 of my favourite art techniques for kids here!).
Today, my daycare kids were making some Valentine’s crafts using one of our very favourite art processes. It’s a marbling technique that all ages of kids can do using food colouring and shaving cream.
These pictures still don’t completely capture the beauty of this technique, but hopefully they’re impressive enough that you’ll try this easy process home with your kids.
You really do need to do it to appreciate it. It’s so fun and magical, and really gorgeous. AND, it’s a kids’ project that’s easy to set up, and clean up, as everything can be quickly rinsed of under the tap.
What you’ll need:
- Shaving cream
- food colouring (liquids or icing gels)
- eye droppers or pipettes (optional)
- stir sticks
- plastic gift card or a piece of cardboard (for scraping)
- something to make your print on: white paper or cardstock, white cardboard, doilies etc.
This isn’t a terribly messy activity, but because there’s food colouring involved, you should protect your work surface. We always use an inexpensive vinyl tablecloth for messy crafting.
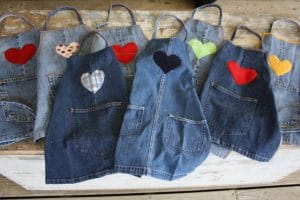
You’ll also want to protect your child’s clothing with an apron or a smock. You may have noticed the aprons that the hooligans wear when we’re getting messy. I make them from the legs of our old jeans.
You can get the tutorial for my repurposed denim aprons here.
Marbleizing with shaving cream and food colouring:
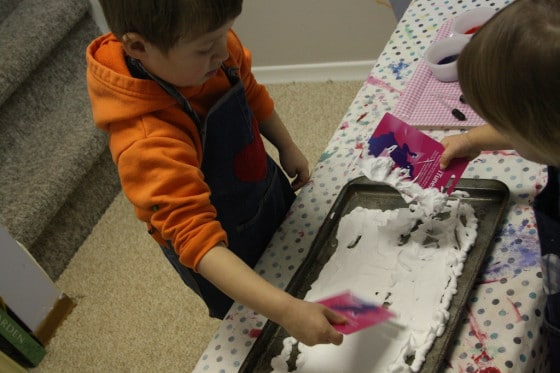
Have your little one squirt a generous amount of shaving cream onto a baking sheet.
As much as it may be tempting to do this step yourself, let your child give it a try. It’s great for muscle control and co-ordination.
With an expired gift card or credit card or even a sturdy piece of cardboard, smooth the shaving cream over the surface of the pan.
Let your child have a go at this step as well.
It’s very satisfying to smoosh and spread the shaving cream around, and you can always go over it one last time yourself to smooth it out.
Now things get really fun!
If you’re using liquid food colouring, simply dribble your colours all over the surface of the shaving cream.
We used Wilton icing gels to colour our shaving cream today.
I mixed 4 colours (pink, purple, red and turquoise) ahead of time with a bit of water. I added a generous dab of gel to 2 or 3 tbsp of water so our colours would be really intense, like this:
I gave the hooligans some droppers to transfer the colours to the baking sheet. This was also a great test in fine motor control, as they had to squeeze the dropper in order to fill the dropper, and to release the drops of colour onto the shaving cream.
This took them quite some time, and I let them work away at it, until the baking sheet was well covered.
Next, grab a stir stick (a craft stick, a skewer or even a plastic knife), and let the magic begin! This next step is a fascinating lesson in creating designs and colour blending.
Stir and swirl the drops of colour together, and watch the transformation…
Now, take your white paper or cardboard or whatever it is you’re making your print on, and gently press it into the marbled shaving cream. Don’t press it in deep because you don’t want to disturb the pattern of colours that you’ve just created.
Lift your paper off, and let it sit for a half a minute or so, and then with your credit card, gently scrape the shaving cream off to reveal THIS:
Isn’t this just the coolest art process ever?
So simple, but it never fails to completely WOW me!
What a pretty piece of Valentine’s art to hang on a wall in the playroom.
Follow the Hooligans on Facebook

Jackie is a mom, wife, home daycare provider, and the creative spirit behind Happy Hooligans. She specializes in kids’ crafts and activities, easy recipes, and parenting. She began blogging in 2011, and today, Happy Hooligans inspires more than 2 million parents, caregivers and Early Years Professionals all over the globe.








Marie Dobbs Brasseit
Beautiful!
happyhooligans
Thanks, Marie!
marge paz
Just reading your ideas make me feel like i could be creative. Love your site!
happyhooligans
I’m so happy to hear that, Marge! That’s what blogging is all about for me!
MapleMouseMama
Jackie, I love this idea ( like pretty much all of your ideas, LOL). Do you think a couple of ten year old girls would be interested? I need some relatively small, short on time craft ideas for a sleepover, but I think this would be fun for the mess factor!!
Suz
MapleMouseMama
jackie
I just emailed you, Suz, but yes, I think this would be a hit with a couple of 10 year olds! *I* personally LOVE doing it, and I’m a whole lot older than they are. lol
Roo
If you mix PVA glue with the shaving foam it will set
Lisa
Beautiful creations!!
simplysummers
How cute!! We’ve done shaving cream painting before, but I never thought to use a doily!! That is precious!! Just added some pizzaz to her valentine for her big brother!! Thanks for sharing!!
Nikkie
This is lovely – as a teacher that specialises in children with learning difficulties and additional needs I’m always looking for sensory based arts & crafts! Will be using this for Mother’s Day! Thank you!
happyhooligans
That’s super, Nikkie! Have fun with it!
Still Playing School
Gorgeous!
happyhooligans
Thanks, Devany! I think you said on my page you do this with paint, right? What kind of paint do you use? Watercolours or acrylics?
Mel
Hi Jackie, will liquid watercolours work instead of the food colouring? Not sure if the colors will “transfer” as well, what do you think?
happyhooligans
I can’t say for sure because we’ve never tried it but I would think they’d work just as well. Just try it with a small puddle of shaving cream and a drop or two of the watercolours to test, Mel.
Heather
you can also add elmers glue to the shaving cream and the design will stay puffed on what ever you are making. We make snowmen on paperplates like this in the winter. You can’t mail them, but they turn out awesome! I can’t wait to try the food coloring with it!
LC
Trying this at my library, wish me luck!