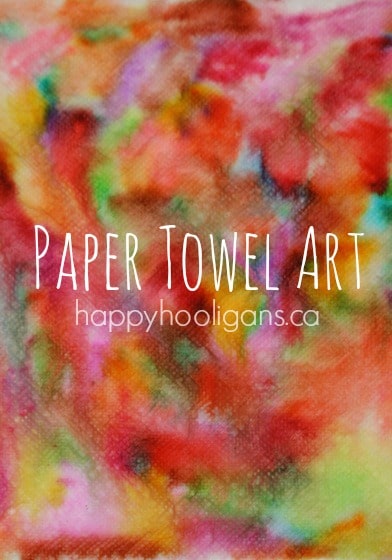
Paper Towel Art – an easy art project and a lesson in water absorption!
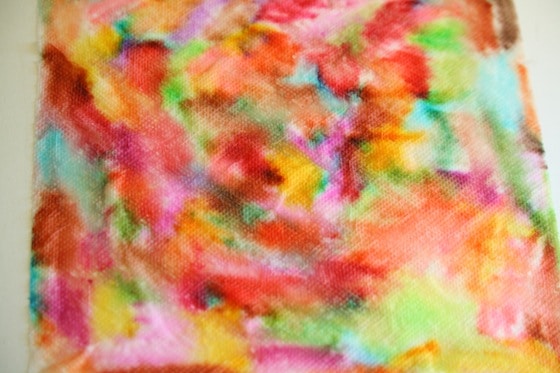
This is actually a great way to test your markers to find out which ones are good, and which ones have dried up. With the good markers, you can create a rockin’ piece of art like the ones we made today. It’s one of my favourite, easy art techniques for kids.
For young children, this process is great for developing fine-motor skills, learning about water absorption and colour blending. Older kids will find the process rather mesmerizing, and they’ll think the results are pretty rad.
Note: Whatever you do, when you’re testing your markers, do NOT throw out the ones that have dried up! They’re totally valuable! You can turn them into homemade liquid watercolours for your kids to paint with, and use for other projects.
Now, I’m not exactly sure what we’re going to make with these colourful paper towel creations that we made today, but I’m sure we’ll work them into a craft of some kind, and when we do, I’ll share it with you.
For now, here’s how your hooligans can make some some paper towel art of their own at home or in the classroom.
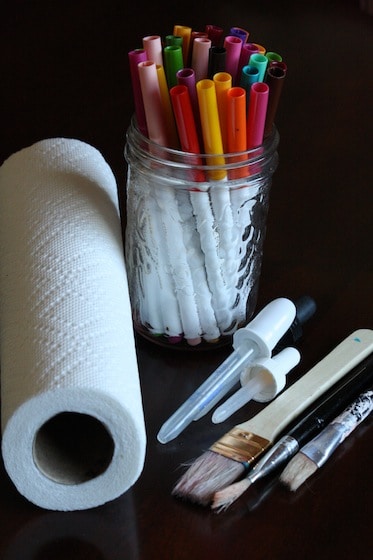
Supplies for making your one-of-a-kind paper towel art:
- washable markers (not permanent markers – the ink needs to bleed when wet)
- paper towel
- paintbrushes (or a cup of water and a medicine dropper).
- water
How to dye paper towels with markers and water:
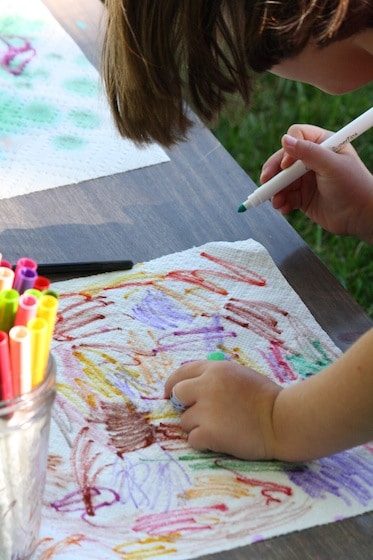
Have your child scribble all over a piece of paper towel, filling in as much white space as possible.
An older child can do this on his own, but a younger one may be overwhelmed at the prospect of covering the entire paper towel, so you may want to work together for this part.
Work on a hard surface…
Once you’ve finished filling in your paper towel, place it on a hard, non-absorbent surface.
You don’t want anything soft and absorbent under your paper towel because it will wick the colour out of your work. A plastic tray or a cookie sheet would work well. We worked on the hard, veneer surface of our craft table.
Just add water…
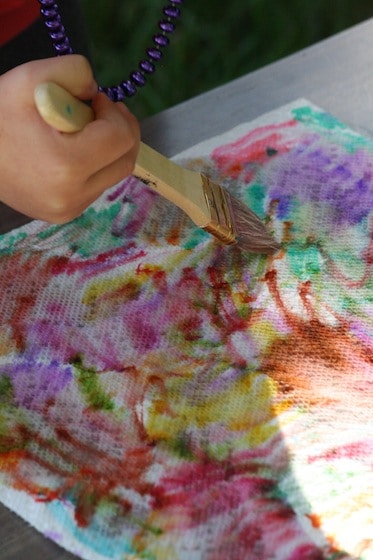
Now, have your child wet the paper towel by either brushing water onto it with a paintbrush, or by dripping water all over it with an eye dropper.
This part of the process is a great lesson in water absorption. The hooligans watched the colours bleed and blend as the paper towel absorbed the water. Their art work was instantly transformed right before their eyes.
Drying your paper towel art:
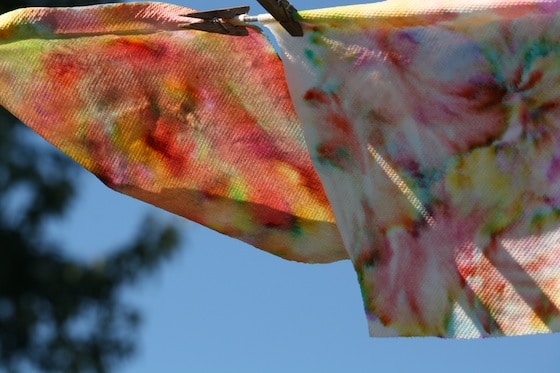
Dry your paper towel somewhere that the air can get under it and all around it. I hung some of ours on the clothesline, but I also put a couple on a cookie sheet so the would dry from underneath. Just be sure to lay it on a surface that will A) not absorb the colour or B) not stain!
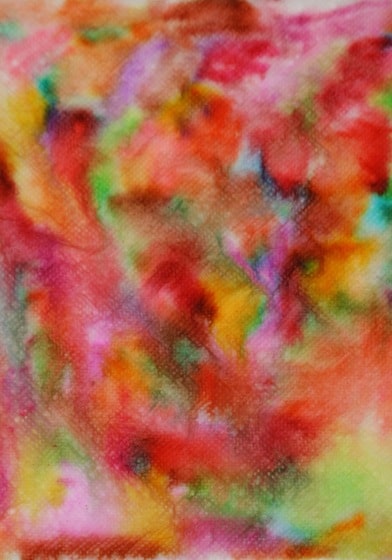
Our colours faded a little as they dried, but our art was still very pretty.
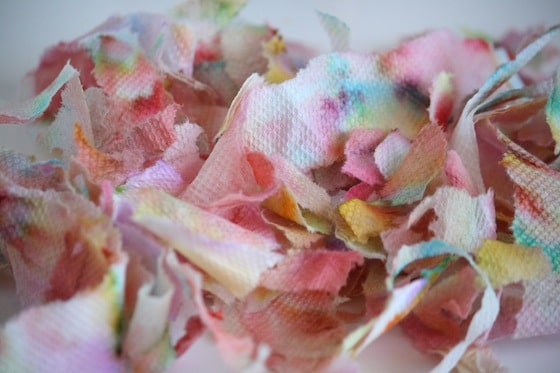
To finish, just for fun, we tore our paper towels into long strips and small pieces. More fine-motor development. 🙂
Now I just have to figure out what we’re doing with it!
In the meantime, we’re going to use those dried up markers to make some homemade liquid watercolours.
You’ll love these projects too!
- Homemade Water Colour Paints
- Homemade Puffy Paint
- Crayon Resist Painting
- Art with Melted Crayons
- Art with Glue, Salt and Water Colours
- Smoosh Art Painting
- Tape Resist Painting
Get 3-5 Playful Preschool e-Book!
25+preschool activities by 25 bloggers, 10 printables, 50 links to activities not featured in the book all for $8.99!
Follow the Hooligans on Facebook

Jackie is a mom, wife, home daycare provider, and the creative spirit behind Happy Hooligans. She specializes in kids’ crafts and activities, easy recipes, and parenting. She began blogging in 2011, and today, Happy Hooligans inspires more than 2 million parents, caregivers and Early Years Professionals all over the globe.



sharon
I love how colourful they are! I would modpodge them to a small canvas. You could leave them like that or write something on it like their name or a verse or poem.
Shelli
The torn art reminds me of Christmas for some reason. What if they made gingerbread house or candy collages? Or even filled plastic Christmas ornaments with the scraps and some beads or sequins?
Judy
How about putting the torn pieces inside of a clear glass or plastic Christmas ornament?
happyhooligans
That is a terrific idea, Judy!
Stacy@{Share&Remember}
If you left them whole, you could have made them into a banner like we did here: http://shareandremember.blogspot.com/2013/09/duck-tape-at-walmart-for-back-to-school.html We made this weeks ago and I still have them up, I just love the look of these banners!
Ana
I love it, Jackie! The colors are so vibrant! Pinned!
Kay smart
When we did this we did we first drew on a piece of copy paper then put paper towel on top scribbled and used the water …then we ended up with two unique pieces of artwork. As we’re doing a spring wall we turned the paper towel into peg butterflies (aus)
Meredith @ Homegrown Friends
Love this Jackie! I’ve always done it with food coloring and droppers. Love the way you did it. You could probably make them into flowers. I have a tutorial using tissue paper on my site.
Megan
You could use the ripped up pieces to make soap mud.
Kathrin
Great idea eill try this this afternoon. Here is my suggestion for what to do now with it. sticky paper cut out leave shapes stick it sticky side or on the Window let the kids stock the shrets to the leaves cover with another layer of sticky paper makes nice suncatchers.
Love from Austria
happyhooligans
You guys are awesome! I love all of the suggestions you’re coming up!
sue martin
I love lots of your ideas. Thanks. I’m just not sure that calling the children hooligans is respectful. ..I do appreciate is meant in fun. .. and probably not to their faces.
happyhooligans
Haha, the hooligans don’t even know that I refer to them as that, Sue. I never even use the term when talking about them other than on my blog. It was just a fun name to call my website, and a great substitute for having to use the words “kids” or “children” or their names, when writing about our activities. Thanks for your thoughts. 🙂
Barbara
Don’t throw away worn out markers–put them into a baby food jar with a little water and they make beautiful water colors before too long!
happyhooligans
Oh, don’t you worry, Barbara, we’ve done it! It’s fabulous, and I’ll be blogging about it soon!
Cindy
I can picture them being Mod Podged over a bowl shape to make a bowl or over a jar for a flower vase as a gift…. Love the colors…..
Andrea Cooke
Cindy, would you let the paper towel dry, then put it over the bowl and Modge Podge?
Debbie
Cut out things like eri carle has done Indy s books!
Sarah @ How Wee Learn
what a simple and beautiful craft! In my Kindergarten class we made something similar with coffee filters and shaped into flowers with pipe cleaner stems for Mother’s Day. But your ripped pieces … hmmm … will take some creative thought – I bet your little hooligans would come up with a great idea!
Eschelle Westwood (@Eschelle)
I should really do this it would be so lovely for fall in all warm colours!
katepickle
This is so clever!!!! My kids would love to do this and watch the magical change!
happyhooligans
You’ll have to give it a go, Kate! And let me know how they liked it!
Lauren
Oh how fun! I think we will do this today. Thank you for sharing at our Pinning for Play link party! (<- You're also featured this weekend there.) 🙂
happyhooligans
Glad you liked it Lauren. It was so easy! You could totally do this on short notice!
Jessica Briggs
Perhaps make a fall tree with those as leaves? Great project 🙂
mainegirl
It looks like lovely Easter grass to me.
Haley Suggs
Put them into a flower pot and add some colorful flowers
iGameMom
These look beautiful! Thanks for sharing at Mom’s Library. I am featuring it on iGameMom http://igamemom.com/2013/10/09/7-easy-art-projects-kids-can-do/
happyhooligans
Yay!! Thank you, Beth!
Beth
Your paper towel art turned out so pretty!!! I will be sharing it with my readers over the weekend!
Thanks for linking up to TGIF! Hope to see you linked up again later today,
Beth =)
happyhooligans
Thanks so much for passing it along, Beth!
Kate_LaughingKidsLearn
I love this so much Jackie! I will be including it in my ‘Share It Saturday’ preschool activity collection. Thank you and I really hope to see more of your awesome posts linked up in the future.
happyhooligans
Thanks so much, Kate! I’m honoured to be one of the features in your collection!
Carrie @ Crafty Moms Share
Those are beautiful!! Such a fun activity. Thank you for sharing at Sharing Saturday!!
happyhooligans
You’re so welcome, Carrie! I’m glad you liked this one. 🙂
Debs
They look so great! We did an absorption activity with coloured water on paper towels once and the results were so pretty my daughter would have used a whole roll had I let her as she just wanted to keep making more and more! Thanks for sharing on Tuesday Tots. Just letting you know that I’m featuring it this week 🙂
Natalie
Lovely idea! Has anyone suggested confetti? Unfortunately I would need to gatecrash a wedding to use it at the moment!!
Emily
Could you use it like paper mache to decorate something?
happyhooligans
That’s a great thought, Emily!
Shelly
First thing that came to mind…wrapping paper! How great to wrap presents for our friends and loved ones with our kids art!!!
happyhooligans
Great idea, Shelly!
Lula B
We love this kind of art! Sometimes we use the results in our art journals, or I scan or photo them and use them to make blog buttons – like you I used one for my most recent post. (Kinda wishing I hadn’t thrown away a bunch of old washable markers yesterday in a decluttering session, now!)
happyhooligans
I never thought to photograph the paper and use it as a backdrop, Lula! That’s brilliant! (and I know what you mean about decluttering – I was doing the same here yesterday!)
Linda
I would use it in a photo frame with a smaller photo on it so there is a colourful background. I am going to do this with my Dayhome. Thank you excellent craft for little ones 🙂
happyhooligans
Great idea, Linda! I think that would look super!
Leona
This is great. I’ve just done it with my 3 year old daughter and we’re going to use pipe cleaners to turn them into butterflies 🙂
happyhooligans
Wonderful, Leona! That’s such a great way to put your finished art to good use!
Lee Murray
Take an outline picture (like a coloring page) and then have them make a collage with it outline in marker…
Georgina
I didn’t read every suggestion, so forgive me if I’m repeating something someone has already said, but, you could set them hard with pva glue, flat in a plastic tray. Then once set, cut them into shapes, love hearts or whatever and string them together. Hang them by a window and I’m sure they’d make lovely light catchers. 🙂
happyhooligans
Great idea, Georgina! Thank you!
jenneen heilbronn
I wouldnt have torn it up, but kept it whole to use as wrapping paper
Karen
i didn’t read previous posts, but I was thinking paper mach�…but placing mix first and just laying these over top of it….you could make a beautiful pi�ata!
Sara
I love it! I would use the shreds as potpourri. Get a scented spray or make your own!
Tryhonesty74
I used to work in a petstore years ago. When i got bored I would take the paper towels and wrap them up, much like you would a shirt your tyedyeing, and dip them in puddles of water with marker ink in them and tye dye them like this, then write notes to my coworkers on them when they dried.
Tineta Ellis
Sorry for my ignorance, but what is Modge Podge? Sounds fascinating if it’s a way to transfer things onto canvas. Tineta
happyhooligans
It’s a clear sealer, Tineta that also acts like an adhesive. It’s similar to white glue thinned with a bit of water.
Tineta Ellis
Many thanks. Does anyone know an easy way to transfer outlines directly onto a canvas other than using an overhead projector and tracing? I got some fabulous marbling results using paper towelling and fluoro acrylic paints diluted to run nicely , also food colouring.
Susanne
On the back of the paper go over where the lines are on the other side with the side of an HB pencil. Place (or tape) the paper on the canvas and trace over your lines. That will transfer the pencil onto the canvas.
happyhooligans
Thanks for the tip, Susanne!
Cris
Use the untorn paper towels to make giant “kleenix carnations”. It’s an old craft we did with the colored kleenix available in the 1960’s for cheap decorations : fan-fold the paper towel. tighten a pipe cleaner around the middle of the folded paper towel. Tear a narrow strip off each outer end of the folded paper towel. That makes the edges of the “carnation petals”. Carefully fluff out the fan layers into a half-ball, lightly stroking upward from the pipe cleaner “stem” to get a realistic shape.
Monique Adams
we do this activity with coffee filters…..scribble ( or “design”) all over the coffee filter. Place it in a salad spinner ( you know, the ones you wash and dry your lettuce in). Spray with water and SPIN the heck out of the thing!. The colors all blend together and kids LOVE to spin that salad spinner. We made butterflies out of ours: Use two DRIED coffee filters and pinch both in the center. Twist a pipecleaner around and form the ends into antenna. We have made hundreds of these 🙂
happyhooligans
The salad spinner is a brilliant idea! We have one of those! Totally trying that!
Jess
Not sure if this has been said in the comments yet.
We do crayons markers on coffee filters, spray water with a spray bottle and when they dry fold them up and cut. Make them into snowflakes. 🙂
Jess
I meant *crayola markers…. Darn spellcheck
Erin
As far as what to do with them, those pretty strips would make lovely Easter basket filler, or wrapping material inside a gift bag!
happyhooligans
They would! That’a great idea, Erin!
K Wendt
You could put the ton up pieces in a clear sandwich Baggie and make butterflies out of them by using pipe cleaners.
Mona
I know permanent markers won’t bleed but they would be kind of cool to use with this project too. You could draw shapes or a picture with a permanent marker (just the outline) and then color all over the paper with the washable markers and see what the designs came out looking like after you used the water.
happyhooligans
I like the way you think, Mona!
Jayn
Try cutting the dry towel into shapes and use a glue stickor spray adhesive to stick on to cards. If you use a spray bottle for the water, the paper doesn’t tear and you have more control of the amount – best done outside, they spray each other too
Joa
ive seen this done on another website / blog where the writer used permanent markers to draw / write outlines before wetting. The permanent marker didn’t budge and then she used the dried piece of paper to stick on card board and make cards. We’ve just made that with my 7 years old son and we both had fun watching the permanent marker staying put while the colours slowly bled. He was even more fascinated when we hung our pieces to dry (I’ve got some supa-dupa strong paper towel) and the colours kept cmixing and creeping everywhere!
We really enjoyed it and for me it’s fantastic as there’s barely any set-up and tidying up.
happyhooligans
Love this idea, Joa! We’ll definitely try it here. Thanks so much for sharing!
Johanna
Hello Jackie !
That’s a fantastic activity: easy set and pack up, supplies that most families will have, and mesmerising even for the non-arty kids, like my eldest, who enjoyed learning water solubility.
I’ve experimented a bit, and out of curiosity I stuck a piece of paper on top of the coloured-water soaked paper towel. The colours transferred beautifully, and while the transfered colours were still wet I sprinkled salt and it worked just like watercolours. I wish I could share the photos I’ve taken because it’s really nice.
Next time we’ll do it, I’ll cut some water paint paper smaller than the paper towel and put it under it before spraying..
happyhooligans
What a creative way to extend the activity, Johanna! Now I want to try that too!