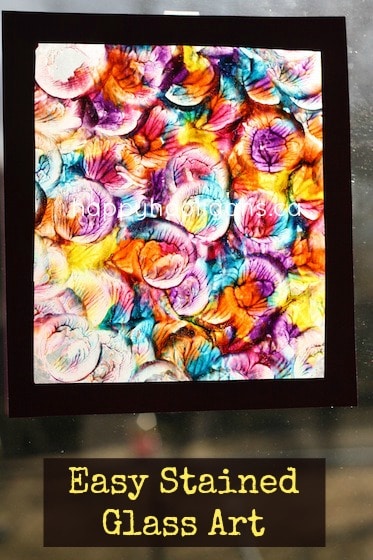
Teach your kids how to make stained glass art with paint, bottle lids and wax paper. This is a fun art activity for toddlers and preschoolers and the results are beautiful, and look just like stained glass when displayed on a window.
I love the look of stained glass, so when I find a cool stained glass art project that my daycare kids can do, I’m all over it. Recently my toddlers and preschoolers made these gorgeous “stained glass” paintings using bottle lids, paints and wax paper!
When it comes to easy art techniques for kids, this one is the bomb!
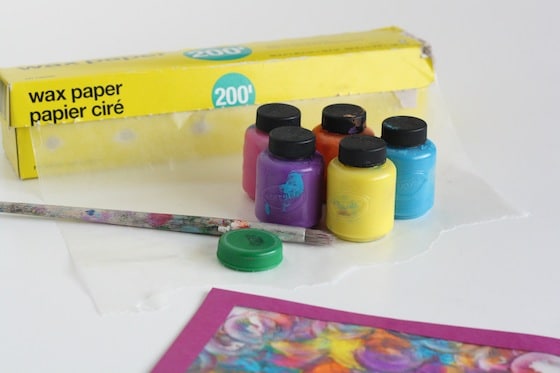
For your stained glass painting project you’ll need:
For your convenience, I’ve included Amazon Affiliate links in this post. I receive a small commission when you shop through these links. Thank you for your support.
- Crayola Washable Kids Paint
- Wax Paper
- card stock
(to frame your painting)
- bottle lid
- paint brush
I suspect that any paint would work for this project, but I chose Crayola Washable Kids’ Paints because of their vibrant colours and glossy, translucent quality.
The stained glass painting process:
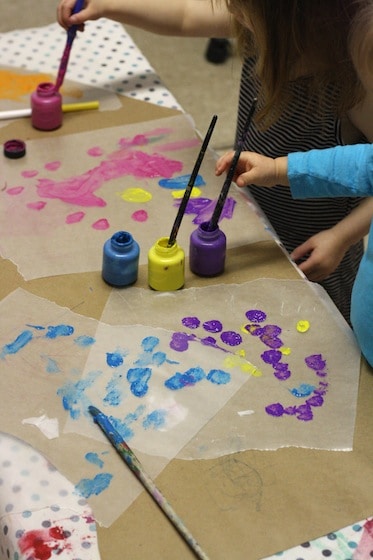
I gave each child a square of wax paper, and encouraged them to cover the entire surface with their paints.
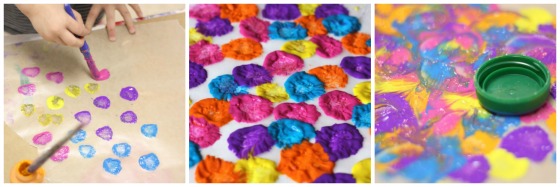
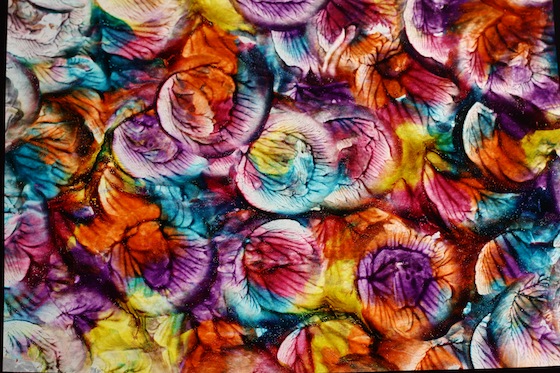
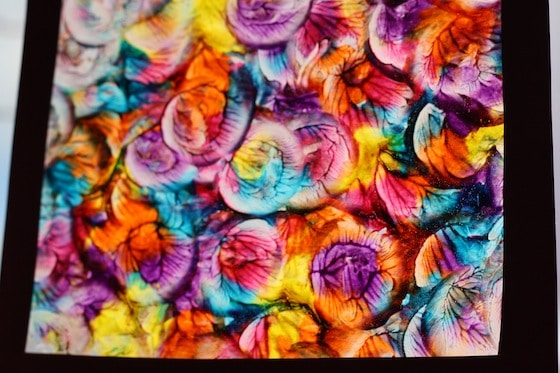
I thought they would simply brush the paint all over the waxed paper, but a couple of them experimented by dabbing their paint on the wax paper. That’s when my plan came together. In case you’re wondering, the outer photos in the next image were taken under fluorescent lighting, while the middle one was taken in natural light in front of a window.
Painting with bottle lids on wax paper:
- Have your little one dab paint all over their wax paper. Splat it on nice and thick. The closer together your paint dots are, the better it is for blending the colours together in the next step.
- Next, give them good-sized plastic lid. Our Gatorade lids were perfect, but the flat bottom of a glass or jar would work too.
- Now, press and twist the lid into the paint, blending the dots together. Occasionally swipe the lid against a piece of paper to clean it off, to prevent the dots from becoming too “muddy”.
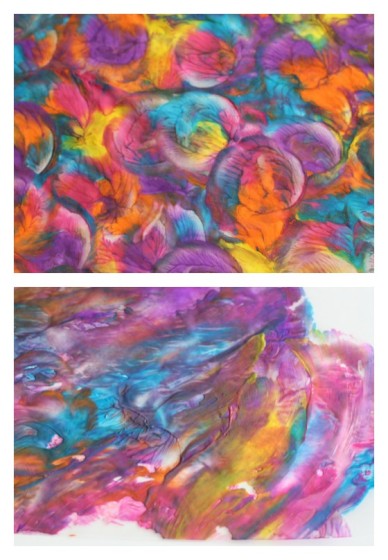
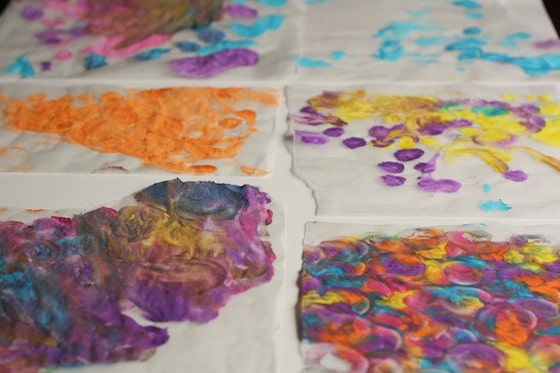
We were all so impressed by the finished results! Some of the younger hooligans simply spread their paint around, and some chose to paint sparingly, and skipped the bottle lid step. Each child decided how they wanted to their project to look.
And they all turned out great. Here’s the whole collection:
When the paintings had dried, I held them up to the window for the hooligans to see, and WOW!
Isn’t this impressive?
To complete the project, I cut out some simple card stock frames, and the hooligans glued them to them onto their paintings.
Then we taped them up in the window, and when the sun broke through the clouds and shone through the waxed paper, the paintings were even more beautiful!
What a gorgeous way to add a pop of Spring colour to the windows!
Imagine painting a piece large enough to completely cover a window? Or to cover the panes in a french door? Hmmm, there may just be an idea for a future project here!
More Stained Glass Painting Projects for Kids:
- Create the Look of Stained Glass with Sharpie Markers and a Jar
- Stained Glass Art – Tape Resist Project for Toddlers
- Stained Glass Sharpie Art with Photo Paper
- Tissue Paper and Contact Paper Stained Glass Window
You May Also Like:
- Homemade Water Colour Paints
- Homemade Puffy Paint
- Crayon Resist Painting
- Art with Melted Crayons
- Art with Glue, Salt and Water Colours
- Smoosh Art Painting
- Tape Resist Painting
Follow the Hooligans on Facebook

Jackie is a mom, wife, home daycare provider, and the creative spirit behind Happy Hooligans. She specializes in kids’ crafts and activities, easy recipes, and parenting. She began blogging in 2011, and today, Happy Hooligans inspires more than 2 million parents, caregivers and Early Years Professionals all over the globe.







mavismariearie B
Love it, as usual!! They did a great job…..I love anything simple & easy, which turns out pretty while having fun making it!
jackie
Thanks, Mavis! This is going down as another one of my all-time favourites here!
Inese Boki�a
Thanks! Thanks! Thanks!:) Very inspiring! 🙂 I will definitely tray, too. Fab!:)
jackie
You’re welcome, Inese! Glad you enjoyed it. Have fun making yours!
Courtney
This is great. I love the French door idea. Will try it with my little one.
Jennifer
Wow, that would look amazing in a French door. We have a few paned windows here – we need to get busy making some amazing ‘stained glass’
yvette
Love it…..awesome project we will be making these for mothers day. . .thank you again
happyhooligans
You’re so welcome, Yvette! So glad you enjoyed this activity!
Sarah @ Frugal Fun for Boys
I love the way these turned out! What a great idea!
happyhooligans
Thanks, Sarah! I was pleasantly surprised by how they turned out too!
Aleacia
These turned out so pretty! We’ve never painted on wax paper before, I’ll have to give it a go with the girls!
Thanks for linking up to our Eric Carle Inspired post! 🙂
Emily
Came out great! Easy for both my 5 year old and 2 year old. Thanks!
Stephanie@Twodaloo
Love this! May I use it in my Toddler Art Tuesday roundup that goes live tomorrow night? Pretty please with smoochies and everything? 🙂
happyhooligans
You bet, Stephanie! I’d love for you to share! Thanks!
thejennyevolution
My Family-Focused Monday hop is live now and I would love to see one of your awesome posts linked up @ http://www.mondaykidcorner.blogspot.com.
Have a terrific week.
Play Create Explore
This is such a neat project! How beautiful the results are! 🙂
Trish
My 4-year old and 5-year old (and Mommy, of course!) did this project today. I had the same paints you used, but ran out of several colors early, as we didn’t have much in the little jars to begin with. We then used Crayola washable fingerpaint. This worked better, because then they could just squeeze it out of the tube. They weren’t really getting enough on with the paintbrush anyway, so this worked great! Will let them dry tonight and make frames tomorrow. BTW…a milk cap works wonderfully, as you showed above. The cap gives some texture to the art and almost makes it looks leafy. We tried a yogurt cup too, but liked the results better with the milk cap. Thanks for the idea!
happyhooligans
You are so welcome! It’s so funny that you used the finger paints, Trish, because that’s on my to-do list too! After doing it with the other paints, I figured it would be a great project to try with finger paints! So glad it worked well for you! I can’t wait to try it now. And yes, who knew the humble, little milk cap would come in so handy?
Nikitaland
This is by far the coolest craft project I have seen in a long time! May I do a blog post on this with your photographs of what you created? I want to share this so badly with everyone, not to mention, I want to try this craft too to see what I come up with! Have a great day!
happyhooligans
Glad you liked it! When it comes to using photos, most bloggers are fine with you using a single (one) photo from their blog post, as long as you provide a link back to the original bloggers site for the instructions. It’s still a good idea to check with the blogger first (so thank you for asking!). I don’t know of any bloggers who would permit you to use more than one photo, or to write up your own instructions for the craft or activity while using photos that are not your own. The general idea is that if you’re going to share someone’s idea (and we love it when you do), that you direct your readers to that blogger’s site in order to get the instructions. Thanks again for checking first. Have fun if you try it at your house!
aearthr
Beautiful! It looks like flower petals. Pinned to Pinterest boards!
shirmila
Excellent idea! children would love it for sure.
Debbi Douglas
WOW, this is fantastic! I have a few Adult Clients who would love to do this as well.
Thanks so much for your lovely tutorials happyhooligans.
Veens
We have done the lid thing on chart paper, but never on wax paper. I just know what we will be doing tomorrow 🙂
Emily
Jackie, I LOVE these! I linked to this project on AllFreeKidsCrafts. Just thought I’d let you know 🙂
Claudia vickers
Love it, my pre-k class will go crazy they love painting I probably use finger paint. Thanks
justfordaisy
Love this! Thanks for sharing – we’ll be giving this a go this week! They look lovely!
Wondering What We Did Today?
Cute! We tried this a few weeks ago!
Joyce
Would like to share that I did this with the handicapped adults I work with and they turned out beautiful. We used the painted wax paper as a dyed Easter Egg. I had cut out an egg frame from a cereal box painted white and we taped the painted wax paper to the back of the egg frame. Look beautiful on the window !!
happyhooligans
Beautiful, Joyce!
Kristina & Millie
Hey there 🙂 We featured your artwork in our 12 Kid Crafted Gifts for Mom’s day round up! http://2crochethooks.com/12-kid-crafts-for-moms-day/
happyhooligans
Well, thank you, Kristina & Millie!
Mindy
Does the frame need to be hollow on the inside such as a box within a box for the sunlight to come through or is entirely backed by a cardstock and that will still allow the light to shine through to the wax paper???
I am about to try this with my 5 & 1/2 yr old daughter. It is a special Mommy and Me day while my 12?yrold went to Disneyland with friends.
happyhooligans
The frame has to be “empty”, Mindy, for the sun to shine through. Have fun!
Jeanine
I don’t understand, am I putting another sheet of wax paper over top, THEN lid stamping? I am always last to get it sorry Jackie?.
Joyce anderson
Hang the wax paper art on a window by gluing 1″ foam strips to each side, like a picture frame. Then attach 2 small suction cups to 2 corners, and hang in a window.
happyhooligans
Great suggestion, Joyce!
Tessa
I’m wonder the same thing is there another sheet of wax paper over top of the painted wax paper before you slid and stamp withy the cap?
Shani
This sounds great for my Kdg kiddos. I have a large window I would like to cover and I think I will just attach it with painters tape to make it look like a frame. I will also use the painters tape to cut in some shapes for the stained glass effect.
Nancy W
your site would be much more appealing if you moved that “Shares” bar on the left side of the screen.. I covers part of the instructions and personally it turns me away from trying your projects because I am not going to try to read instructions THROUGH an obstruction on the screen.
happyhooligans
Thank you so much for letting me know, Nancy. I had no idea. For me, it shows outside of the body of the post. No-one else has ever let me know it covers the body of the post. If I’d known, I would’ve moved it sooner. Let me see what I can do about it, and thank you for the heads up!
Miss T. Esl Arts And Crafts
Hi there I’m Rosemary.For 5 years now I am in The Middle
East as ELL teacher.I have just encounter your website searching for
arts for my coming lesson. I reckon that, I need to
modify this a tad to suit perfectly for my kids and this will probably be brilliant.Many thanks for sharing your mind and writing it all together.
Shanna
Beautiful! All I have is parchment paper which is too think for the effect I want but we will be trying this soon!
Patty
Lovely!! (And perfect timing) I was just going to do balloon prints on paper, using my favorite Biocolor paint, but now will be painting on wax paper!
Jackie Currie
Ohh! Ballon printing sounds fun, Patty! I’ll bet it will be wonderful on wax paper!