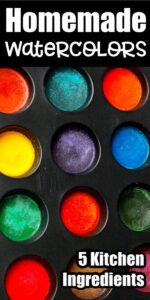
This HOMEMADE PAINT is made with cornstarch, baking soda, corn syrup and vinegar, and costs just pennies to make. It’s a wonderful and inexpensive paint for toddlers and preschoolers. The paints dry into solid watercolour paint pucks that will last indefinitely. Just swipe a wet paintbrush over them to make art.
How to Make Homemade Watercolour Paint for Kids
Today I’m sharing our awesome recipe for homemade watercolour paints. These DIY paints are terrific for toddlers and preschoolers. They cost just pennies to make, they work great, and you can store them indefinitely. In the past, we’ve made homemade liquid watercolours from our dried out markers, so be sure to check those out as well.
Why make homemade paint?
Making homemade paint is a great way to save money if you have kids who love to paint and who go through paint quickly. The hooligans love a good art project, and they love using those little trays of watercolour paints. I always loved them when I was a child too.
Now, I don’t know about your kids, but the hooligans can blow through a tray of those store-bought watercolours in a matter of minutes.
They never last long because the paint trays are so tiny, and the colours get all mixed together as the kids drag their brushes through them.
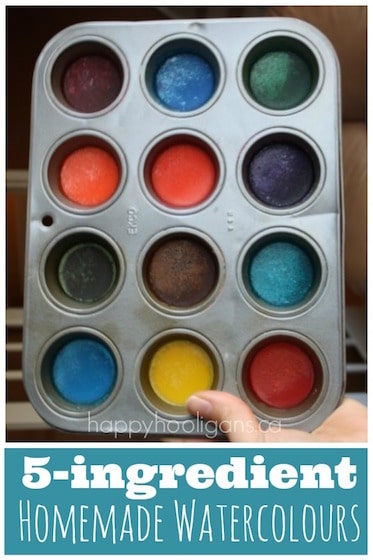
Well, I’ve found an awesome, inexpensive solution to that problem.
I make homemade watercolour paint disks for my daycare children.
Similar to IKEA paint pucks
These paints are similar to the hard paint pucks you find at Ikea. You just swish a wet brush over the disc of paint, and the colours come alive.
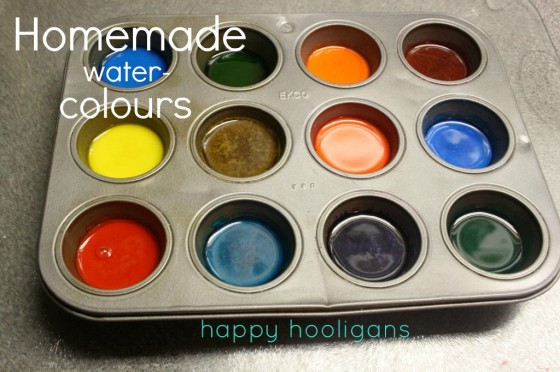
Colours won’t get muddy
These paint colours don’t get mixed up like they do in a small tray of watercolours because the wells in the muffin tin are deep enough and far enough apart to prevent the paints from running together. They last much longer too.
It should be mentioned that these paints are not archival quality by any means, but they’re perfect for toddlers and preschoolers who like to paint.
Watch how to make them in this short video:
Homemade Watercolour Paint Recipe:
You can get the printable instructions at the bottom of this post!
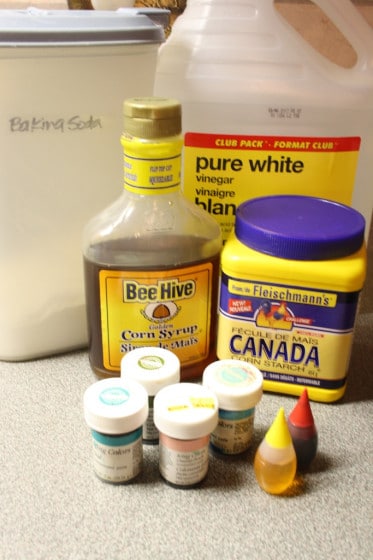
The photos that you see in this post are a double batch.
Ingredients and supplies:
- 4 tbsp baking soda (bicarbonate soda)
- 2 tbsp white vinegar
- 1/2 tsp Light Corn Syrup
(you can also use Karo syrup or golden corn syrup
)
- 2 tbsp cornstarch (known as corn flour in the UK)
- Food colouring (icing gels produce the most intense colours)
- Mini Muffin Tin or ice cube tray
Doubling the Recipe:
This recipe doubles easily. I made a double batch and it half-filled all 12 compartments of my mini muffin tin.
Making your Paint:
Mix the baking soda and vinegar together in a spouted container (hello science experiment) and wait for the fizzing to stop. I use a 2 cup measuring cup for this.
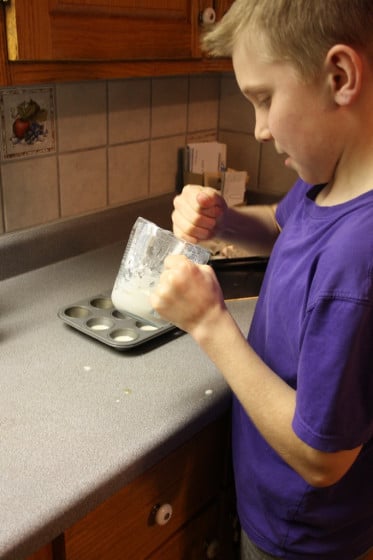
Add the corn syrup and cornstarch, and mix well until the cornstarch has dissolved.
Pour into your containers.
Your mixture will be VERY thick. Cornstarch, when mixed with liquid becomes a Non-Newtonian substance (think oobleck) which acts like both a solid and a liquid. The trick to keeping it in liquid form, so you can pour it, is to keep stirring it. As soon as you stop stirring, it will settle back into a solid. If that happens, just dig back in with a spoon, and get it moving again, and it will revert back into liquid form.
Now, grab your colours and have some fun!
Stir your colour in with a toothpick or popsicle stick and mix well.
We used Wilton Icing Gels to colour all but two of our paints; for the red and yellow, we used liquid food colour.
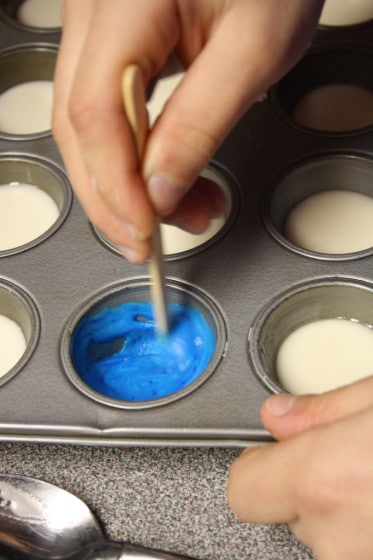
For the liquid food colouring, we added 6 drops to get the intense colour we were looking for. An added pinch of cornstarch helped compensate for the extra liquid.
Let your paints set
Now the hard part: waiting.
Your watercolour paints have to dry completely. This could take a couple of days if your environment is cool and damp.
We left our paints beside our gas fireplace, and they were dry in less than 24 hours.
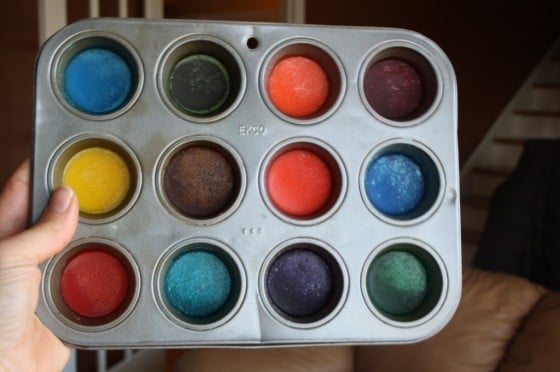
Let’s Paint!
When your watercolours are dry, simply grab a paint brush and some water and test them out!
I was so impressed with how our homemade watercolour paints worked!
The paints glide on smoothly, the colours look super. They’re nicer than any dollar store watercolours we’ve ever used. They’re a little chalky when they dry, but not as bad dollar store paints that we’ve been using recently.
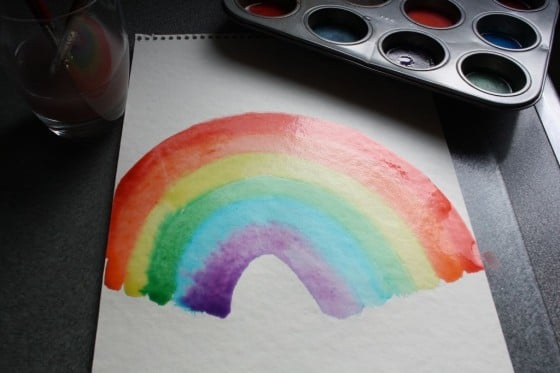
The wells of the muffin tin are better than the shallow trays that kids’ watercolours usually come in. Our paints stay much cleaner because the colours won’t slosh together every time a child swirls a brush around in them.
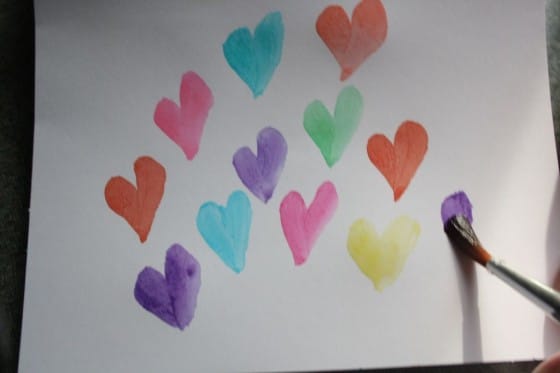
How to store your homemade watercolour paints:
These homemade watercolour paints will store indefinitely because there’s nothing in them that can spoil.
When you’re finished painting, simply store the paint tin uncovered, and the water will evaporate, leaving your paint discs in perfect condition for your next art session.
Do homemade watercolour paints stain?
This post has been edited to add that our homemade watercolour paints have never stained our clothes or hands.
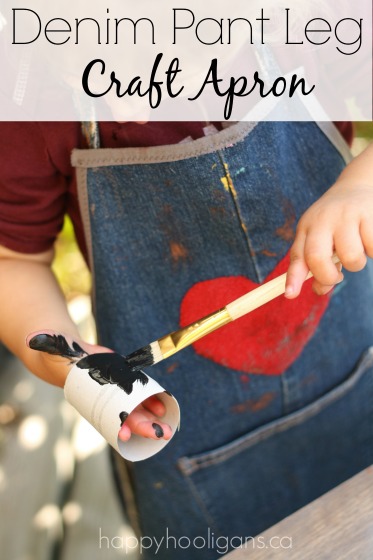
If, however you prefer to protect your child’s clothing when crafting, have a peek at these adorable Repurposed Denim Aprons that I make from the pant-legs of our old jeans!
Boredom Busters for Kids!
Print off our checklist of 100 Fun Things for Kids to Do at Home. Stick it on your fridge, and they’ll never be bored again!
You may also like our:
Homemade Watercolour Paint for Toddlers and Preschoolers
Equipment
- Muffin tin
- stirrer
- measuring cup with spout
Supplies
- 4 tbsp baking soda bicarbonate soda
- 2 tbsp white vinegar
- 1/2 tsp Light Corn Syrup also known as Karo Syrup or Golden Corn Syrup
- 2 tbsp cornstarch also known as corn flour in the UK
- Food colouring icing gels produce the most intense colours
- Mini Muffin Tin or ice cube tray
Instructions
- Mix baking soda and vinegar together in a spouted container i.e. 2 cup measuring cup.
- Add corn syrup and cornstarch, and mix until well dissolved.
- Pour into a mini muffin tin or ice cube tray
- Your mixture will thicken if you stop stirring so keep it moving as you pour.
- Add a dab of icing gel or 6 drops of liquid food colour to each compartment of paint. An extra pinch of cornstarch will compensate for the extra liquid if using liquid food colour.
- Let your paints set for 24-48 hours.
- To paint, simply swish with a wet paint brush.
Get the 3-5 Playful Preschool e-Book!
25+ Preschool activities by 25 bloggers, 10 printables, PLUS 50 links to activities not featured in the book.
Click to download your copy now!
Follow the Hooligans on Facebook!

Jackie is a mom, wife, home daycare provider, and the creative spirit behind Happy Hooligans. She specializes in kids’ crafts and activities, easy recipes, and parenting. She began blogging in 2011, and today, Happy Hooligans inspires more than 2 million parents, caregivers and Early Years Professionals all over the globe.





Valerie @ glitteringmuffins.com
Very cool! I’m thinking of an idea for this paint, I’ll have a try to see if it works and get back to you. Of course if it does I will post and link back to you 🙂 Thanks for the inspiration! Btw you should link your fabulous aprons in this post, so people can also make those to go with the paint if they want their kid to wear one 🙂
happyhooligans
Can’t wait to see what you do with them, Valerie! Thanks for suggesting I link up the denim aprons! I’ve gone and done that. Brilliant! 🙂
Aleacia @ Dilly-Dali Art
These look amazing! I’ve been looking for paints like these. I have an idea that I tried with tube watercolors and they just shrunk up and cracked, I was so sad! Now I’m going to try it again with these paints. Jackie to the rescue!!
happyhooligans
Thanks, Aleacia. Can’t wait to see what you do with yours! Be sure to share with the rest of us! 🙂
jessicalehman
Fabulous! I love watercolor painting and I’ve been doing it with my kids. But, just as you said, they LOVE mixing them together on the tray and getting the colors all muddy. I’m totally going to try this. I think my son will enjoy helping me make the paints, too! Thanks!
happyhooligans
Yay! So glad you’re going to try this! I love that you don’t have to worry about how quickly they’ll go through them too, since it’s so inexpensive and easy to whip up another batch!
happyhooligans
I did see some recipes that called for a sugar/water syrup instead of corn syrup, Rika. I’m not sure what measurements you would use, but you could probably google it to find out the equivalent.
heather at wordplayhouse�
The colors are vibrant and beautiful too�we’ll have to try this. Fun making the paints…then painting!
hisveganmama
Wow! So glad to see how stunning they turned out on paper. Love stuff that comes right from the pantry!
mom teach play
I love this, can’t wait to try it! Thanks for the idea!
Mandi
I can’t wait to make these!!! They turned out so colorful! As soon as I saw your post on FB last night I was like oh I am soooo making those! haha
Amanda
I have a bunch of mini muffin tins that these would be perfect for!
mae
Going to Try the paint idea
Megan @ CoffeeCupsandCrayons
Very cool! We are definitely going to try this too! FBing and tweeting for anyone who hasn’t see this yet.
happyhooligans
Thanks, Megan! Glad you liked!!
moonsprig
What a fun and easy recipe. Thanks so much for sharing this. I am excited to make these as soon as I can! Water coloring paint is so magical and I bet it is even better when you make your own paints!
OneMommy
How cool is that? We are running low on water colors, might need to mix up a batch and see how it works!
happyhooligans
I’m going to mix up a new batch for us over the March break too! They’re so easy to make. 🙂
Kristina
Wonderful! Such a great idea…can’t wait to try it.
happyhooligans
Thanks so much for featuring our paints!
veronica
These are great. How long do they last? If I made a batch for my kiddos would it last through a entire project? (meaning 3 uses for 45 minutes each?)
Thanks!
happyhooligans
I’m not sure they’d last that long, if you were actually painting for a whole 2-plus hours. Our first batch lasted over a week with the kids painting every day for a little bit here and there. I’ve just made a second batch recently, and 2 girls went through the purple one in one sitting. They were both two years old though, and just kept adding water to it with their paintbrushes, and every single thing they painted that day was purple. lol If your kids are older, and can control the amount of water they use a bit better, they would probably last.
Mary Claire Letourneau
Cool, Keep me updated!
Monica Talley
This is something I need to try. I love watercolours in my classroom but have many issues when it comes to students mixing colors in the tray. I will have to visit my local dollar tree and find some mini muffin pans. Thanks for a brilliant idea.
Mom V
These look fun and great for children, but keep in mind that the food coloring paint will fade much quicker than commercial watercolor paint.
happyhooligans
You make an interesting point, Mom V. I can only speak for the colouring that I used (Wilton Icing Gels), and the doodle art that I painted a couple of months ago is still as vibrant as it was when I painted it. Having said that, I wouldn’t recommend using this paint for a “masterpiece” that you want to keep forever anyway, simply because of the quality and the ingredients of the paint, but it’s great for those every day projects, or times when your kiddo “just wants to paint”. 🙂
Sarah
Yes, I’m curious if they’d be washable? Let me know what you come up with. I have a 3 year old who loves to paint, but it HAS to be washable!
happyhooligans
We didn’t have any staining here, Sarah. Not on hands, or on the washcloth that I cleaned up with, but if you’re concerned, you could put your little one in an apron or a smock. Have fun!
missy
CornSyrup substitute. For every cup called use 1 cup sugar and 1/4 cup water (LIGHT)
1 cup brown sugar and a 1/4 cup water (DARK)
Making mine with the substitute today. Used all my corn syrup last night on peanutbuter pocorn!
happyhooligans
Thanks for sharing a substitute for the corn syrup, Missy!
Sara Arribas
do you think light honey would work?
happyhooligans
I think in certain baking recipes, the honey can used as a substitute for Kayro/Corn syrup, but I don’t know if it would work for this recipe, Sara. Sorry I can’t be of more help!
boniferous
My kids are playing right now. My kids get to learn science from the reaction of chemicals, following directions (in making the paints), using tools to measure, learning about measurement sizes, primary colors and seconday colors and how to make them, creativity, art and some responsibility. Coolness!! I find alcohol or vinegar remove any color stains so it’s all washable. SWEET!
happyhooligans
So many opportunities for learning before the paint even hits the paper! Thanks for pointing them all out!! And thanks for your stain fighting tip! Hope your kids have a blast with these! 🙂
Margie Goodluck
Great Art recipe idea.. I will try with my kids art class …they will love painting with paint they have made themselves. We recently recycled denim too… the kids made their own denim covered art journal and decorated them with textas, ribbons and buttons etc they look fabulous. Happy creating, hooligans. Cheers from Australia
Elizabeth Johnson
The egg cartons that are clear plastic would work as well as a muffin tin and would not keep the muffin tin from being available for muffins. I use the egg cartons to put paint in when I teach kid’s art classes. They last for many projects before having to be replaced.
happyhooligans
Hi Margie, Ok, so I notice that you made your paint and msg’d me at 2:42am (my time I guess), and then painted your egg cartons and were letting them dry at 3:09am, and were waiting for them to dry before adding your paint. The paint must be poured into your carton as soon as they’re mixed. If you let them sit while you prepare your egg carton and let it dry, the paints will start to set up, and I think you’ll have difficulty transferring them to the egg carton.
Margie Goodluck
Thanks I appreciate your replies, it’s all sorted now…the egg cartons dried quickly and before I finished the paint. Now i just have to wait for the paints to dry. Cheers Margie
Margie Goodluck
Hello Jackie
Thanks for your advice……I did wonder if the reason was because i waited …i needed to buy corn starch!! ooops!
I did continue on by adding some more vinegar and then the corn starch straight away and it seems to be okay. I have done 12 colours into an egg carton and i will see how it is this time tomorrow! If it doesn’t work i will do it again as the recipe says and try it with baking soda. i hope it works too. Cheers margie
Jessica
This is too cool! Wow, I can’t believe how cheap and easy it is going to be to refill my school supplies when I’m running out, I think my boss is going to love me too much! I love this, thank you so much for taking the time to share this with all of us! Amazing!
happyhooligans
Hi Jessica! These paints ARE cheap and easy, but I should tell you that they’re not a suitable replacement for the tempera type water paints you use in the classroom. They are vibrant and fun to use, but the quality when they dry is chalky, and will rub off if you handle the artwork. We just use them in the daycare as a replacement for the cheap watercolours that you buy at the dollar store. The work that they produce with them, isn’t work that you would really be able to keep and store. If you’re just looking for cheap paint to let the kids go nuts with though, then you’ll love this recipe. 🙂
Cheers for now! Jackie
Nicci
What a great idea. Im going to use it on my blog and link it to you! Thanks for the inspiration! Love your site!
chelle9279
I am super excited about making this with my 4 year old! Her favorite activity in all the world is painting and she can go through the water colors! Thank you for the post and thank you for this blog – I cannot wait until my wee one goes to bed tonight so I can look around your site further!!! (found this link from a friend of mine on pinterest and am so glad she pinned it!)
happyhooligans
Perfect! You’ll love these then (and so will your daughter). Have fun with them! So glad you found us!
Maria
Thank you so much for sharing all your wonderful ideas, I’ll try with the corn substitute, because we don’t have any kind of syrup here. My kids also love painting!!
happyhooligans
You’re welcome, Cari! I’m glad you loved them! I saw your post, and they turned out great for you! Thanks for linking back to us!
Janet
You have such a wonderful site, and I’m so glad I found it. I was looking for activities to keep my four year old granddaughter busy, because was going to have surgery. As soon as I can get up and even halfway back to normal, I plan to get her busy on the type of projects you have on your blog. I wanted to let you know how much I appreciate you sharing your great ideas!
happyhooligans
I’m so glad you found us, Janet, and so happy that you’re planning on doing some of our crafts and activities with your granddaughter!
Sending you well-wishes for a speedy recovery! x
Tammy
I just made some of these water color paints. I followed the directions to the letter and used the correct ingredients. There is liquid sitting on top of the solid part, so I added more corn starch, to the point where it was hard to stir. Thought I had it. Just checked on them again and the liquid is back sitting on the top. Any ideas or is this normal?
happyhooligans
Yes, Tammy, they’ll be wet immediately after making them. You have to let them sit for up to 48 hours until they harden. If you can find a warm spot to put them, they’ll dry faster though. I set mine by our gas fireplace, overnight, and they were dry in less than 24 hours. That layer of water on the top will evaporate as they dry. When you look at the first photo of my blog post (the one with the writing on it), mine are so wet on top that you can see an air bubble sitting on the surface of the red paint compartment. Have fun with your paints!
Shantelle
hello! before i make these, i wanted to make sure of a couple things 🙂 1. are they just like watercolor trays that when they dry, they can be reused? what i mean is, when water is added, do they get gummy or gross, can they be used over and over? 2. what is the karo syrup for? is it able to be left out? i didn’t want to get a whole bottle for just that little bit, it’s not something i use otherwise. Thanks so much!!
happyhooligans
Yes, Shantelle, they’ll last for as long as you have them. When you’re finished using them, they harden back up. I don’t think you can leave the corn syrup/karo syrup out. I haven’t heard of anyone leaving it out. I’m not sure what purpose it serves in there, but I would think it’s needed for holding it all together because it’s sticky stuff. You could try it without though, but it might be a waste of the other ingredients if it didn’t turn out.
Amy m
This is fantastic! I can’t wait to make this paint. I’m not sure who will have more fun-my daughter or me lol. Thanks for sharing!
happyhooligans
Have fun, Amy! Mixing up these paints never gets old for me. They ARE fun to make! 🙂
Shirin
Before I start mixing these, do we really need to add only 1/2 tsp corn syrup? Looks like you made so much of this liquid, and yet the recipe only calls for a few spoons of everything here and there. Maybe I am slow today, but thought I’d ask first. Thanks.
happyhooligans
Hi Shirin, that’s a double batch that I’ve made there. I mention that a little further down in the post. I guess I should make that point a little earlier in the post. I’ll do that now. Have fun with your paints!
Ann
Thanks for letting my know about these paints via Renie, Jennifer. I’ll definitely be trying them out. I told Renie that I’d probably try agave syrup as well as corn syrup. And that I would like to eat the paints! Ann
Anne Hiebing
Thanks for the recipe. I have a almost 3 yr old grandaughter living in Badami, India. Can’t wait to get this recipe to her mom (my daughter). No watercolors available there.
happyhooligans
You’re welcome, Anne! How wonderful that your granddaughter will be able to experience the joys of painting with our recipe!
kellie
So fun! Thanks so much for sharing!!
Dee
Hi. I just made and had the same issue with it being too thick after adding corn starch.( I used baking soda) added a little more vinegar and was fine
happyhooligans
So you used baking soda instead of cornstarch, Dee? How did they turn out once they dried?
Dee Westley
Sorry my comment was a bit confusing lol. I used the recipe as stated but after mixing I added a little extra vinegar and they still turned out well. Although they took about 2 1/2 days to set. love them
happyhooligans
Thanks, Dee. Glad they turned out well for you!
nichole
I went to make these and before the food coloring after mixing all ingredients it didn’t seem to have enough liquid did I do something wrong?
happyhooligans
Hi, Nichole, Cornstarch is one of those substances that feels almost like a solid when there’s a little liquid added to it. If you mix it with a stir stick or a fork, it will become a very thick liquid. It will seem extremely thick and paste-like when you’re trying to mix it. If it’s extremely dry, I would add your food colouring, and see if that’s enough to liquify it so that you can mix the colour in, but yes, it will be very thick and dry-ish. If you still think it’s too dry, and not working, I would try adding a couple of drops of vinegar. You don’t want it to be too wet and easy to stir though. Hope this helps. 🙂
Angie Wilson
I just made 3 batches of this for my daycare kids. It took me 1 error batch to figure it out. Once you add the vinegar t the baking soda you need to mix it IMMEDIATELY – do not delay. Once it’s completely mixed – I quickly added the corn syrup and added the corn starch in little bits. It has that thick cornstarch/water consistency. If you do not mix the vinegar and baking soda very quickly – it will be lumpy and a bad batch.
happyhooligans
Hmmm.. Interesting. I’ve always made it exactly how I’ve described in the post, and never had a problem. Thanks for sharing your experience though. It may help others who encounter a similar problem. I’m glad it ended up working out for you, Angie! Enjoy!
LadyShold
Water is a safe additive, when I thought it got all dry and wouldn’t stir I added 2 tablespoons of water to help, water will evaporate later,but in the mixing helps keep it workable.dont add to much water. Hope this helps it worked for me. LadyShold (Artist) just add one dropper ful of white Indian ink,to make white.
happyhooligans
Thanks for the tips, LadyShold. I appreciate it! I didn’t even know there was such a thing as white Indian ink.
Jill
Since the ingredients are all “food” items, is there a chance these paints will eventually mold or rot or smell bad? I ask because I’m considering using this to make a painting for my living room.
Sorry if this question has already been answered – you have a ton of comments here and I didn’t read them all! Thanks.
happyhooligans
As long as you store them uncovered, so the air can dry them out, they’ll keep indefinitely, with no spoiling, Jill.
Jill
I was referring to the painting I make, not the paints themselves, but I guess your answer would apply to that too. Thanks!
happyhooligans
Correct, Jill. The paintings won’t mold either. I’ve had one on the bulletin board in our craft room for a couple of years now. Regarding your plans to paint a picture for your living room, please keep in mind that these paints are neither archival or artist quality. They are an inexpensive substitute to the children’s watercolours that you would typically find at the dollar store. If you are looking to paint a piece of art that will last for years and look somewhat professional, these are not the paints for the job.
LadyShold
With white, I added a dropper of Indian ink to pasty mix stirred. I’ll let you know how it came out,most likely great. Thanks for the water color recipe.
Karn
When coloring rice paper or soft tissue for quick projects, such as flowers, I use fruit cups or applesauce cups to mix my water and food coloring in. I usually have about a fourth to half inch of water in the cups. When my project is finished I let the cups sit so the water evaporates. I stack the dry cups, smaller storage space. I just add water for the next project. I can tell what color I will have by the color of the bottom of the cup.
happyhooligans
What a great idea! Thanks for passing it along!
Christine
Those are the mini-est muffin pans i have ever seen! So cute and perfect for the watercolors! Im thinking of freezing the tablets after they dry…the way my 5 yr old goes through water colors, I want to make lots at once. Hope they freeze well, what do you think?
happyhooligans
You won’t have to freeze them, Christine. They’ll keep indefinitely just as they are. I’ve had mine in a cupboard for a year before, and they were perfect when we pulled them out. NOne of the ingredients are perishable, so they’ll keep just as long as store them uncovered so there’s no chance of mould if they’re damp.
Cheryl Hayes
I am a high school teacher and we often have need of paint. How about lining the muffin cups with a sheet of the clingy plastic wrap, pushing it down into each cup, and then when your paints are dry, pop them out and put in an empty yogurt carton with a lid for storage.
happyhooligans
You certainly could transfer it to the yogurt tubs, Cheryl, but I would leave the lid off. Store these paints uncovered so they don’t go mouldy.
Essi
can i use apple cider vinegar instead?
happyhooligans
I’m sorry, but I don’t know, Essi. I’ve never tried it with apple cider vinegar. I imagine it would work, but I really cannot say for sure.
Tasha (@xocanadianangel)
Who knew it was so easy to make your own Water color paints? WOW this is awesome! Definitely a money saver too! Thanks so much for sharing 🙂
shelyy walker
My daughters teacher had paints on her wish list I told her I had found out how to make on line. I’m giving this to her so my daughters class can make this thanks so very much for sharing.
happyhooligans
So glad you found our recipe! Thanks for passing it along to your daughter!
Dayna
I made these and they work great! I teach art at rather large elementary school. Towards the end of the year, with each watercolor project the students do, specific colors get used up (like blue) and I’m scambling to find every last bit of the color to finish up the project. My solution from here on out is to whip up a large block of those frequently used colors for each table to share. I’m so excited about this find that I will be sharing it next week at a workshop I’m presenting for art teachers in my district. I will proudly credit your blog for the find and share it with my fellow co-workers. Thank You!
happyhooligans
Wonderful idea, Dayna! And thank you SO much for sharing the word at your upcoming workshop!! XX
Fanny
Hi, can you make this few days in advance or store them for future use? Thank u 🙂
happyhooligans
Absolutely, Fanny. Just like store bought paint trays, they’ll keep indefinitely if you store them uncovered. We’ve pulled ours out a year after making them, and they’re as good as new.
tabitha
Love this I will be sharing it and making some over at my blog too!!! thanks for all the great ideas!
happyhooligans
Thanks so much, Tabitha! Hope you love ’em as much as we do!
Cassie
OMG God sent me your link via Teach preschool. My 4 homeschooled kids are just now learning painting tchniques, and watercolors was up first. I was dreading the idea of buying multiple packs of paint, but this will work perfectly and cheaply! I can’t thank you enough! PInning and FB sharing. 😀
happyhooligans
Perfect, Cassie! Isn’t it amazing how the Universe can deliver just what we need at exactly the time we need it?
Don Jusko
I’m a professional and I love this page. Many years ago I taught a Christmas Camp group of 1st graders, we used Easter egg colors. Today they are stuck without the primary colors. This Wilton Set of 8 Icing Colors is great, it includes transparent Yellow, magenta and cyan. Here’s another tip, when I make watercolors I use the best ingredients, honey and gum Arabic is all you need to mix with dry pigment. They are the same pigments you use for cooking, PY100, PR122 & PB15. My paints won’t rub off or turn chalky. Dry them under the refrigerator.
happyhooligans
Thanks for all the tips, Don!
Victoria
This is AWESOME!! The colors are so bright! Love it 🙂 Definitely going to try these very soon!
meridith
I made these for my daughter who is not quite 2 yet. My daughter LOVES to paint and is so excited when it get the ice cube tray down that I put the paint in. I have found they clean up just as easy as the store bought ones. as an added bonus if my daughter decides the eat, drink. or lick her paint or project I don’t have to worry about her getting something that is going to make her sick. Thanks so much for posting this wonderful paint.
happyhooligans
I’m so glad you’re enjoying the recipe, Meredith. I like the idea of using an ice cube tray. I have about a dozen of those. I could make up lots of sets so the hooligans could each have their own to work with.
meridith
Here is an update on the Ice cube tray paints. My daughter and I went to visit my mom and other family in Texas for Christmas and Christmas gift funds were extra tight this year. In the process of cleaning out a cabinet Mom and I found a large stack of old ice cube trays from before we had an ice maker. She was going to throw them out but I took them made them all in to paint sets and wrapped them up to give to my friends kids/my daughters friends . I made over 20 sets of paints. I had more invested in the wrapping and bow than the gift its self but no one noticed that fact. Needless to say the ice cube tray paints were a huge hit with everyone we gave them too, and when I told them they were homemade they could not believe it. This made us able to give a lot of gifts with very little funds which made for a great Christmas. For any one interested I had about 4 cents or less invested in each set of paints I made.
happyhooligans
Meredith, I think that is just fantastic! I’m so thrilled to think that our recipe brought you (and it’s recipients) so much happiness at Christmas this year. Good for you for being so resourceful, and so wonderful that you gave a useful gift that really impressed for very little cost!
Jeri Lynn Willis Jagger
This was a huge hit for Christmas…I made some up from Santa…and the boys just love it. I have a 3 and 5 year old (well I also have a 16 and 14 year old as well as a 5 month old….but the 3 & 5 year old were the target age for this). I love it because it’s big enough to SHARE!!!! Not those little strips of water colors you get at the store…THANK YOU for the post…thinking the Easter bunny is going to bring your sidewalk chalk and the bubbles #thinkingahead!
suepheasey@gmail.com
In the UK I notice corn syrup is replaced with golden syrup for cooking. Golden syrup is quite thick and extremely sticky so would this be a suitable replacement for making paint? Is corn syrup also very sticky?
happyhooligans
Yes, corn syrup is also very stick, thick and slow running. Yours sounds quite similar to mine, so I would think it should work. Do you have Karo syrup there? I know that’s an alternative in some parts, Sue.
happyhooligans
It might, Kelly. I really don’t know. Bear in mind that this is not “quality” paint. It occurred to me when you said you like to add white to your colours that you might be thinking you can use this for some serious art-work. This is really just an inexpensive paint option for young children who go through their art supplies quickly.
ak
tried this today…it is wonderfull!!!!!!!!!
Kristin Moore
I accidently messed up and put baking POWDER instead of baking SODA. I kept adding vinegar until it became a correct consistency. Dried in a few hours. At first it worked great then it turned to sludge lol. Next time I’ll make it correctly and see how it goes. But all in all it was great and I can’t wait to try it again. Oh, and when the kids heavily coated the paper in the paint is when it dried all chalky and flaky.
annie
We have made these in a silicone pan and popped them out to use like watercolor crayons. If you are lucky and have a water bottle sillicone ice tray that makes cylindrical shape it makes great “pencils”
Nadia
Hey, looking forward to trying this out. Was just wondering, what’s the best way to store the paints? Leave them in the tray? If so, covered or uncovered? And how long do they last?
Thanks so much!
happyhooligans
Yep. Uncovered in the tray. They’ll last for as long as you have them. I had a tray tucked away for a couple of years once, and it was as good as new when we found it and used it.
Gail
Hi! What a great idea. But what on earth is corn syrup. I live in South Africa and have never heard of it. Please shed some light……
Thank you.
happyhooligans
Do you have “golden syrup” or “Karo Syrup”, Gail? I believe that’s what it’s know as in other parts of the world.
Tally
I’ve done this before!
reshma
thanks for sharing the recipe. can we use this for face painting too
happyhooligans
I’ve never tried. It might be a bit chalky for face paint, but you could give it a try as there isn’t anything harmful in it.
Rachel
Hey! Great post! I was so excited to make these with my daughter but when we made it, it came out like that corn starch & water mixture where you can’t stir it. It solidifies when you move it around. Does that make sense? I’m not sure what I did wrong, maybe too much corn starch? We can’t stir our colors in, any idea what we could change to make it work next time?
happyhooligans
Yes, it does do that, Rachel. It stiffens right up. You really have to dig to get it moving, and once you do, it goes quite liquidy. As soon as you stop moving it, it solidifies again. That’s always the way with cornstarch and water. If it’s absolutely stuck, and you can’t move it at all, I’d add a few drops of water and work that in to get things moving.
Rachel
Ok thank you for the reply! I’ll try that. 🙂
Emily G.
I accurately followed this recipe only to find out it was a powdery/chalky mixture that couldn’t actually be poured into the ice cube tray so there is probably something missing front the recipe, perhaps it calls for extra vinegar? I added another 2 tbsp of it and I could finally pour it into the tray like it’s supposed to be in the instructions/picture.
happyhooligans
Hi Emily. That sounds right. I’ve edited the post just now to say that corn starch and liquid, when mixed together, form a non-Newtonian fluid. That means, it will act like both a solid and a liquid. When you stir it, it’s liquid. If you stop stirring, it settles into a solid. If you’ve ever made GOOP before, you’ll know what I mean. The trick is to keep stirring, and if it settles, dig your spoon in, and get it moving again, and it will quickly revert back into liquid form. Hope this helps!
christopher morrison
Best site for making color tablets, well done., if you add drop of washing up liquid it reduces staining and helps mixing re surface tension in water.
Luna
I wonder if it is possible to scoop out the vinegar, syrup, and baking soda, add a little water, and glue together to make an instant liquid thick paint. I haven’t tried it yet, but I added glue to normal tempera before to make it stick over silky surfaces like plastic plates and brilliant paper.