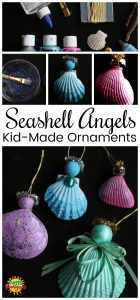
This SEASHELL ANGEL ORNAMENT is fun and easy for kids to make, and might just be the prettiest homemade ornament on your Christmas tree this year. Great craft for Sunday School too!
See all of our angel crafts here.

If you have a stash of seashells in your craft cupboard, you’re going to want to make these seashell angel ornaments. They’re absolutely darling, and so simple to make. They may just be the sweetest homemade ornaments you hang on your Christmas tree this year.
We’ve made several angel crafts in my daycare this past week, so be sure to check out our wine cork angels, our coffee filter angel ornaments and our doily angel Christmas cards.
Today’s seashell angels were inspired by one very special ornament that’s had a special place on my Christmas tree for the last 20 years.
My oldest son gave me the seashell angel, pictured below, for Christmas when he was 3 or 4 years old. He purchased it at our church’s Christmas bazar and his Sunday school teacher helped him to wrap it.

My eyes still mist up when I think of how proud he was giving me a gift that he’d chosen and bought all by himself, and this little angel remains, to this day, my favourite Christmas ornament of all time.
I don’t know why it’s taken me so many years to replicate this ornament with my daycare kids. We have a huge stash of shells. The kids LOVE sorting them and using them for nature crafts. We’ve actually used them to make Christmas ornaments before. It just never occurred to me to make these angels.
We finally made them when the kids came over for a craft day today.
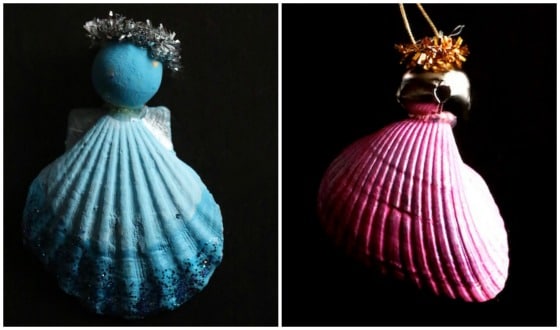
They turned out beautifully, and the kids were thrilled to have such a precious ornament made from one of the seashells they’ve played with so often over the years.
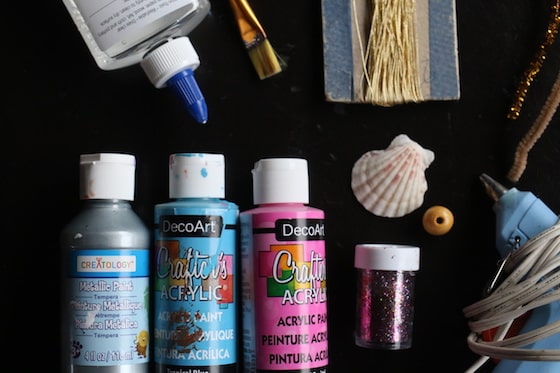
To make your seashell ornaments, you’ll need:
Supplies:
- seashells
- wooden beads (or one of the alternative materials pictured further below)
- metallic pipe cleaner for halo
- regular pipe cleaner to attach angel’s head
- paint/paintbrush
- glue/glitter
- hot glue gun
- metallic thread for hanging
- craft gems/thin ribbon (optional embellishment)
Instructions:
Paint your angel’s head and body
Begin by painting your seashell. I would advise using acrylic craft paint on your shells. It will hold up well over the years, and if you’re adding a coat of varnish or clear glue and glitter, like we did, it won’t streak or run.
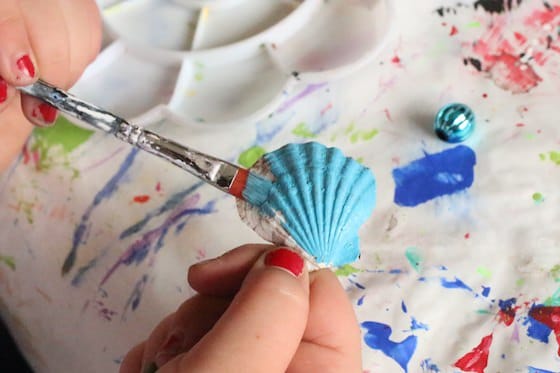
Paint your wooden bead as well. Our bead had a glossy finished, and I worried a little that the paint might not adhere to it, but it did. A coat of varnish or clear glue wouldn’t hurt, to protect it from getting scratched over the years.
Alternatives for your angel’s head
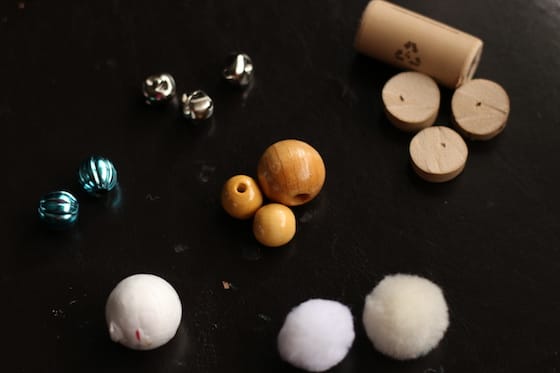
If you don’t have wooden beads for your angel’s head, you can use a jingle bell, pom pom, small styrofoam ball, large metallic bead or a disk cut from a wine cork.
Attaching your angel’s head
When your seashell and wooden bead are dry, you’ll need to attach your angel’s head to her body.
If your seashell has enough surface space at the top of it to set the head on, you can just squeeze a dollop of hot glue there and press the bead in place.
A lot of our seashells had a very thin edge at the top which I knew wouldn’t support the head no matter how much hot glue we used. I got creative and came up with this simple solution:
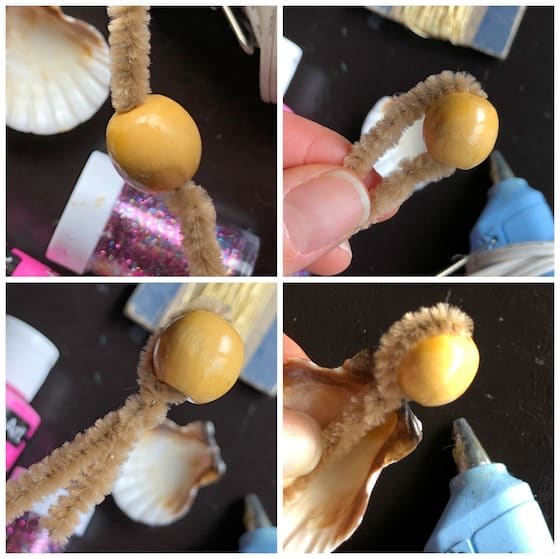
- Run a pipe cleaner through the hole in your bead. I chose a beige pipe cleaner so it would blend with the colour of the bead.
- Bend the pipe cleaner down over the back of the head and twist the two ends of the pipe cleaner together. Trim any excess, leaving about a one inch tail.
- Run a line of hot glue down the back of the seashell and press the tail of the pipe cleaner into it. While the glue is drying, tweak the positioning of the angel’s head so it’s right where you want it to be.
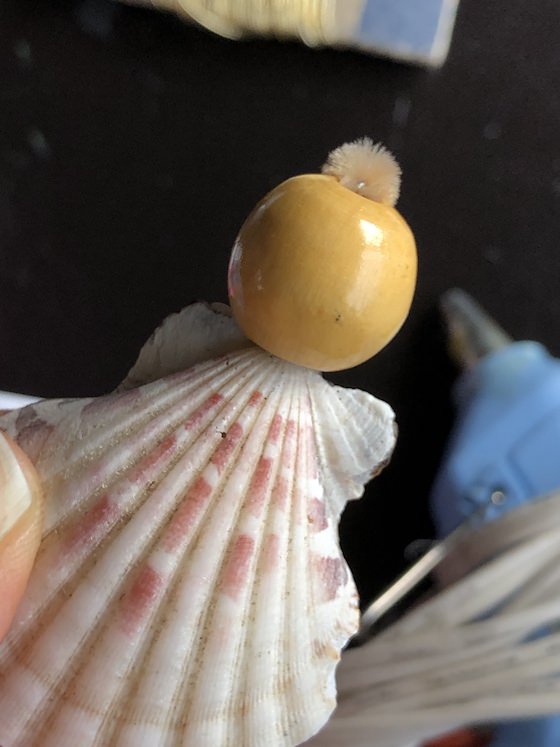
Halo and glitter
Cut a very small piece of pipe cleaner, and attach it, with hot glue, to the top of your angel’s head.
Now your angel is ready for any embellishments, such as glitter and jewels.
I know some of you are not fans of glitter, but when it’s contained in glue it’s virtually mess-free, and it adds such a nice touch to these ornaments.
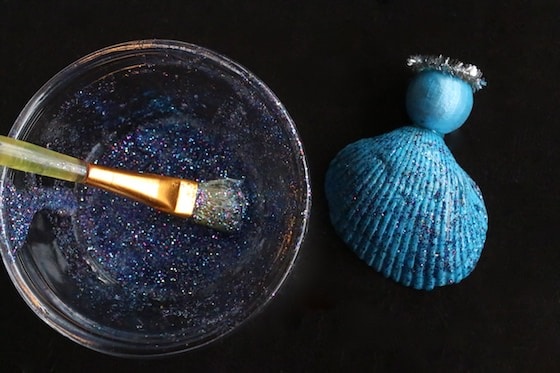
Some of the kids brushed glitter over the entire surface of their angel’s dress, while others were selective about where they added it. Some chose to not add glitter at all.
Feel free to add a craft gem to the front of your angel for the finishing touch.
Hanging your ornament
To hang our angels, we slipped a length of metallic thread under our angel’s halo and secured it with a knot.
Aren’t they absolutely precious?
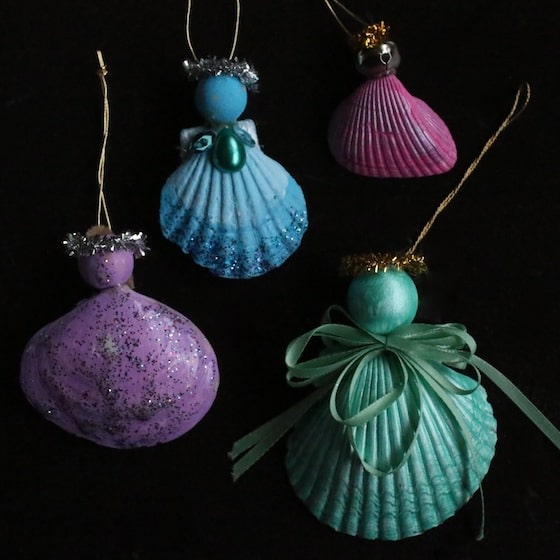
Without a doubt this is one of the prettiest homemade Christmas ornaments we’ve ever made, and a really wonderful way to put a few of the shells in your seashell collection to good use.
More Easy Christmas Crafts for Kids

Jackie is a mom, wife, home daycare provider, and the creative spirit behind Happy Hooligans. She specializes in kids’ crafts and activities, easy recipes, and parenting. She began blogging in 2011, and today, Happy Hooligans inspires more than 2 million parents, caregivers and Early Years Professionals all over the globe.




Leave a Reply