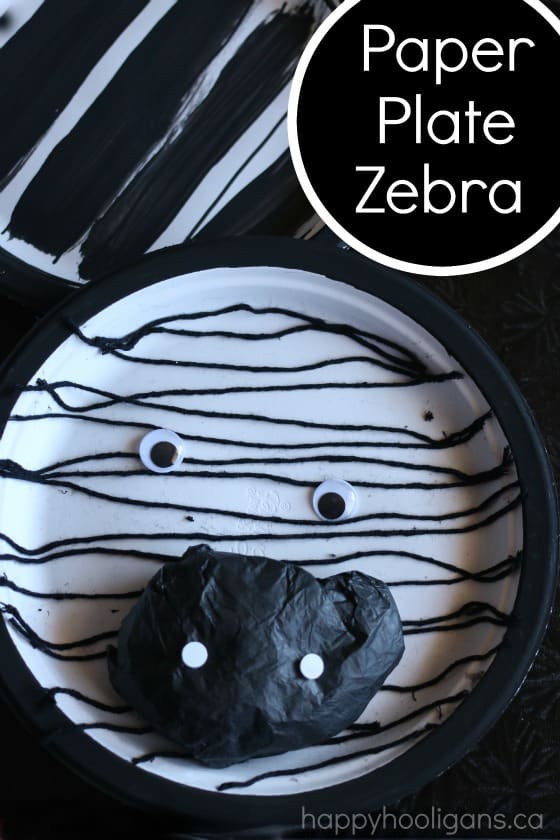
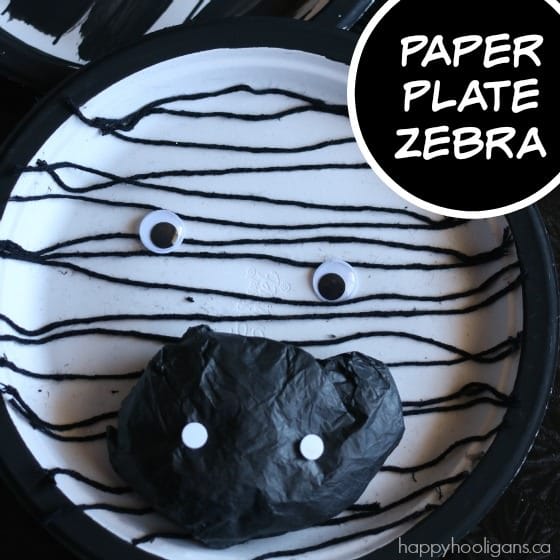
This is the most adorable paper plate zebra craft, and it’s SO easy to make! It’s perfect for a zoo animal unit or for preschoolers who are learning the letter “Z”.
As you may know, we’ve made a LOT of paper plate crafts in the past year. We’ve just finished putting together a huge collection of A-Z paper plate crafts in which we’ve made at least one paper plate craft for every letter of the alphabet.
Of course, we left the hardest letters for last, and Z was a real challenge. There’s zipper, zig-zag and zebra, but how the heck would you make a zipper or a zig-zag or zebra out of a paper plate?
Well, I’m not too sure how you’d make a zipper, but we figured out zebra, and my-oh-my, we ended up making the cutest zebra craft ever!
What I love about this paper plate zebra is that he isn’t one of those cookie-cutter crafts where the kids have to piece to gather a bunch of construction paper shapes to make their zebra.
Nope!
This zebra craft allowed the kids to get creative with paint and/or yarn; the only stipulation being that they had to make zebra stripes on their paper plate.
At first I thought our letter Z paper plate would be just that – black and white stripes. I hadn’t even considered that we would turn our plates into zebra faces, but those stripes looked so beautiful… we couldn’t help ourselves. We had to add some eyes and a nose to bring them to life!
And I’m so glad that we did because we wound up with some mighty fine little zebras that are down-right adorable.
Let me show you how we made them.
To make our paper plate zebra craft, we used:
- paper plates
- black sharpie marker
- black paint (you could use black and white)
- black yarn (you could use black and white)
- glue
- paintbrush
- 4 googly eyes (2 large and 2 small)
- black tissue paper
*In addition to paints and yarn, you could also set out black crayons and markers, and strips of black construction paper or tissue paper. Anything you have on hand that you could make black stripes with would work.
I handed out the paper plates, and set out the marker, yarn and paints.
I told the hooligans that we we’d be making zebra stripes with the supplies on the table. I didn’t suggest zebra bodies or faces because I didn’t want this to be complicated – just a few zebra stripes to represent the letter Z in our paper plate collection.
Our painted zebra stripes:
I’ll show you our painted zebra stripes first.
Here’s our first painted plate.
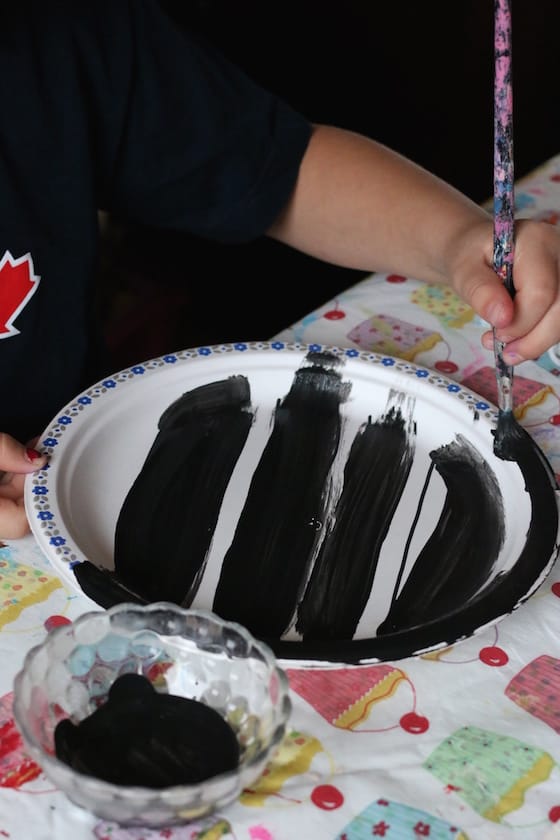
This hooligan drew her stripes on with the black sharpie, and then filled them in with paint.
Very simple, but very much looking like zebra stripes!
Our yarn zebra stripes:
For the yarn striped plate, we drizzled glue all over the plate’s surface, and spread it around with a paintbrush.
If you’re working with very young children, you can pre-cut the lengths of yarn for them to glue across their plate.
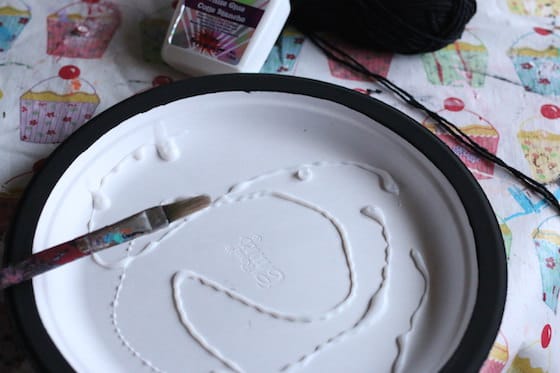
A couple of older kids worked on the yarn plates. They took lengths of yarn, and draped them across the plate, tapping them into the glue with their fingers and their paintbrushes.
This got to be a bit tricky because their fingers would get gluey, and the yarn would stick to their fingers.
There was definitely some problem solving going on. They figured out that the paint brush could be used as a tool to help, and that it was handy to have a damp wash-cloth near-by while they worked. We had some very sticky fingers happening here.
The kids continued cutting and gluing their yarn until the plates were covered in stripes from top to bottom. Any yarn that went out over the edge of the plate was trimmed off.

Something kind of neat happened when they finished working: one of the hooligans referred to the stripes as ZIG-ZAGS.
Aha! ZIG-ZAG! Another “Z” word!
Here’s a shot of our zebra-striped paper plates – one created with paint, and the other with yarn.

We were so impressed with the way our plates turned out, and I couldn’t help wondering what they’d look like if we added some features to them.
To keep things simple, we just added eyes and noses.
We gave our zebras couple of big googly eyes, and then we wadded up a sheet of black tissue paper for the nose.
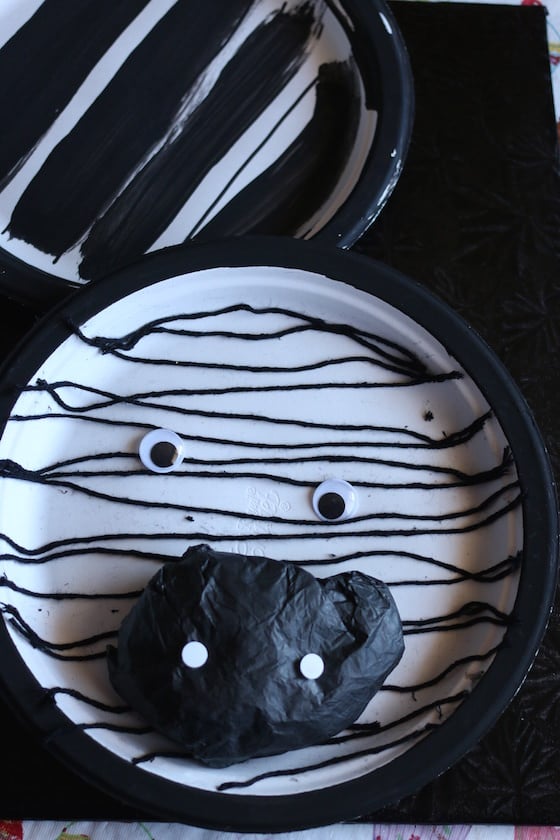
To finish, two smaller googly eyes, placed upside down, were glued onto the nose.
And there we are! A quick, easy and adorable paper plate zebra craft to represent the letter “Z”!
I’ll be sharing a couple more new paper plate crafts in the next little while as we finish up our A-Z collection. Once the entire collection is finished, I’ll be putting together one huge alphabet paper plate craft round-up for you!
To see a few of the other paper plates we’ve made so far, check out:
17 Paper Plate Craft for Preschoolers
Get the 3-5 Playful Preschool e-Book!
25+preschool activities by 25 bloggers, 10 printables, 50 links to activities not featured in the book all for $8.99!

Follow the Hooligans on Facebook, Pinterest and Twitter!

Jackie is a mom, wife, home daycare provider, and the creative spirit behind Happy Hooligans. She specializes in kids’ crafts and activities, easy recipes, and parenting. She began blogging in 2011, and today, Happy Hooligans inspires more than 2 million parents, caregivers and Early Years Professionals all over the globe.


Leave a Reply