Learn how to make butter in minutes with this amazing and simple science activity. All you need is cream, a jar, and some elbow grease. Easy recipe for home or the classroom, and a fun, edible experiment for kids of all ages.
Grab a jar and some whipping cream. I’m going to show you how to make homemade butter with your kids today. The process is really fun and easy and it will fascinate all ages!
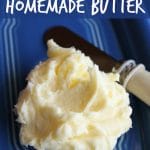
Nothing tastes better than homemade butter! Whether you slather it on a piece of homemade bread, a muffin or a dinner roll, you just can’t beat the taste of butter you’ve made yourself.
Making Butter is a Great Science Lesson for Kids
Making your own butter couldn’t be easier! It’s so easy, in fact, making homemade butter is one of those classic science activities that teachers do in the classroom with their students. All you need is a carton of cream and a glass jar!
Oh, and a little elbow grease. That’s the fun part. You’re going to shake, shake, shake your way to your batch of tasty homemade butter, and that does require a bit of muscle.
You can do it though! Heck, even my preschoolers can handle this experiment!

To Make Homemade Butter, You’ll Need:

Ingredients and Supplies:
- a glass jar with a lid
- heavy cream (35% whipping cream)
- 2 or 3 glass marbles (optional)
Please note that the marbles are optional. I do not use them, but others say it speeds up the process because they provide extra agitation for the cream. If you use the marbles, make sure your glass jar is made from thick tempered glass i.e. a Mason jar. You wouldn’t want the marbles to break the glass.
How to Make Homemade Butter in a Jar
Step One: Fill your jar half way with cream. If you’re using marbles to speed up the process, drop them in now.
Step Two: Put the lid on tightly and SHAKE it like crazy!
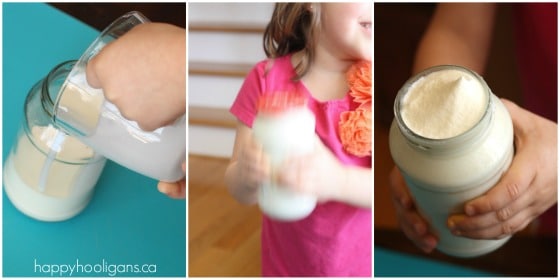
After a minute or two, the cream will thicken, and you won’t hear liquid sloshing around anymore. You can read the scientific explanation for what’s happening here.
Keep shaking.
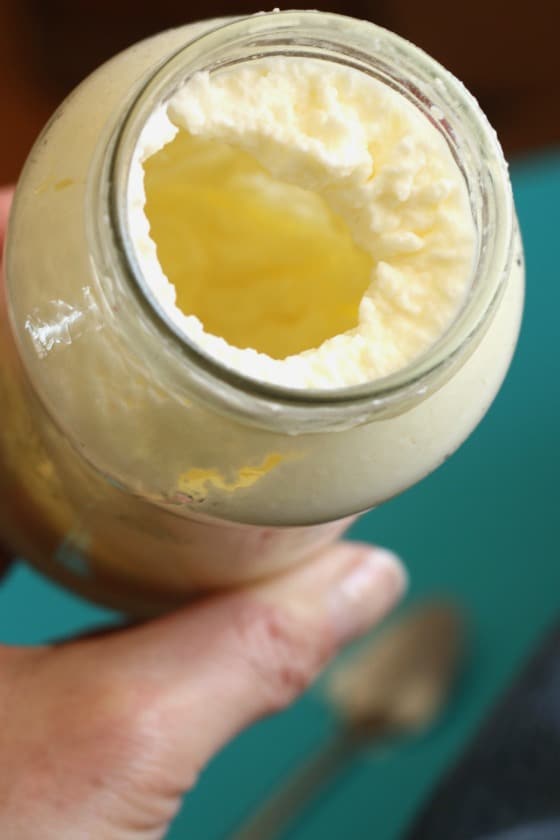
As the Cream thickens, you get Whipped Cream!
About halfway through, I take the lid off to show the kids what’s happening inside the jar. The cream has turned into whipped cream! And yes, we grab a spoon, and taste some.
Pop the lid back on, and keep shaking. After a few more minutes, you’ll hear liquid sloshing around in the jar again. The first time I made butter, I thought something had gone wrong, and that the whipped cream had thinned back into cream.
Buttermilk!
But a peak inside will reveal that the sloshing is the buttermilk separating from the butter that’s starting to solidify in the jar.
Almost ready!
Once again, pop the lid back on, and shake it for another minute or so, until the butter has formed a solid mass.
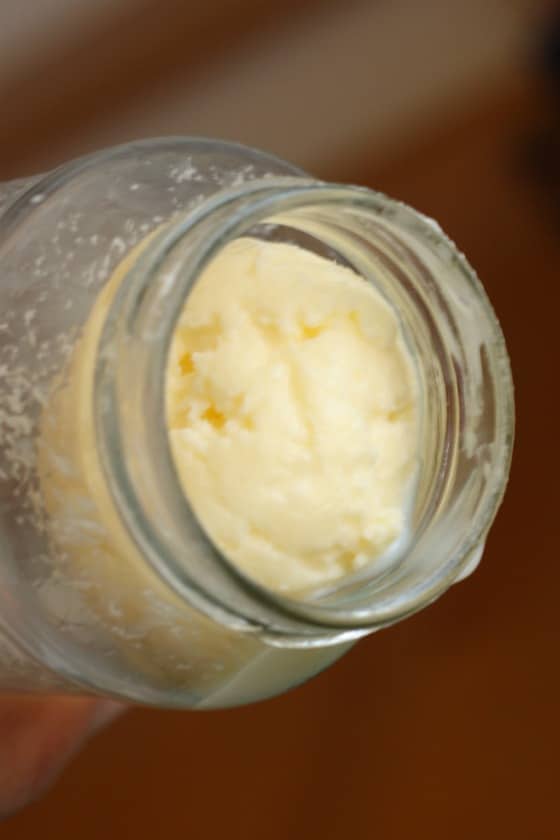
We made BUTTER!
Pour off the buttermilk, and shake the butter out of the jar.
Be sure to save your buttermilk for baking.
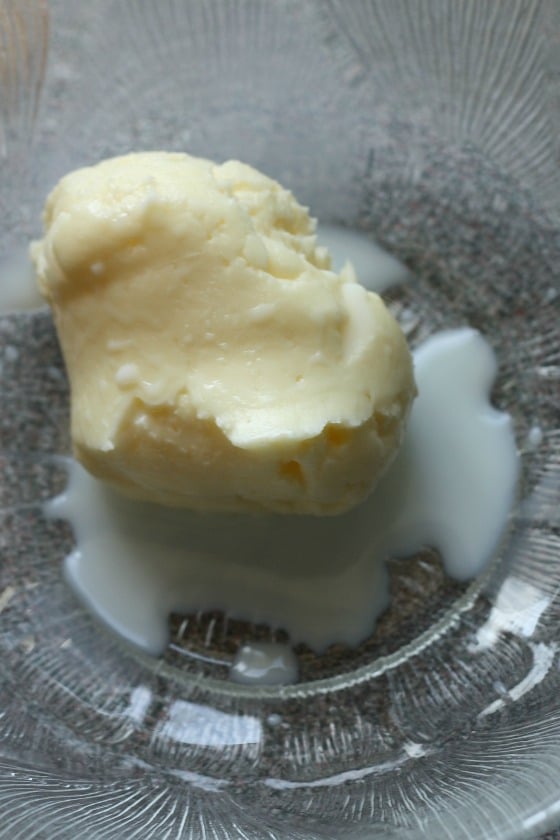
Rinse your Butter:
Step 3: To finish, you need to rinse your butter under cold water. Knead it a little as you rinse. This will remove the last of the buttermilk and will prevent your butter from going rancid quickly.
Time for a taste-test!
We slathered our light and fluffy homemade butter on toast.
Mmmmm!
I’m telling’ ya… Homemade butter is out of this world!

If you like, you can add a dash of salt, or you can flavour your butter with citrus zest of freshly chopped herbs.
Check out this collection of homemade flavoured butter recipes by A Taste of Home.
And if you really want to impress your family, bake some bread machine dinner rolls to spread your butter on.
Common questions about making homemade butter:
Can I make butter from milk?
You can’t make butter from the milk that’s likely in your milk jug in the fridge right now, but you can apparently make it from fresh, un-pasteurized cow’s milk (also known as raw milk). It is a bit of a lengthy process as the milk has to sit overnight, but if it interests you, you can visit Mother Earth News for the instructions.
What’s the easiest way to make homemade butter?
Ok, sure, making butter in a jar requires a bit of elbow grease and a lot of shaking. If you’re not up for that task, or if you want to make butter more quickly, there are a couple of ways to do it:
Using a butter shaker is faster and easier:
Check out this butter shaker (affiliate link) from Amazon. You can make butter in 3 minutes with it.
How to make butter with a stand mixer:
Of course, making butter in your mixer is a snap! Just pop over to A Little Insanity for the easy instructions.
How long can I store homemade butter:
Homemade butter won’t keep for long because there are no preservatives in it. It will spoil quickly if left at room temperature, but will keep well for a few days in the fridge.
Homemade Peanut Butter Next!
Hope you enjoy this delicious homemade butter as much as we do! Next, I think the hooligans and I will attempt making homemade peanut butter! We’ll let you know how it goes!
How to Make Homemade Butter In a Jar
Ingredients
- 35 % m.f. cream also known as heavy cream or whipping cream
- jar with a lid
Instructions
- Fill your jar half-way with cream.
- Pop the lid on, and start shaking.
- When the sloshing sounds stop, remove the lid, and check for whipped cream!
- Pop the lid back on, and continue to shake until the mixture separates into buttermilk and butter.
- Remove lump of butter (save the buttermilk for baking).
- Rinse butter under cold water, kneading any buttermilk out of the butter.
- Stir in a dash of salt if you wish.
- Your butter won't keep for long because there are no preservatives. If you're not eating all of it the first day, store in the fridge for another day or two.
- Store in the fridge if keeping for more than one day.
Nutrition
More cool science activities for kids:
Get the 3-5 Playful Preschool e-Book!
25+preschool activities by 25 bloggers, 10 printables, plus links to 50 additional crafts and activities all for $8.99!

Follow the Hooligans on Facebook

Jackie is a mom, wife, home daycare provider, and the creative spirit behind Happy Hooligans. She specializes in kids’ crafts and activities, easy recipes, and parenting. She began blogging in 2011, and today, Happy Hooligans inspires more than 2 million parents, caregivers and Early Years Professionals all over the globe.


Brenda
Jackie! What a great idea. Is it cheaper then butter? I sure hope you have lots of fans reading your blog cause I sure enjoy it.
Diane
I don’t think I would use the marbles. Marbles could/will break the glass or chip it. I guess I rather just mix it with a blender.
Jennifer
What do you think the total shaking time was? This is awesome! My husband and I were just talking about figuring out how to make butter. How very timely!
happyhooligans
Perfect timing, indeed! And what’s funny is that this wasn’t even supposed to be posted! It’s a really old post, and I was editing some behind the scenes things on the blog tonight, and somehow this slipped through to my fb page! It was fate I guess!
It probably takes about 10 minutes of shaking, Jennifer. If you have herbs in your garden, you can chop some leaves up and add to the finished butter. That’s really good too!
Pam
Can the salt just be added at the start of the process or will that keep it from ‘churning’ into clumps? I would think it would be more evenly distributed if you added it to the cream at the start.
happyhooligans
I think it might interfere with the process, Pam. I would add it at the end. It’s easy to stir it in for even distribution.
yndi
Can you use evaporated milk to make butter?
happyhooligans
You can give it a try, but I believe you need regular cream with a high fat content to make butter.
Barbara Street
Awesome, Jackie!! We do this each year at preschool when we are doing a Life in the Country theme. We use babyfood jars and in addition to the heavy cream, we put a marble in it. We do small groups, so the kids transfer through 3 different groups, each just around 7 minutes or so. When they are at my group I read a story and each time I turn the page the jar gets passed to the next friend to keep shaking. Last year we did have one jar break from the marble and some over-exuberant shaking, but that had never happened before. We had a mom bring in a bread machine, so we had fresh bread baking all morning that we put butter on at lunch time.
happyhooligans
How fun! I’ve never done this with the Hooligans! Just with my own fam and friends. I think we’ll have to make some here this fall, and do our bread machine dinner rolls to go along with the butter! That’ll be such a nice fall lunch! I am SO excited that the Hooligans are coming back on Tuesday, Barbara!! I’m really sorry that summer is over and that my boys have to go back to school, but I can’t wait to get back into little people crafts and activities! j.
happyhooligans
Ok, I have to do this with the hooligans. With fresh bread machine dinner rolls! Mmmmmm. Must put that on our fall activity list!
I’ve heard about putting a clean penny in the jar, Barbara. It might be a bit lighter than the marble?
Jackie Currie
Thank you!
Kassy
Just about every time I try to make whipped cream I end up beating it into butter.
Cristina Archuleta
That was my question .. is there another alternative to shaking it instead? So if I beat it with a hand mixer or with a kitchen aid machine it would get the same result as well? I’m sure it would not use the marbles right ? Lol
happyhooligans
Yep! You’ll get butter! 🙂
Cathy jenkins
Been doing this with my preschool classes for 30 years. We typically do this in preparation of our thanksgiving feast. We also make cornbread. Delicious combo!
Amanda H.
We have done this before and they kids loved it! said it was the best butter they have ever eaten. A tip to speed up the process – add 3 or 4 clean marbles to the jar. Helps the process go faster. It is a nice upper body workout!!!
Jan Stark
Can you let me know how long it will keep just plain nothing added. Cheers Jan
Carol Frazier Shepherd
Does the jar have to be glass? I’m not allowed to have glass in my classroom.
happyhooligans
Someone commented earlier on my fb page saying they use a tupperware container, Carol. You could try that. 🙂
karen
Not sure about the tupperware container, more chance of the lid popping off. How about a plastic peanut butter jar, or a Kraft Marshmallow creme jar. Those are now made of plastic.
jacque
I used to be a teacher and we would make this in baby food jars when we were studying Pioneers/Westward Expansion. However, anytime we put marbles in the baby food jars and shook them we had lots of jars BREAK! We eliminated the marble, but it took longer. I am assuming you use a mason jar and the marbles don’t cause a problem?
Rattlin Chains
Can you use store bought heavy cream, or do you need unpasteurized cream?
happyhooligans
Store-bought heavy cream is what we use. 🙂
910m
Caution the kids to not lick the marbles or quick as a wink the marbles will be in the tummy!
Kelly
I remember doing this as a 4th grade science project. We each had our own little half pint container of heavy cream that we shook until we had butter. It was fun. Definitely going to do this as a fun summer project with my kids. 🙂 Thanks for the reminder!
Pamela Wallace
Buttermilk? Where did that come from?
Misty
That’s what I was thinking where does the buttermilk come into play it was mentioned in the ingredients
happyhooligans
When you’re finished, you’re left with a lump of butter in a pool of white liquid. That liquid is the buttermilk, Misty. You can use it in your baking if you like.
Betty shoemaker
I use to churn butter in a little daisy churn for my Mom. She would buy cream from a farmer friend. She loved the butter milk to drink. Had to laugh at the girls that wondered where the buttermilk came from. Our children just don’t know about those things. This is a great idea and will do this with my great grandson when he visits.
john
WOW! I thought the cream had to set out over-night to sour before starting!
happyhooligans
Maybe you’re thinking of homemade sour cream, John?
Jusanonymouswhatever
That’s the milk you are referring to. From milk you get the cream, from cream you get the butter.
Alison
I have seen someone else mention that (leaving the cream out the night before) to enhance flavor.
happyhooligans
I’ve heard that at room temperature the process will happen more quickly.
Brandie
How do you ‘rinse’ the butter without ruining it?
happyhooligans
The butter itself repels the water, Brandie. The liquid rinses away, and you’re left with your “clean” blob of butter.
BT
We did this in 4th grade with an amazing teacher who always had something new and creative in her classroom. I was fairly certain we used baby food jars and a cube of ice, of course we weren’t after the buttermilk necessarily. I could be wrong but it definitely accomplishes the agitating and pours off with everything else while getting it cold!? I’m no scientist, but that’s what I’m going to try. I couldn’t remember what type cream, that’s how I found this post. I won’t say or try to figure how long ago that was but it’s def great to see there are teachers still doing stuff like this in their classrooms. Ty for the information, and thank you for what you do. I’m sure it’s a challenge and a blessing. They do not pay the majority of you near what you are worth!
Jackie Currie
Thank you for your very kind comment! Please let me know if it works with the ice cube! I’m curious!
Samantha Huntley
We used to do this as kids growing up in VT. A dear friend always made butter in the spring and stirred in fresh finely chopped strawberries! DIVINE 😉
Valerie
What’s the purpose of the marbles? Just curious.
happyhooligans
They add extra agitation, and speed up the process. Completely optional, Valerie.
Danny
My daughter-in-law is allergic to dairy; will this work with goat milk?
happyhooligans
Can you get “heavy cream” from a goat, Danny? The fat content is key. You couldn’t do this with regular cow’s milk. It has to be high-fat, heavy cream.
Chris
How long does this keep? Doesn’t recto be refrOperated?…we hate hard butter in our house!!!
happyhooligans
I can’t exactly understand your question, but I’ll take a guess. It doesn’t keep long as there are no preservatives in it. If you’re not going to eat it all in one day, keep it in the fridge. It will likely be a small amount, and will soften quickly if you set it out on the counter for a few minutes before using it.
jeff pizel
HI , I have been eating about a Lb. of butter a week for ever ( I am 73) … I take a stick of Butter and Microwave it ( wrapped ) for TEN Secounds,then put on it’s side and add 6 secounds , check consistancy should be Much softer . Comes in handy when the meal is ready and Butter is still in Fridge Have Fun
Roxanne
Sounds so easy I love it. 2 questions can I add the salt prior to shaking and can I add passion fruit juice to flavor the butter?
happyhooligans
Add the salt after, Roxanne. It might interfere with the process. Plus, you’ll want to taste the butter as you’re adding the salt so you’ll know how much is right. You can try adding juice, but you’ll likely end up with very wet, mucky butter.
Angie
We leave our fresh cream (skimmed off the milk from our Jersey cows) out on the counter to come to room temperature before we put a quart or so in our Kitchen Aid mixer and use the wire whip to bring it to whipping cream. Then we switch over to the beater blade, put the pouring shield on the bowl and a kitchen towel over the mixer and bowl (to catch the splashing when the cream clumps up into butter) and let it mix while we tend to other kitchen duties.
Cream left out overnight will give the resulting butter a stronger flavor (fresh cream equals ‘sweet cream’ butter) as it begins to sour which some folks prefer.
Milk will not create butter. It must be the cream off the top of fresh raw milk or straight cream from the store (not half and half). Depending on the breed of goat (some, just as with cows, produce more cream than others) and the fact that goat milk creams slowly (takes much longer for the cream to rise to the top than cow’s milk), makes it more difficult to collect the cream from raw goat’s milk.
Homemade butter must be rinsed thoroughly in cold water until all the whey (also called buttermilk, not the same as the cultured product bought in stores) is gone. We pour off all the whey, let the mixer beat a little more until it clumps up onto the beater blade. Removing the bowl from the mixer, we take a rice spatula to press and ‘knead’ the whey out of the butter, rinsing with COLD water (warm water will begin to melt the butter) until it runs clear.
Any whey will turn sour quickly and contribute to butter’s rancidity.
For this reason, we only leave out on the counter the butter we will use in one day and freeze the rest in flexible silicone muffin pans (pressing the soft butter into the cups with the rice spatula). After the individual ‘muffins’ freeze, we pop them out, put them in freezer storage bags and label them with a date and return them to the freezer.
We don’t salt our butter, but it’s easy to salt to taste right after rinsing and kneading. Homemade butter makes wonderful cookies! —Angie from Douglas Falls Creamery on FB
Nic*
Never just pour away the buttermilk though. It is super beauty stuff. You can drink it (if you don’t like the raw taste add some flavour like chocolate or vanilla) it’s full of good acids helping the stomach. Or, if you don’t have enough for drinking use it like a cleansing tonic for your face. AMAZING for the skin. After you cleaned for face, dip a cotton pad in it and wipe it over your face. Leave on for a few minutes and rinse face with clean water afterwards….but you don’t have to.helps get rid of talg and makes the skin super soft. Ancient recipe….what do you think Cleopatra bathed in? Wasn’t milk, but buttermilk 😉
nadene
I make homemade butter and love it.. here is the way I make it.. 1 pound of cheap margarine-room temp, 1 cup of buttermilk, 3/4 cup oil and salt to taste.. mix all together .,. I use a food processor or my kitchen aid mixer .. mix till all blended and smooth and creamy.. put into containers, can be frozen for later also.. it stays soft and creamy
Dugar
My mother made butter like Nadine’s recipe and it was awesome!! I may try the other as a project for my grandson.
Cheryl
How can something made with margarine be called “home-made butter”?
Tom
That ain’t butter.
Joanne
Quick question. How much butter would you get from a cup of whipping cream? I’m really keen to try this with the boys and we need butted fur a baking recipe we were planning on making today anyway. 🙂
happyhooligans
I’m really not sure, Joanne. We’ve never measured. Sorry!
Katel
I do this a couple times a year. I whip a quart of cream and usually get about 1 1/2 – 2 cups of butter (plus the “buttermilk” or whey).
Just a note, the buttermilk made here is NOT the cultured buttermilk used in buttermilk biscuits or soda bread. They are NOT interchangeable. However you CAN use it in any baking that calls for milk. (I compare it to a sweet skim milk.)
My 16 yr old never thought she liked “real butter” (we usually use margarine) until she had some the first time I made it…
pame
You put some salt con it? I guess…I mean other way its not yummy…. But love the idea.
happyhooligans
It’s delicious without salt, but you can certainly add some if you want to.
Kathy
I’m SOOO excited to try this! I found a recipe for homemade slow cooker yogurt last night & now I find a recipe for BUTTER! AWESOME! THANK YOU! Just one question though; can you freeze it?
Cindy Farris Gruver
That a great science experiment! That being said, having grown up with homemade butter, no thanks to eating it! As a child, I hated the butter milk oozing out of the butter. (All these years later, I get the shivers just thinking about it!) We will gladly do the experiment, let the kids taste it, and then — bye bye to the homemade!
Helen Hall
One of my aunts used to make butter this way when I was a little girl, about 45 years ago. I’ve wanted to try it myself, as I think of her often now that I’m grown. I remember her shaking and shaking a big glass jar. Not sure but I think she used plain, whole milk for hers. Gonna try this ASAP! Thanks for sharing, and bringing back some sweet memories.
Sandra Donsbach
we use to milk a cow and took what I called scum of top and put little salt and shook it made great butter ,
Mindy Nickel Gates
Instead of a marble, you can use an all wood clothespin. You don’t have to worry about breaking the jar, but you still get extra agitation.
Ona Lee
My butter churn has wood for agitation. A clothes pin is a great idea!
Sheri Holmes
Fun to see you kiddos surprised by the buttermaking process. When I was about 3 years old, we lived across the street from a lady who had a cow. Every Wednesday, she churned butter, and I helped. She had a big glass jar-like container, and its lid had paddles that went down into it. It had a handle, which made the paddles turn. Cream went in, I got to crank the handle (for a LONG time, it seemed), .When the butter formed, she washed it and put it into a little wooden bowl. She made a design on the top with a wooden spoon. Then, to pay me for my work, I got to eat several teaspoons right out of the bowl! Yumm! Talk about nostalgia!!
Jannell Leonard
I’m 76 years old, so I remember when butter was made in a crockery churn with a top made of wood with a hole in it for the churn paddle. Churn held about 4 gal of milk and you sat down with the churn between your legs and pumped the paddle up and down until the butter was made. The buttermilk left behind was delicious and had little flakes of butter in it and as Sheri Holmes said the butter was put in a small bowl and a design pressed on top.
Susan schmidt
I have made butter in my blender and it works just as well but this might be fun to do with kids!
mwells
As a young kid back in the olden days my Mon would be cooking breakfast and my dad would be shaking a quart jar of cream for fresh butter. We had our own cow and cream was abundant. This is wonderful memories.
Emily B
The marble idea is genius! We’ve done this with the kids before but they got bored halfway through.
rosalynd
We are doing this now, boy is it a lot of work. How long can you expect without marbles in a mason jar? My arms are sore…. HAHA THANKS
happyhooligans
10 minutes is how long it usually takes us without marbles.
Peggy luther
Can this be used then for baking cookies.?
happyhooligans
I’m not sure, Peggy. I’ve never tried baking with it.
Karie
Peggy, I read all the comments, and someone mentioned this butter makes great cookies.
Trish
This looks so simple and I think the kids are going to love doing it. I have always wanted to make butter to go with my homemade bread.
Kate
I remember doing this about 25 years ago using a film canister with just a little cream to make a little lump of butter. If you have little hands and don’t want to use glass, a plastic container comparable to an old film canister will work.
Most of the readily available cream here in Texas contains carrageenan. Will this process still work if I use cream with carrageenan?
happyhooligans
I really don’t know, Kate. You could hit Google, and see if you can find an answer there though. Sorry!
Richelle
this is awesome! I remember doing this as a school experience way back in elementary school during thanksgiving season. My question is, what is the ratio from butter to buttermilk? We are stationed where it’s hard to find buttercream because of language barrier. I told my friend about this and she needed buttermilk for a recipe.
happyhooligans
I’m not sure what the ratio would be, Richelle, but a common substitute for buttermilk is to add a bit of vinegar or lemon juice to regular milk. You’d have to google it to see what the exact amounts are though.
waynette sharon
Why is there no mention of buttermilk in the recipe? Need to know how much buttermilk & when to put in.
happyhooligans
There isn’t buttermilk in the recipe, Waynette. It’s just cream that you put in the jar. When you shake the jar, the cream will separate into a liquid and a solid. The solid is butter, and the liquid is buttermilk. You pour the buttermilk off, and you’re left with butter. 🙂
Teressa
There seems to be quite a few ingredients and steps missing from this “recipe”.
happyhooligans
I’m not sure about the missing steps you’re referring to, Teressa.
Mae
She did her best to help us Teressa.
Jaime
If you’re planning to use the marbles – watch out!
Our marbles caused the jar to break – whipped cream/butter flew all over the room and my 5 year old, who had been shaking the jar slipped in the mess and landed on her rump in the middle of the mess.
Great fun, I recommend trying it, but sans marbles!
Hillary
This may have been asked before, but how long will the butter keep?
happyhooligans
It will keep for a couple of days if refrigerated, Hillary.
Charlene Jones
We do this every year at Thanksgiving. The kids love taking turns, it gets passed around until everyone has had a turn shaking it. My sister started the tradition and I’m sure it will continue years after she and I have gone.
Holos
If you buy the cream at the grocer’s choose the oldest available. Older cream, especially room temperature, turns to butter faster.
cmccoy
Yes! Let the whipping cream come to room temp before shaking and it will make much faster…around 5 minutes! with my class of 1st graders, I take an empty water bottle and pour in the cream, put the lid back on and shake, shake shake! The bottle is clear, so the kiddos could see, and then I simply remove the cap and pour out the “buttermilk,” and then cut off the top of the bottle to reveal the butter! It’s simple and NO MESS to clean up! Just the scissors, or knife. We use a plastic knife, or spoon to put the butter on crackers, or bread. When finished, just toss it all – works beautifully! Our last Thanksgiving feast, I made the “cornbread,” which is made from grits in the back of Sara Morton’s Day – A Day in the Life of a Pilgrim Girl.
BL
I’ve had comparatively quick butter success using a Tupperware-type dressing mixer – the plastic bottle with the agitator disk in it and a tight lid, designed for shaking vinegar and oil into an emulsion. Works well for whipped cream if you keep it very cold and don’t overdo it, and makes fast butter when it starts to warm up from shaking in hot little hands. 🙂
Locogato1419
This is AMAZING!!!! It was easy to follow and you describe every step perfectly!!!
happyhooligans
Glad you enjoyed it!
Karen @ Raising Little Superheroes
I never thought about making my own butter before. What a great idea and fun activity for my kids. They will love shaking the jar. Thanks for sharing!
Dee M Hernandez
I can’t believe it my family used to work so hard to make butter ? Now this looks so easy !!
Amy
I made this this morning, what did I do wrong because I did not get butter and I tried the blender, the mixer and my food processor..
happyhooligans
Hmmm… Did you use 35% m.f. cream, Amy? The only reason I can think for it not working is that perhaps you used 10 or 18% m.f. If you use the 35 (whipping cream or heavy cream), it should turn into butter quickly in a blender or food processor.
Amy
Thank you so much for your tip. I am definitely going to make this again. Thanks!
Mae
Can I make a tiny but just to test it out in a baby food jar? and also! when do i add the salt? Please reply soon.
happyhooligans
Sure. Make as much or as little as you need, Mae! Salt it after you’ve rinsed and drained it. You won’t need much at all if you’re just making a bit.
Mae
Wow that was quick!! Thanks. Me and my mom want to make it but im not sure if we’ll eat a lot of it within a few days. Also, how does it taste unsalted? i like the sticks of unsalted butter but does it taste to same?
Mae
Hi, I know ive been asking a lot but can you use half and half?
happyhooligans
No, you need to use whipping cream (also known as heavy cream or 35% m.f. cream), Mae. It’s the amount of fat in the cream that enables you to turn it into butter. Half and half doesn’t have enough fat in it.
Mae
OMG THIS IS AMAZING!!!! My whole family loved this. Its was fun but im a weak tween girl SOOO…. My mom had to shake it but stil amazing. We made it in a large mason jar really quick and split it into halves, one salted and one unsalted, both good. Thanks so much for this recipe!!
Riley
Amazing!!! Ive done this before but this time I added cinnamon and sugar with a few grains of salt…. Mmmm. Wiii be having oatmeal to go with it tomorrow!!
cloo
It was satisfying to see and feel the buttermilk run out of the blob. I did this project in kindergarten and wanted to do it again, and now it helps me get my anger out safe.
Roshni
I wanted to know if the cream you used is the same cream that can be collected after boiling milk. A heavy layer that settles on top after it boils and cools down.
happyhooligans
I don’t believe it would be the same, Roshni. The cream I use has a much higher concentration of fat in it, which wouldn’t be present in milk.
Fred J
I don’t know how you could have explained this process any simpler. Reading some of the comments makes me wonder about some people. I just finished pouring some heavy cream into a mason jar that my 9 year old girl and I shook for 15 minutes. After rinsing the butter we tasted it. I’ve never dreamed butter could taste like that. Incredible!
Deanna Hodge
What will happen if you can’t rinse the butter?
happyhooligans
Hi Deanna! I’ve just asked in a blogging group filled with parents and teachers, and the teachers say when they make it in the classroom, they don’t rinse the butter. Rinsing is important if you’re going to store the butter for more than a day or so because it will spoil quickly if you don’t rinse the buttermilk away. If it’s all going to be eaten right away, as it would be for a classroom experiment, it’s fine not to rinse it. 🙂
Lana
Hallo where can I buy 35% fat heavy cream? I leave in Miami Florida and can not find it.
Elena
Tried many times before but following your steps was able to make butter first time with good taste. Thank you.
happyhooligans
Oh, great! So glad you had success, Elena!
Michelle
Can this butter be frozen!
Jackie Currie
I’ve never tried freezing homemade butter, so I’m really not sure, Michelle. Sorry!
Margeaux
This was so satisfying to turn my jersey cows cream into butter! So easy, thank you!
Sienna Brown
Wow this was so cool. I didn’t have a jar with a lid so I used a protien shaker with a metal spring inside. It was so simple and taste delish! Thanks for posting
Jackie Currie
Great thinking Sienna!
Susie Porterfield
When I was a little girl we lived way out in the country. We had a cow and other assorted farm animals and my grandma would make butter out of the cream from the cow. Of course, she didn’t make it in a jar haha! I can still see her hands as she washed the butter to get the buttermilk out. I’m so thankful to have grown up this way and I have so many precious memories from my childhood.
agreso
Tried many times before but following your steps was able to make butter first time with good taste. Thank you.
Jackie Currie
I’m glad our post helped you get it right!
King
Awesome recipe and directions. I honestly didn’t know making butter was so simple and easy! I tried it for the first time and I has fairly happy with my butter. Straining the buttermilk was the hardest for me, but its not that bad. Thank you for sharing!
King P.
Awesome recipe and directions. I honestly didn’t know making butter was so simple and easy! I tried it for the first time and I has fairly happy with my butter. Straining the buttermilk was the hardest for me, but its not that bad. Thank you for sharing!
Jackie Currie
You’re welcome! I’m glad you gave it a try!