I am so excited to share this cool Sharpie art process with you today!
We’re making name art with Sharpies and tin foil, and the process is slick, shiny and colourful. With this
With this easy art technique, kids can make a piece of unique “name art” to hang in their bedroom or to give to a friend. I hope you’ll try it at home with your kids or, if you’re a teacher, that you’ll use it as an art-class activity with your students.
It’s no secret that I’m a huge fan of Sharpie markers. They’re my favourite markers for making art with even when I’m crafting with toddlers and preschoolers.
I’ve always believed that when you give kids great tools, they produce great work, so we use Sharpies often here in my home daycare. They’re wonderful when working on smooth surfaces like glass, plastic and wax paper.
In the past, we’ve used Sharpies on tin foil for small projects like our tinfoil jar lid ornaments, and foil wrapped ornaments. This was our first time making a bigger piece of art with Sharpies and foil, and the process and results were awesome.
Let me show you how it’s done.
For your convenience, this post contains affiliate links.
To make Name Art with Sharpies and Tin Foil, you’ll need:
- Sharpie markers (My favourites are these Glam 80’s Sharpies)
- Tin Foil (also known as aluminum foil)
- styrofoam meat or produce tray (you could also use a piece of thick cardboard)
- black acrylic craft paint
- paint brush
I tested this project myself before introducing it to the kids.
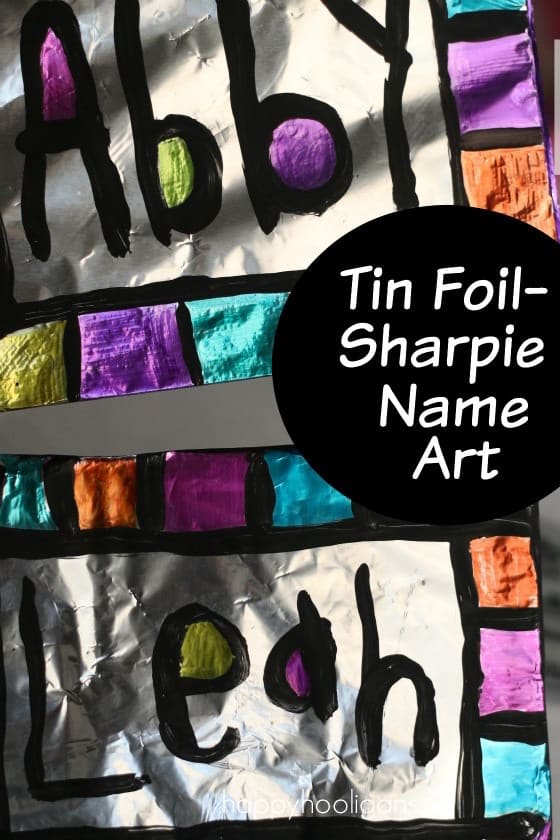
My cousins’ daughter was coming for a visit over the summer break, and I thought this would be a cool project for her to do, but I wanted to make sure it would work well. To experiment, I used two of my daycare hooligans’ names, and I was thrilled when the results looked like this:
I knew I had a winning an art project for my crafty little cousin.
This is how the process went:
To start, I cut the curved edges off of a styrofoam meat tray. I always have a stack of styrofoam trays on hand because they’re versatile for crafting with (see our styrofoam button trees) and can be used as paint pallets or trays to hold the supplies for a craft project.
Note: always run your styrofoam trays through the dishwasher to sterilize them before re-using.
Trimming the edges off left me with a flat “canvas” to work on.
I wrapped the styrofoam in tin foil, making sure the front was smooth, and free of any creases.
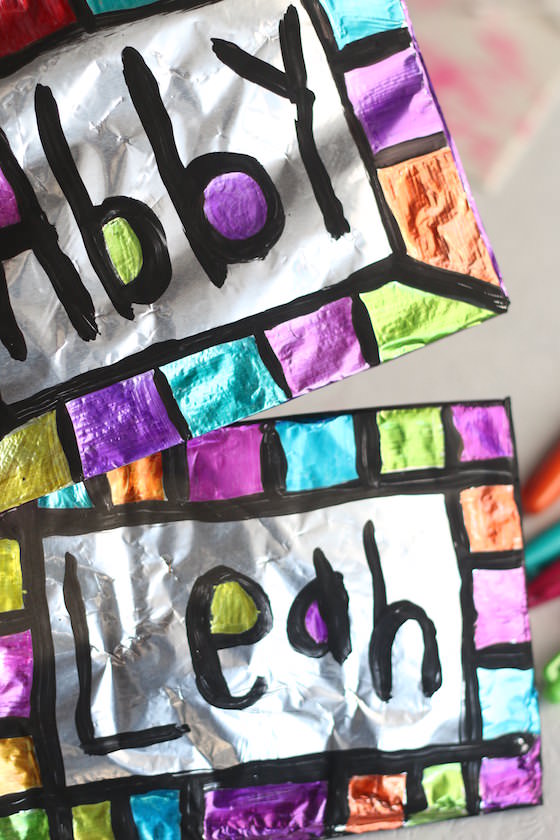
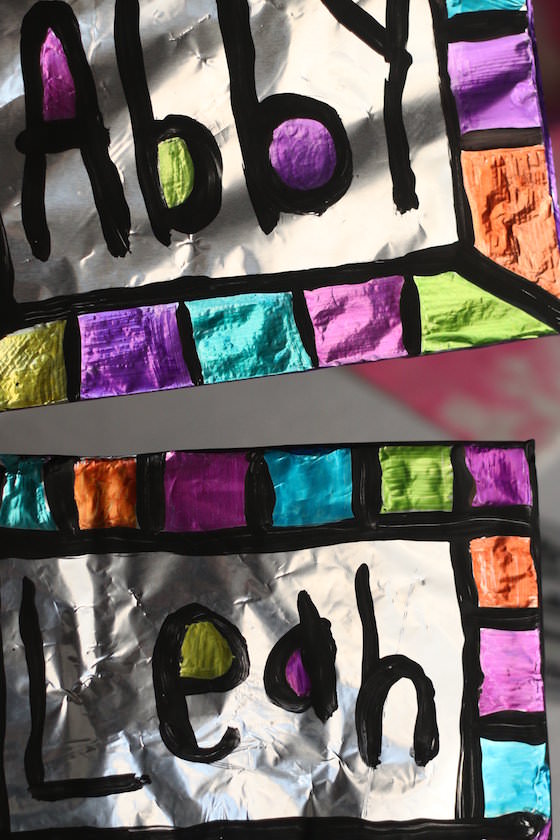
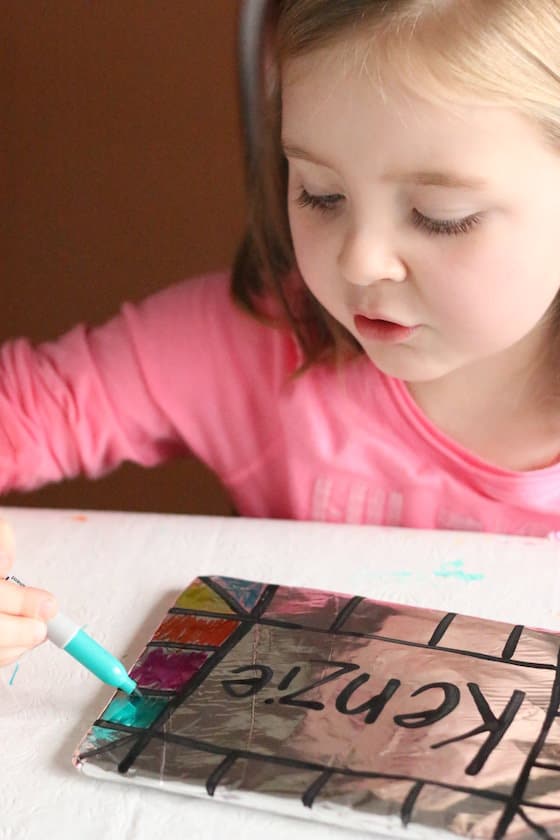
Then, with a fine paint brush, I created a border of squares around the edges of the canvas.
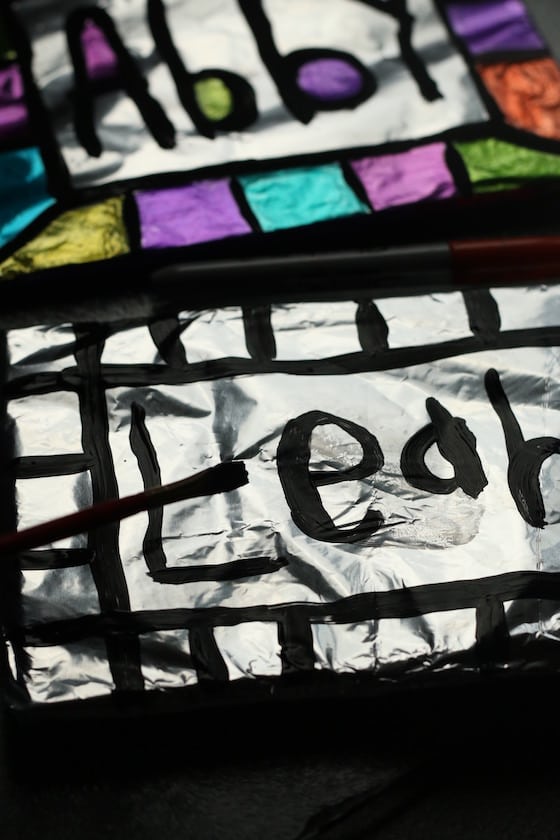
In the center of the canvas, I painted the child’s name.
Note: load your paintbrush up with a generous amount of black paint when making your border and painting the name. You may even need to go over some lines twice for full coverage.
It’s fun when there are letters like e’s and o’s and p’s and b’s that have centers that can be coloured in.

I let the paint dry fully before moving on to the next step.
Next step: Sharpies!
I avoided pale pinks and yellows, and instead, selected vibrant, bold colours, knowing that they would show up best on the tin foil.
With the Sharpies, I coloured in the blocks around the edge of the frame, and the centers of some of the letters in the kids’ names.
If you’ve never coloured on tin foil with a Sharpie, you must! The foil is so smooth and slippery. It feels so slick!
Don’t you love how the foil gives the colours have an iridescent, metallic look?
Here’s my crafty cousin working on the piece of name art that I prepared for her.
Aren’t these pieces beautiful? Perfect for displaying in a child’s bedroom!
Now, I need to come up with more cool Sharpie and tin foil art projects for the Hooligans!
Meanwhile, here are a whole bunch of cool ways to use aluminum foil in the craft room and around your home!

For more easy and cool Sharpie art projects, check out:
Cool Sharpie Art with Glossy Photo Paper
Stained Glass Jars with Sharpie Markers
Tracing Activities with Sharpie Markers
Get the 3-5 Playful Preschool e-Book!
25+preschool activities by 25 bloggers, 10 printables, 50 links to activities not featured in the book all for $8.99!

Follow the Hooligans on Facebook, Pinterest and Twitter!

Jackie is a mom, wife, home daycare provider, and the creative spirit behind Happy Hooligans. She specializes in kids’ crafts and activities, easy recipes, and parenting. She began blogging in 2011, and today, Happy Hooligans inspires more than 2 million parents, caregivers and Early Years Professionals all over the globe.


Estee
Hi Jackie,
I enjoy your crafting blog and I will use this project in my after-school program. I wanted to share another fun sharpie-tinfoil project which was done for special occasions in my grade school growing up: Insert a paper stencil into a sheet protector, which the children trace with black sharpie. Then color in the picture with colored sharpies. Then remove the paper from the sheet protector and replace with a piece of tin foil which has been crumpled and carefully spread out to fill the entire sheet protector and be a beautiful textured background for the sharpie art.
Hope you enjoy!
happyhooligans
Oo! That sounds lovely, Estee! We’ll have to try that here! Thanks for sharing!
Addi Ganley
This is such a great idea thank you for the post. I always have a ton of sharpies in my office and who doesn’t have foil? An easy project with items we use everyday.
CT
Love this! And another good backing for the foil is foam core board. I cut the board into smaller rectangles, cover with foil and tape it down on the back down with clear tape. We used poster paint, but I can’t wait to try the permanent markers. I have a lot!