Learn how to make a colourful homemade wind chime for your backyard with a coffee can and CDs or DVDs.
Here’s a set of homemade wind chimes for kids to make for Father’s Day for a Dad who love music and coffee. It could be a great gift for kids to make for Mother’s Day too, or for anyone who loves their coffee and their music.
This project is simple, and the only tool you’ll require is a one-hole paper punch! Sounds too good to be true, but it’s not!
These wind chimes are a great project for kids of all ages, and they work well as a group project too.
If you’re working in a group, everyone can decorate and contribute their own CD chime to the project, and an older child can work on decorating the coffee can while the younger children are colouring their CDs.
Let me show you just how easy this was to make and put together!
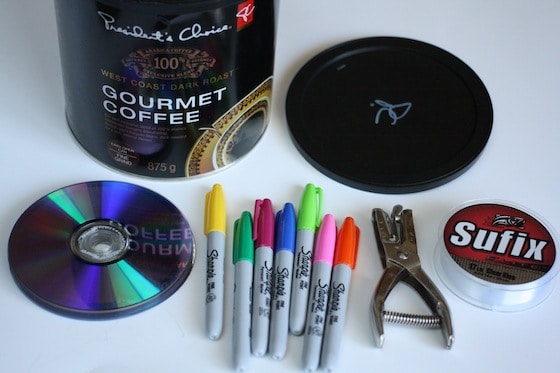
To make our Coffee Can CD Wind Chime, you’ll need:
Supplies
- Coffee Can (label off)
- TWO coffee can lids
- one hole punch
- fishing line
(or yarn/twine etc.)
- Sharpies
(I love the Glam 80s colours)
CDs are great for crafting with! They’re really versatile, and upcycling them into an ornament that can be enjoyed for years is a great way to keep them out of the landfill.
I also really love crafting with Sharpies! Check out some of our other Sharpie projects to see why!
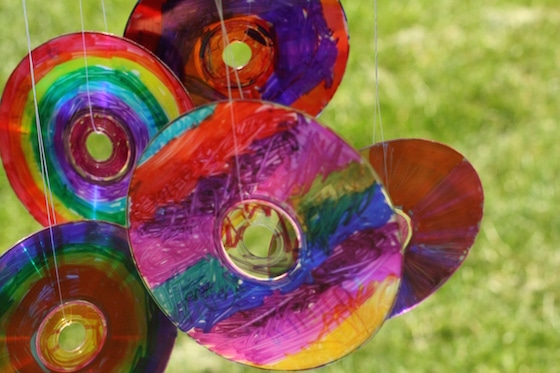
Recently, after making our Tie Dyed Sharpie Bookmarks for Mother’s Day, I started experimenting with Sharpies to see what other smooth surfaces we could create some neat art with. I discovered that CDs work beautifully, so I had the toddlers and preschoolers in my daycare coloured up a whole bunch of them.
Aren’t they gorgeous?
I knew immediately we had to use them outdoors, because of how beautiful they would look spinning in the wind, reflecting the sunshine. That’s how I came up with the idea for homemade wind chimes!
Because of the size of the CDs, I wanted to use something large and shiny for the body of the chime, to keep things in proportion and similar.
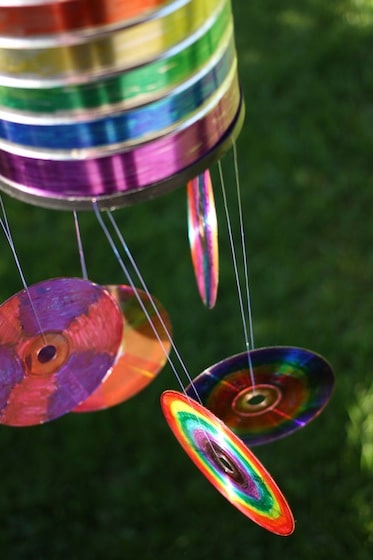
A coffee can fit the bill perfectly. It was easy enough to colour. The 6 sections were exactly what we needed for using all the colours of the rainbow, and using a couple of coffee can lids on the top and bottom of the can meant I required no tools to put this baby together! Yay!
Assembling your wind chime:
Once your cds and can are coloured, you’ll need to put everything together. This is really easy to do!
In one coffee can lid, punch as many holes as you have CDs. Space the holes fairly evenly around the edge of the can. No need to measure. I just eye-balled it.
Cut a length of fishing line, and slip one end through the hole of a cd and through a hole in the coffee can lid. Tie a knot up near the lid.
Repeat until all cds are attached to the lid. I staggered the cds so they weren’t all hanging at the same level.
Pop this lid on the bottom of the can. That’s right. The bottom. Take a minute to ensure any loose ends of fishing line are tucked in and hidden underneath the lid.
To hang the can, take the other lid and punch 2 holes – one across from the other near the edge of the lid.
Thread a piece of fishing line through the holes. Knot it and pop the lid back on the can.
That’s it! You’re ready to hang your gorgeous wind chimes!
We took our chimes outside and hung them in a tree beside the playhouse where the children can enjoy them. They look amazing spinning in the wind, and they sound so lovely too!
More easy, outdoor ornaments for Kids:
Summer Stars Deck Ornaments – twig ornament
Recycled water bottle wind spirals
Rainbow (painted sticks) wind chimes.
Get the 3-5 Playful Preschool e-Book!
25+preschool activities by 25 bloggers, 10 printables, 50 links to activities not featured in the book all for $8.99!
Follow the Hooligans on Facebook

Jackie is a mom, wife, home daycare provider, and the creative spirit behind Happy Hooligans. She specializes in kids’ crafts and activities, easy recipes, and parenting. She began blogging in 2011, and today, Happy Hooligans inspires more than 2 million parents, caregivers and Early Years Professionals all over the globe.









Adventures Of Adam
Great idea. For some reason I have never thought of attaching them to the lid!
happyhooligans
This was the first time it had ever occurred to me too!
Coombe Mill (Fiona) (@coombemill)
A lovely and fun idea. Well illustrated #Outdoorplayparty
Mudpie Mama
Sooo pretty! Thanks so much for sharing at the OPP 🙂
Shelley Moore
We Just finished ours for a birthday gift. Nana will be so thrilled! Beautiful idea- thank you!
happyhooligans
Yay! So glad we inspired you, Shelley! I hope Nana enjoys it!
Lynn Kidstler
The nicest thing about hanging CD’s around your yard is that they flash and keep all the deer, rabbits etc. Why you could hang a ‘theme’ from each tree….fish like an aquarium under one… birds under another. When they are hanging from the outer edge of your yard the animals don’t get close enough to yard garden to care! Hange a few in weird spots…near blueberries etc. By the way, I really enjoy your website. Thanks.
happyhooligans
Great ideas, Lynn! I love the idea of creating themes!
Pamela Stevenson
Another variation and so you don’t have to find another lid. Use a hammer and nail. Lay the can on the ground so you can keep the side flat when you hammer the nail through at an angle so the can doesn’t get bent. Put 4 holes the you could bring your strings together to hang it up on one loop. With the can open at the top you could put at small plant in it as well as the colorful chimes underneath.
happyhooligans
I love the plant suggestion, Pamela!
Linda Casper
Oh how I love wind chimes!! Thank you for sharing. I’m going to do this craft!!