
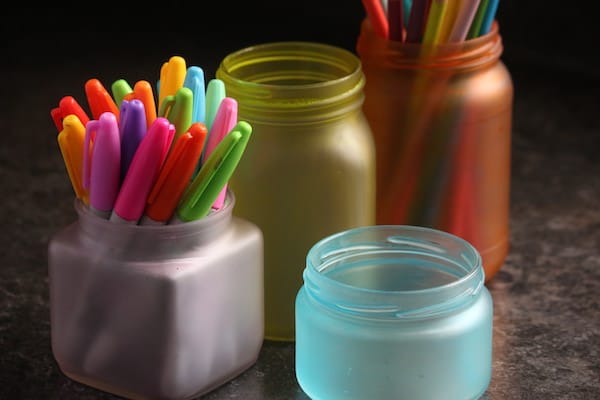
Give a mason jar a frosted finish with white glue and food colouring. Use your transformed jar to hold makeup brushes, cut flowers, paintbrushes or pencils.
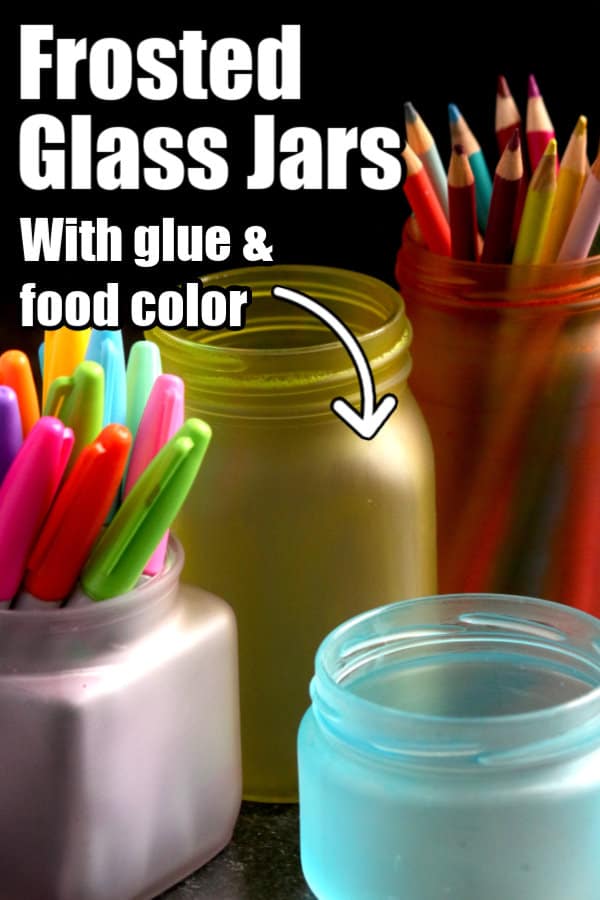
Today I’m excited to show you how to how to paint a mason jar and give it a frosted finish with white glue and food colouring.
I came up with this idea a couple of weeks ago when my daycare kids decoupaged small jars to make votive candle holders. In places where the jars had been brushed with glue, but not covered with tissue paper, the glass appeared to have a “frosted” effect.
I figured if it was that easy to leave a frosted finish on the jar, I would add some food colouring to the glue to see what would happen.
You may also like our:
How To Paint A Mason Jar With A Frosted Effect:
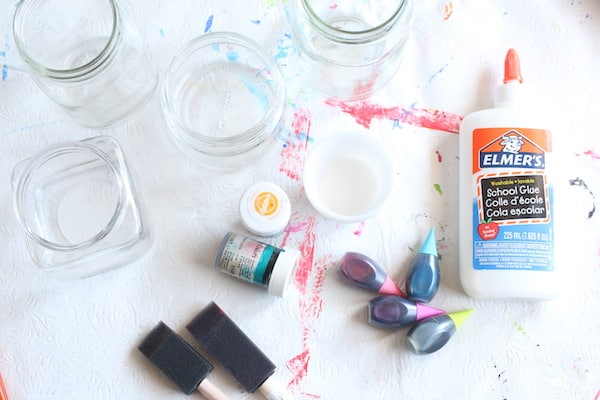
Supplies:
For your conviencience, this post contains affiliate links. As an Amazon associate, I earn from qualifying purchases.
- clean glass jars

- food colouring (or Wilton icing gels)
- small cups or bowls (one per colour)
- white school glue
- water
- foam paint brush
Instructions:
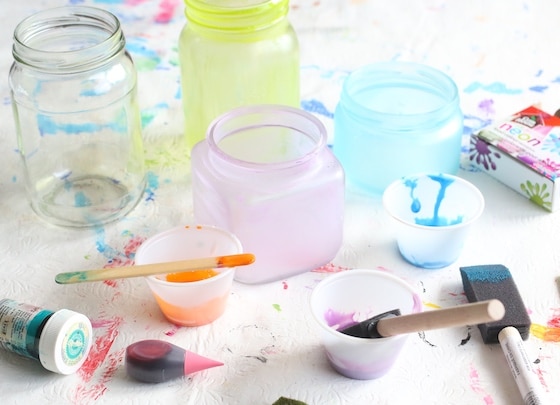
- For each jar squeeze a couple of teaspoons of white school glue into a small cup or bowl.
- Stir in 2-3 drops of food colouring or a dab of Wilton icing gels.
- Add a few drops of water to thin the glue slightly and stir until smooth.

3. With a foam or sponge brush, brush a thin layer of coloured glue all over your jar. Smooth the glue as you go to eliminate brush marks.

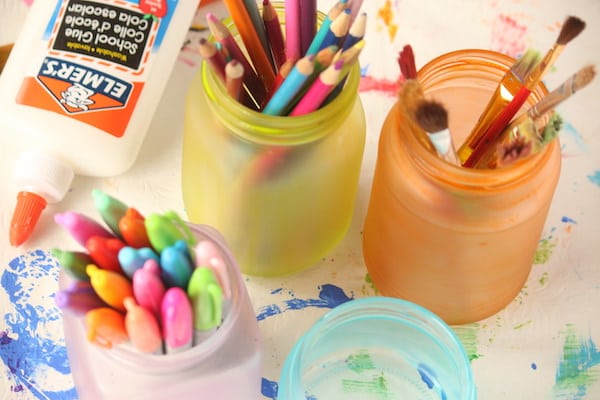
4. Let your jars dry before placing pens, pencils, paintbrushes etc in them.
NOTE: Keep in mind your frosted finish is just glue and water, so your colour coating won’t be water proof. But these jars perfect for storing craft supplies, and they’d look pretty on a desk holding pens and pencils.
You may also like:
- 50+ Uses for Baby Food Jars
- Stained Glass Jars with Sharpie Markers
- Mason Jar Snowman Luminaries
- Valentine’s Votive Holders
Get the 3-5 Playful Preschool e-Book!
25+ Preschool activities by 25 bloggers, 10 printables, PLUS 50 links to activities not featured in the book.
Click here to download your copy today

Follow the Hooligans on Facebook!

Jackie is a mom, wife, home daycare provider, and the creative spirit behind Happy Hooligans. She specializes in kids’ crafts and activities, easy recipes, and parenting. She began blogging in 2011, and today, Happy Hooligans inspires more than 2 million parents, caregivers and Early Years Professionals all over the globe.


Jennifer
so pretty!
Inese Boki�a
Veru, very cute! And so simple, but exellent result! Thanks for idea!:)
Erin- The Usual Mayhem
These are so beautiful, and what a simple craft! I love it!
Shala
Very pretty!
tereza crump aka mytreasuredcreations
A couple of days ago, I went up to my studio to clean up and invited my younger daughters ( 3 and 5 y.o.) to come up with me. I never do that, but I wanted to try one of your activities and see if it would keep them entertained. I brought a few measuring spoons, silicone cupcake molds and lots of little things like buttons, gems, pom poms, foam stickers and pebbles. They played for almost 2 hours… even my oldest daughter who is 10 y.o joined in and they made cupcakes, and decorated chipboard circles and played store. The clean up wasn’t so bad after all! 🙂 thank you so much. I am so glad I found you. I post a monthly learning log where I showcase the things we are doing in our homeschooling journey and I will be linking to your blog. 🙂
My next project is to go through their toy boxes and organize the many little toys that can be used for sensory play in the near future! I also want to do a little Resurrection play with the kids using your idea of toilet paper tube puppets. I think they will love it! Thank you again. 🙂
happyhooligans
Wonderful, Tereza! Isn’t it amazing how a collection of simple items like that can keep children exploring and entertained for so long? I love your idea of going through their toys, and gathering up a good working supply of sensory play toys! Bet you were able to get a thing or two accomplished while they played too! 🙂 Thanks so much for wanting to link to me in your blog!
Heather
Lovely! Is it just Elmer’s white glue?
happyhooligans
Yes, Heather. I’m not sure it that was the actual brand, but it was white “school” glue that we used.
Amy
I have seen mod podge jars but not frosted-this is awesome!
happyhooligans
Glad you liked them, Amy!
heidifaerber21
I cant wait to try this. I think its a wonderful idea and so easy to do. I really enjoy the pictures of the step-by-step instructions, makes it much easier to follow and know if I’m doing it right. 🙂 Thank you!
Lisa~
These are darling! I love that you took a small leftover of a glob of glue and made a fresh, new idea with it. I can’t wait to try this. Thanks so much, Lisa~
Kitty Trask
HI-LOVE THESE JARS BUT i CANT SEEM TO GET A SOLID COLOUR ON THE JARS-HOW MUCH WATER TO GLUE DO U USE?Thanks
happyhooligans
I’m sorry, Kitty, I didn’t even measure. It was a very small amount of water. Just enough to make the glue slightly runny. I’m guessing that for 2 tablespoons of glue, I might have added 1/4 to 1/2 teaspoons of water?
BethLanz
I am trying this with glitter glue and regular glue mixed. Can’t wait to see it dry!
happyhooligans
That sounds lovely, Beth! Let us know how it works!
Stacey M.
Do you think that if you sprayed the dried jars with a clear acrylic sealant they would remain “frosted” but also become more permanent/water-proof? Just a thought!
happyhooligans
I think that would probably work, Stacey. I don’t think you want to brush on a coat of sealer, because you could pull the paint and glue off, but as you said, spray sealer would probably do the trick.
T
I’ve tried this twice, and each time I paint the inside of the jar…when it dries.it dries clear
happyhooligans
I’m stumped, Tracy. If you’re using a decent amount of food colouring, I’m not sure how it would dry clear. Sorry, I really don’t have an answer for you there. interesting that you’re painting the inside of the jar. I would think that would be difficult.
Delma Baker
I paint the inside as well. since the outside is not moisture proof. I would paint the inside
Otilia (@romanianmum)
what a lovely craft! i wish i could find to buy the proper jars for this sort of thing
happyhooligans
Any chance you can find some online, Otilla? Really any type of glass jar will work, but the “canning” jars do have a nice look.
patsy lipscomb
Is there a way to make these safe to drink out of
happyhooligans
You could look into it, Patsy, but I’ve only made these for decorative purposes.
Demetria@MomZest
That is absolutely pretty! I’ll have to try this will all my jars lying around.
Paula
What am I doing wrong? My jars don’t end up looking like yours. I’ve tried both glue and modge podge on 2 different jars. I’ve tried baking them and letting them set over night. They dry clear not frosted. Does it matter that I am using gel based food coloring? Am I using too much food coloring? Any help would be appreciated.
happyhooligans
I used gel colouring, Paula, so I don’t think that’s the issue. My first thought is the glue. Yours is drying clear, but mine is drying opaque giving my jars that frosted look. I used white “Elmer’s” school glue. I was perplexed by your results as well, so I did some googling and found this. These jars were made with mod-podge, and they’re clear as well. Quite honestly, I think they’re gorgeous!
Barbara
can you put a candle in them?
happyhooligans
I would think so, Barbara. i can’t guarantee that the glue/food colouring won’t yellow or blister because of the heat, but I can’t see there being any problem in trying. Let us know if you do. 🙂
Samara
Unfortunately, I didn’t get the frost affect either. I used Elmer’s School Glue with a little bit of water, 2 drops of blue food colour and 1 drop of green. The colours are see through but I don’t really mind.
happyhooligans
Hmmm. I wonder if it has to do with the brand of glue? So yours are completely clear but coloured, Samara?
Samara
They are completely see through but have a blue tint. I also used the elmer’s school glue.
happyhooligans
I’ve heard from a couple of people who say theirs didn’t appear frosted. If it’s not the glue, I really don’t know what would cause the different outcome. Are they still quite pretty, Sarmara?
Samara
To be honest they don’t look that bad.
marge
I am in awe of your inventiveness. You are the Thomas Edison ogearly childhood creativity.
Love Letters For My Daughters
Love this idea! We made your votif candle holders the other day out of baby food jars and they turned out fabulous. I might try this with some more baby food jars to add to our candle holder set.
Sabbie
What food color did u use? I think the opaque thing has something to do with the gel-based clor. Elmers glue dries clear
beverly
can you wash these after done
happyhooligans
Unfortunately, no, Beverly. I’m afraid the glue and food colouring would wash away.
Grace
I didnt relize that you had to use water. When I looked up how to do this before everyone always said just glue and dye. So my glasses were always unevenly painted. Now there all nice and smooth!! lol
Grace
Try using Elmers school glue and only a little bit of water. It might help im not sure.
cheryl ives
I’m wanting to try this but I want the white frosted look….I looked on line to see if they even make white gel coloring and they do but it’s a gel paste dye. Does that make a difference?
happyhooligans
I don’t know, Cheryl. I’ve only ever made these jars that you see here. I interchange my gels and liquid colourings for a lot of projects though, so I wouldn’t think it would matter, but I’m not sure about the white. I didn’t know they made white.
Rachel
What can you use to preserve the frosted look on the jars so that it doesn’t come off?
happyhooligans
You could try brushing or spraying the jar with acrylic craft varnish, Rachel.
Nancy
I bought all necessary supplies today. I had 2 small jars that I used as a test. They dried but never had that frosty image. What is ratio of water to glue? I don’t understand how even though the colors turned out pretty, they are not frosted. What did I do wrong?
Nancy
Mine did not turn out frosty! Pretty colors but clear! What did I do wrong?
Nancy
I, too, followed directions to a tee and mine also turned out clear. I even have the Wilton gel coloring. Do you think I’m adding too much water to the white glue? Also, I tried 2 different colors on 2 tester jars. They did not turn out frosted but clear, but the color is pretty cool. Also, I painted the inside and not the outside. OOPS! So now, maybe I’ll paint the outside and see if it frosts up, but I doubt it. Also, I was going to put wires on them and hang them outside. Will the color just wash away?
happyhooligans
I’ve read back through the comments on this post, Nancy, and I think it might have to do with the colouring. Did you use liquid food colouring? I used icing gels, and that might be the difference. I scrolled back and found a conversation that I’d had with someone else about this same problem. I’m glad they look pretty though. You can hang them in the tree but I can’t guarantee the colour won’t fade after a while, and if they get wet, that will definitely affect things. It’s washable glue, so if it were to get wet enough I think it would dissolve.
Nancy
UPDATE: These are definitely not for outdoors. I followed instructions to a tee, they were beautiful, not frosty, but beautiful. I put a single battery operated t light with timer in them and hung them upstairs on my deck. They were adorable for a few days. Then this morning, I noticed that the glue must have melted, because the color I painted is barely visible in the bottom of the jar and the rest of the jar is clear. The sun must heat up the glue and it oozes to the bottom of the jar. So now, I’m going to buy iridescent tissue paper, fit them into the jars with the tee light and wholah! Do not put these outdoors especially in the sun.
Abby
Wait, so did you use Elmer’s or Mod podge?
Diana Lively
I see you put paint on inside ,can it be done on out side as well?
Jackie Currie
The paint is on the outside, Diana. 🙂