Toddlers and preschoolers will love this paper plate spider craft. It’ll have them painting, cutting, stamping and gluing… all the crafty stuff that little kids love best.
We’ve been making lots of Halloween crafts this month, and I wanted to share our latest spider craft with you.
I LOVE crafting with paper plates! I always have a big stack of the cheap ones in my craft room. They’re so versatile. You can turn a paper plate into just about anything when you’re stuck for a craft idea.
Be sure to check out our epic A-Z paper plate craft collection!
Ok! Let’s make our Halloween spider!
To make this paper plate spider craft, you’ll need:
For your convenience, this post contains affiliate links.
- 2 paper plates
(one for the body, one for the legs)
- black paint
- paintbrush
- a wine cork
- coloured paint to dot the spider’s back
- scissors
- glue
- 8 googly eyes
To make your spider:
Begin by painting your paper plates black. If your child would rather use a different colour, go for it! Colourful spiders would look great!
Spider body:
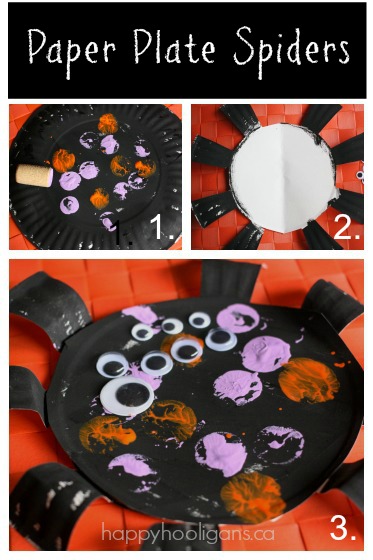
We’re only using the centre of one plate for the spider’s body, so cut off the outer rim. There’s usually a line distinguishing the centre of the plate and the rim. Encourage your child to follow that line.
Don’t worry about it being perfect. Practicing those scissor skills are more important than getting it exactly right, and the process is much more important than a perfect end-result. Plus, your child’s crafts will be much more adorable if they’re a little quirky-looking.
Have your child dip the cork into a puddle of coloured paint and dot it all over the spider’s back. We do a lot of stamping with corks here. The hooligans love the process, and corks are easy for a small hand to hold.
Spider legs:
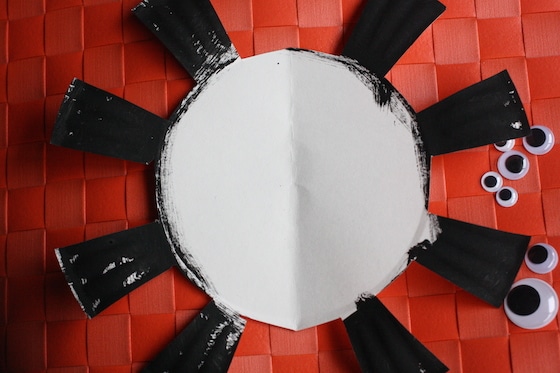
For the legs of your spider, fold a paper plate in half. Mark 4 legs on one half. With the plate still folded in half, go through both layers, cutting out the spaces in between the legs. Open the plate back up, and ta-daaa: spider legs!
A little tip when cutting the legs:
Confession: I found it a bit confusing to distinguish between the legs and the negative space in-between, and I cut off a couple of legs on the first attempt. I ended up with a 6-legged amputee arachnid. Oopsy!
Second time around I drew the legs on the plate, and then made a little squiggle on all the spaces in between. I knew to cut out the pieces with a squiggle on them. Problem solved. 8-legged spider guaranteed.
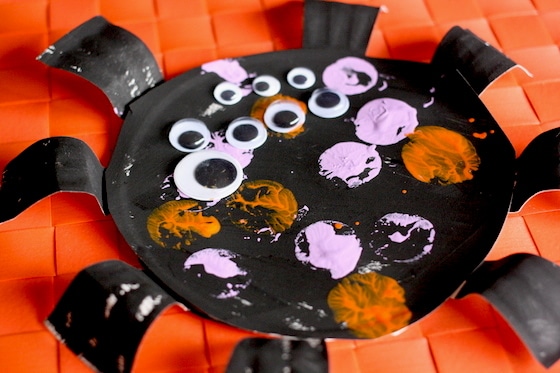
Now your child can glue the body of the spider on top of the legs and then glue the googly eyes in place.
Finish by slightly bending or curling your spider’s legs up and under a bit.
And there you have it! A cute little paper plate spider to dangle in a window or over a door in the weeks leading up to Halloween!
You may also like:
Pom pom spiders and wooly web weaving
Handprint Spider and Web art activity
Get the 3-5 Playful Preschool e-Book!
25+preschool activities by 25 bloggers, 10 printables, 50 links to activities not featured in the book all for $8.99!
Follow the Hooligans on Facebook

Jackie is a mom, wife, home daycare provider, and the creative spirit behind Happy Hooligans. She specializes in kids’ crafts and activities, easy recipes, and parenting. She began blogging in 2011, and today, Happy Hooligans inspires more than 2 million parents, caregivers and Early Years Professionals all over the globe.







Kim
Totally inspired us to make our own paper plate spiders!
happyhooligans
Yay! So glad you made some too, Kim!