
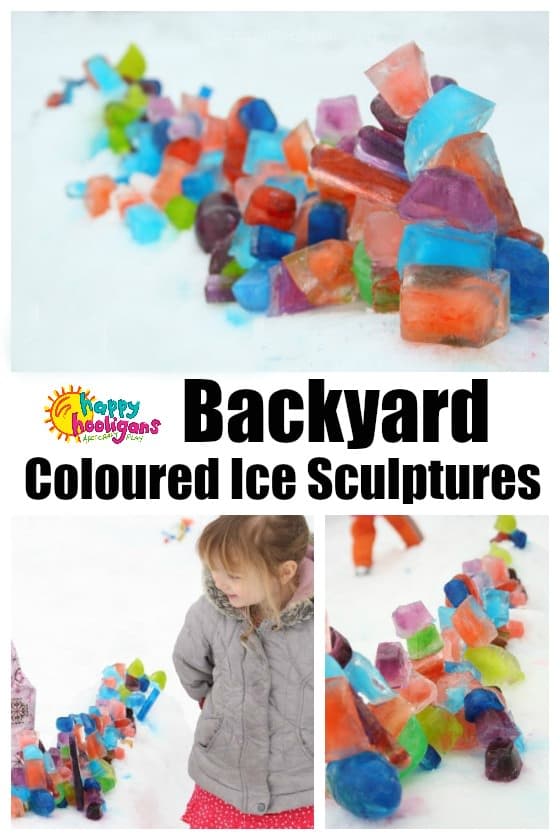
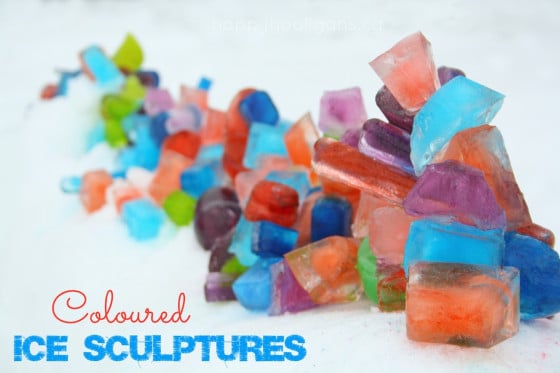
Looking for a fun backyard activity for the kids or the family this winter? Build some COLOURED ICE SCULPTURES IN THE SNOW. It’s a great activity for all ages, and so easy to prepare!
Of all of the fun and cool activities we’ve done in the snow, I think this might be my favourite so far.
Now, we’ve played with coloured ice lots of times, and the kids always enjoy it. You can find all of our coloured ice activities here. We’ve even played with coloured ice cubes in the snow before, but THIS… actually building a large structure with a variety of colourful ice cubes and blocks… this was new for us.
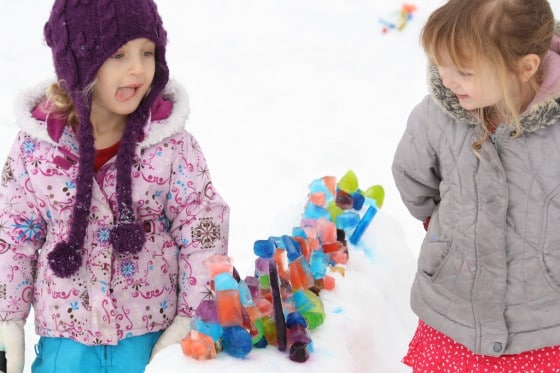
My daycare kids are toddlers and preschoolers, and they loved this activity, but older kids and grownups will love making these structures too.
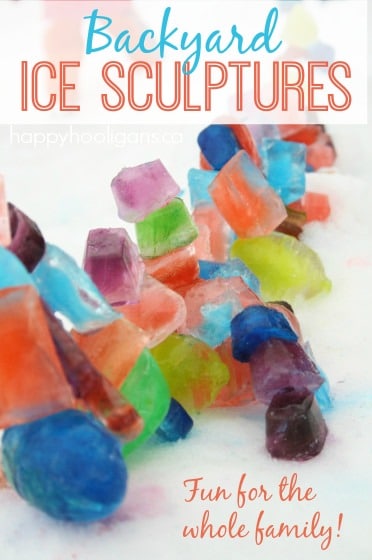
This would be a great backyard winter activity to do as a family on the weekend, or at your school or neighbourhood winter carnival.
I’ve always wanted to make coloured ice sculptures with my daycare kids, but I never quite knew how we would get the ice cubes to stick together.
Then a friend in Ottawa shared photos of her boys participating in some Winterlude activities, and they were building some awesome structures with coloured blocks of ice.
When I asked her how it was done, I learned that the secret ingredient is a bottle of water.
Let me tell you how it’s done.
How To Make Coloured Ice Sculptures In The Snow
Supplies:
- Water
- Food Colouring (Amazon Affiliate Link)
- Ice Cube Trays and Plastic Containers
- Water Bottle
Preparing the coloured ice:
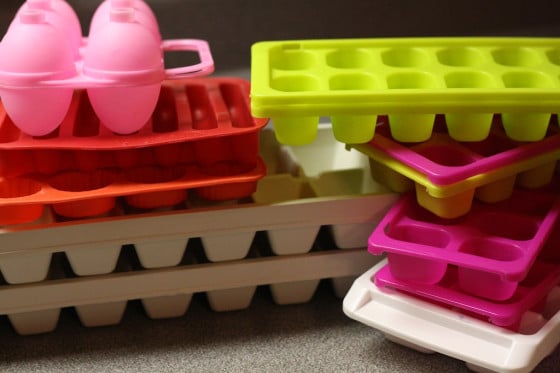
Gather up your ice cube trays and small food containers and storage containers.
I have quite a few of them, and over the course of 2 days, I used them all several times, and made a ton of ice.
I filled up all of the ice cube trays trays and containers with coloured water, and then put some of them in our freezers, and some outside in the sub-zero weather overnight. Once frozen, I transferred all of the coloured ice to a large bin in the chest freezer, and repeat the process.
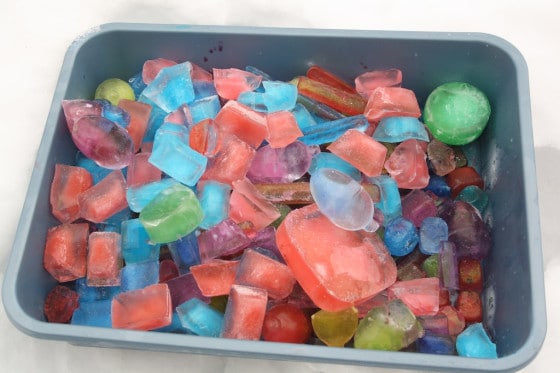
Over the course of a couple of days, I made a whole basin of coloured ice to make our structures with.
In fact, after making our ice sculptures today, I still have enough to do it again another day. In the photo below, you’ll see about half of my stash.
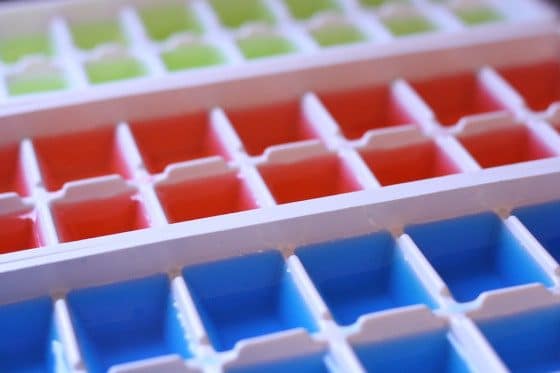
Don’t over-do it with the colour!
I coloured my ice with these Neon colours by McCormick, but you can use whatever brand you have on hand.
GO EASY on the colour though!
For my first round of ice, I put one drop in every ice cube compartment, but I didn’t like how dark the colours were. We used them, but for the next batches that I made, I mixed a jug of water with 5 or 6 drops of colour in it, and I poured that entire jug into a couple of ice cube trays.
Much better.
The best weather conditions:
Once you’ve made enough ice, you just need to wait for a nice, COLD day! You want it to be BELOW zero (celcius) or below 32ºF for your ice sculptures to work.
The secret ingredient:
A bottle of water is the secret to creating great ice sculptures in your own back yard.
I can’t believe I hadn’t thought of it before! Here’s how it works:
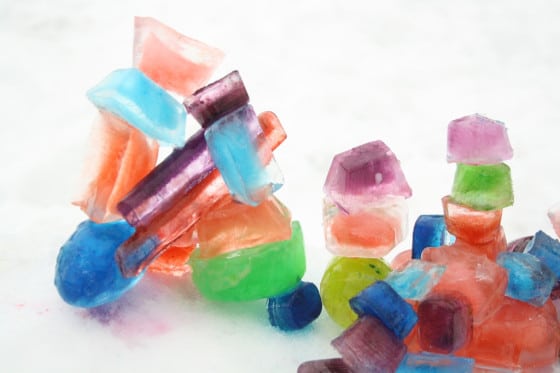
Count to ten!
Every time you add an ice cube to your structure, dribble a bit of water from the water bottle over the ice cubes, and have the children count to ten.
The water freezes quite quickly upon contact with the ice, and while the children are counting, it forms a “glue” that holds the cubes together!
Simple science at its finest.
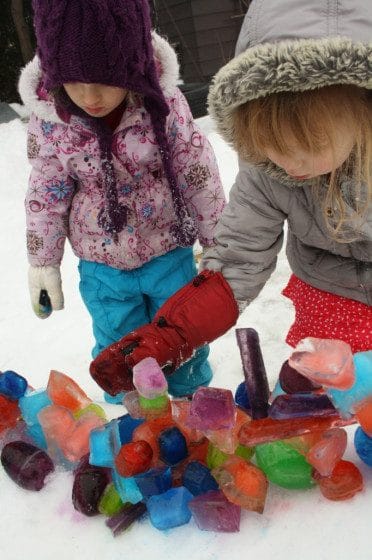
Our outside temperature was hovering right around zero today, so some of our coloured ice cubes took longer than 10 seconds to freeze into place.
The colder it is, the quicker your water will freeze, and the more sturdy your structure will be.
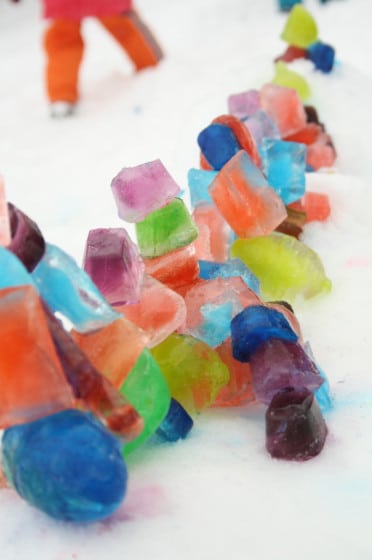
This was a great start for us today though.
The colours are gorgeous, and the ice shapes look good enough to eat!
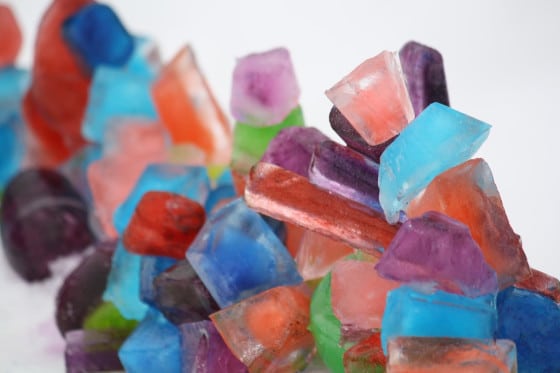
I love that we have this burst of colour, and something so interesting to look against the white backdrop of snow in our backyard.
I’m hoping for temperatures to dip a little more so we can get back out there to make some new sculptures and to add to our existing one.
Check out our snow painting activity and our diamond dig snow sensory bin!

Jackie is a mom, wife, home daycare provider, and the creative spirit behind Happy Hooligans. She specializes in kids’ crafts and activities, easy recipes, and parenting. She began blogging in 2011, and today, Happy Hooligans inspires more than 2 million parents, caregivers and Early Years Professionals all over the globe.


Lynn Furtado
Sigh – I live in Bermuda 🙁 No snow or icy weather here and I just SO love this idea!!! Will have to wait until I’m living somewhere cold!!
Lynn
happyhooligans
I think I’d be happy to trade weather with you any day, Lynn!
Tiffany M.
LOVE this idea!!!!!!!!!!!!! Makes me want to live in a snowier climate 🙂
happyhooligans
Thanks Tiffany! It’s fun for sure, but I’m envious of your warmer temps!
Michelle Jarvis
That looks like soooo much fun!!! Shame ite never gets much cooler than 16c where we live!!! We’ll have to plan a trip to the snow for this one. Thanks for all of your lovely posts. Many of the activities you do have inspired many a play date at our home.
happyhooligans
Thank you Michelle! I’m so glad you’re finding inspiration in our pages! xx
Kori Vincent
Great Idea! I need it to get a little bit colder and we will try it. It looks awesome!
happyhooligans
Crossing fingers that you get to give it a try, Kori!
Gina at Willow Day
I’m so glad that you found me! I love these! We make things with colored ice, too but I don’t think I’ve ever made such of an abundance. Which a terrific idea! Thank you for sharing your well photographed photos, as well! I’ll definitely be back!
happyhooligans
Well, I got a little carried away with my ice making, Gina. You never really know how much you’re going to need. lol There’s so much more than what you see in the photos of the post! There were 2 more plastic bags and another plastic bucket full of cubes in my freezers. We’ll be doing this a few more times before winter is over!
Michelle G.
I’m so impressed! Not only to make so much ice, but to brave the cold to do this! Gorgeous photos ~ looks so fun! {Except for the cold!} 😉
Kierna Corr (@CiarnaC)
These are truly gorgeous – just wish our temps were low enough to do this, but will ‘pin’ it for the next cold snap. 🙂
happyhooligans
Thanks, Kierna. I hope it gets cold enough for you to try it! Your little ones would love this. So would you!
Kim @ The Educators' Spin On It
Pinning this for our next trip to Colorado, I don’t think Florida will ever get this cold, but I’ll HOPE. Thanks for sharing!
happyhooligans
I really hope you get a chance to do it, Kim. It’s so cool! Crossing fingers that Colorado is cold and snowy when you’re there!
Ester
Ol�, meu nome � Ester, estou aqui para convidar voc�, para conhecer o meu blog!
http://saberesdapequenainfancia.blogspot.com.br/
H� algum tempo tenho acompanhado seu blog!
Sou professora da Prefeitura de Campinas- S�o Paulo, Brasil e, tenho usado meu espa�o para registro das atividades e trocas de saberes! Ficarei Feliz com sua participa��o!
Abra�os
Ester
happyhooligans
Thank you, Ester. I’m not exactly sure what your comment says, but I can tell it’s full of happiness and thanks. Thank you!! xx
Jessica @ Play Trains!
This is so awesome! And beautiful. We’ll have to try this…eventually/ I’m pinning this to my Winter board, because it looks like we may not be getting snow this year, unless the weather changes its mind soon! It hasn’t even gotten all that cold. Great idea!
happyhooligans
It’s been a really wacky winter here too, Jessica. Not too many days that have been well below freezing and perfect for something like this. I’m glad we got a chance to get at it last week. It was really neat.
The Iowa Farmer's Wife
This is such a beautiful activity Jackie! I love how the sculptures turned out. Thanks for sharing on the Sunday Showcase!
happyhooligans
Thanks, Adrienne! I’m glad you enjoyed it!
The Monko
Your ice sculptures turned out amazing. I love the photos. Water is a very clever touch, wish I’d thought of that. The ice cubes are a good idea too, i went for bigger lumps but i think yours looks prettier. My ice post goes up on thursday (for kids coop)
happyhooligans
Thanks, Ray! The water really did make a difference. Looking forward to seeing yours later this week!
funatchelleshouse
Those sculptures are beautiful!! However you will not be catching me outside in 32 degree weather!!! if I can avoid it at all…I am a cold weather scare-dy cat 🙂
Thanks for sharing at Sharing Saturday!
happyhooligans
I detest the cold as well, Michelle, but our winter months are so long here that there’s just no avoiding it. At least doing something fun and colourful like this helps to make it more bearable. Come on, Springtime!!
chelle
Yes! Come on spring!! then we can make melting ice sculptures 🙂
The Iowa Farmer's Wife
popping back by to let you know I’m featuring this today on the Sunday Showcase!
Adina Lee
Oooh! So cute. Wow, great post, guys.Thank for this interesting post and sharing with us.
Lisa C.
I love this idea! Pinned it!!!
chantale
i look at so many crafting site and i must say i really love yours! so many new little ideas i can use at work with little cost!.. Wonderful keep it ! ..Just wondering though, the cubes didn’t freeze all together? or i need to keep small bunches to avoid this? i can just see it becoming a giant sculpture in my freezer before the kids get at it. ( i have 3 trays so it might take a bit of time to stock pile)
happyhooligans
Hi Chantale. Once their completely frozen, you can dump them into a plastic bag or a big bowl, and immediately put them back in the freezer. They’ll stay separated as long as they don’t get a chance to melt at all. If that happens, they get wet, and stick to each other, so just work quickly, and bag them up, pop them back in the freezer, and start again. It always takes me several days to stockpile mine too, but you can use small cups and bowls too. Yogurt pots etc. Just run them under hot water for a split second, and your ice form will pop right out.
Colleen Hayward
Would it work the same only mealy quicker in Warmer weather?
happyhooligans
I had someone just say today that they tried it in warm weather, Colleen. Sure it would work, but like you say, it would just melt more quickly.
Melanie
What a fun idea!!!
Anik
I love it!! As soon as cold days come we will freeze some colourful ice and try this activity. Looks like fun!
Jill
I love this idea. This would be really fun for the kids, and the contrast of colors against the snow is amazing!
Thank you for stopping by the Thoughtful Spot Weekly Blog Hop this week. We hope to see you drop by our neck of the woods next week!
Victoria
This looks like so much fun! Wish we had some snow 🙂 Thank you for sharing at the Thoughtful Spot Weekly Blog Spot last week! You are featured as one of my favorites this week 🙂
Cerys @ Rainy Day Mum
I still love this idea and I’m waiting and waiting for our temperature to drop enough here to give them a try this year with the kids.
Thank you for linking up to Tuesday Tots last week and just to let you know that I will be featuring this over on Rainy Day Mum
Suzanne Manser
Love this project. Unfortunately we have rain and flooding in UK at the moment. Wettest winter on record. But great for when it does get cold!
Christine
Haven’t stopped making coloured ice cubes since I saw this. When inside, my DS enjoys using tongs to transfer them from the sink to a container.
pschooltoolbox
Jackie – thanks so much for sharing these today! I know our kids will have a blast! SO FUN!!
Debs
I love, love, love this! Thanks for linking this post to Tuesday Tots. I�m featuring it this week 🙂
LeAnn Taylor
We just had a cold snap here in the Deep South, so I tried this out with the kids. I was so excited I almost made more ice than we could use! I don’t have that many ice cube trays, so I used Glad and Rubbermaid containers of varying sizes. Then we stacked the ice blocks on top of one another to make sculptures. I used liquid water colors to dye the water. They were all so beautiful! The kids are enjoying watching the sculptures as they change in the warm sun. Thanks so much for this wonderful idea!
Heidi
Has anyone had any experience with the melting cubes leaving food coloring /dye on hands or clothing?