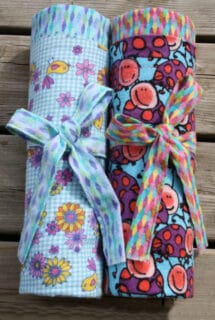
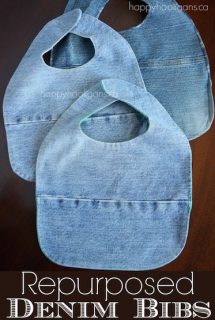
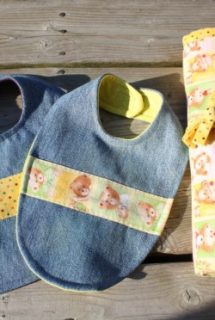
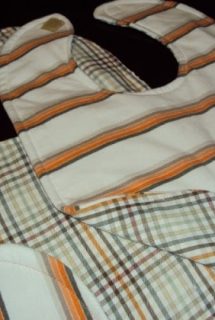
extra large, reversible receiving blankets

Jumbo, reversible receiving blankets are a snap to make, and they make a great gift…

For your convenience, I’ve included Amazon Affiliate links in this post.

I had a baby shower to go to this weekend, and I was only too happy to make a couple of  jumbo, reversible receiving blankets.  They’re one of my favourite baby gifts to make and give.

This project requires only basic sewing skills and is great for beginners:  Measurements don’t have to be exact, and if you can sew a straight line, you have all the necessary skills. :) easy, jumbo, reversible receiving blanket

If you have little ones, you likely have lots of receiving blankets.  I had loads when my boys were babies:   I bought some of them myself, I received many as gifts, and the hospital sent me home with several.  My all-time favourite however, was a huge, double-sided number that a friend made for me when my second son was born.

It measured one meter by one meter, and being so big and double-sided, it was really cushy and cozy – perfect for swaddling him up as he grew, or tucking in around him in the car-seat or the stroller as the weather got chilly.  This photo will give you an idea of how big the blanket actually is.  I set a “Little People” car on it to give you some perspective.reversible receiving blankets

It makes a great crib blanket, or floor blanket, but my very favourite use for it was wrapping Andrew up after the bath.  It was big enough that I used it that way until he was 2 or 3.

Ok, I’m going to walk you through making one of these.  And I’m going to assume you’re new to the sewing scene, and make things as simple as possible.

What you’ll need:

  • 1 meter of fabric for front of blanket
  • 1 meter of coordinating or contrasting fabric for back of blanket
  • spool of thread to match front fabric ( I like to use a colour that will “pop”)
  • spool of thread to match back fabric
  • scissors (a rotary cutter and cutting mat are also handy if you have them)
  • iron/ironing board

  • The step-by-step:

    Before you do anything, PRE-SHRINK your flannel, by machine washing and drying it.  Iron it too.  NOW you’re ready!

    Lay your fabric out on a flat surface with both of your fabric pieces right-sides-together.  Like this:

    reversible receiving blankets

    Now, with your pieces together like this, trim to 1 meter by 1 meter (or  3 feet, 3 inches x 3 feet, 3 inches).   Don’t worry about being exact.  You just want it to be about that size.   You can use scissors to do your cutting, or a rotary cutter/mat will make the job a little faster and easier.

    reversible receiving blankets

    See that strip that I’m trimming off?  Hang on to that.  We’ll be using it later.

    Once you have your fabric cut, pin your edges together, and move to your sewing machine.

    Stitch around all 4 sides of your blanket, leaving an opening about 6 inches long, about half way down one of the sides.  You’ll use this opening for turning the blanket right-side-out.

    Snip your corners so they won’t be bulky when you turn your blanket.   You’ll see what I mean in this next photo. (don’t snip through your stitching!)

    Now, flip that blanket right-side-out through the opening.  Then reach in through the opening, and poke the corners out so they’re nice and square.  With a warm iron, go all around the blanket, pressing your edges so they’re nice and crisp.   When you get to the 8 inch opening, just turn the unfinished edges to the inside, and press in place.

    Pin the hole shut.  At this stage, I pop 2 or 3 pins per side all around the edges of the blanket, to keep everything in place during the final step.

    Back at your machine, close up that opening by stitching very close to the edge of the blanket.  See how close to the edge I stitch when I’m closing it up?

    Now it’s time to put a nice chunky zig zag all around your blanket, about 2 inches in from the edge.  (I set my zig-zag dial to #3 for this).  To lock your stitches in place when starting and stopping your stitching while zig-zagging, set your stitch length dial at this setting:

    Your fabric won’t move at all.  It will stay in one place while your needle moves right and left, leaving a nice little locked stitch that looks like this: (see the nice, neat knot of thread where the pink and yellow flowers overlap?)

    Once you’ve zig-zagged all the way around, check to make sure you’ve removed all of your pins, trim any loose threads, and stand back and admire your work!reversible receiving blankets

    Congratulations!  You’re done!   Well, almost…   remember that strip that I told you to hang onto?

    I fold it in half, and stitch it closed with a zig-zag.  Then I roll the blanket up, folding it in a way that a bit of the reverse fabric peeks out the top (don’t ask me how – I just mess around until I get it right).  And then I tie a bow around the blanket with that strip of fabric!reversible receiving blankets

    How pretty are these?

    I’m pairing these with a couple of my re-purposed denim bibs.reversible receiving blankets

    You can find the tutorial for the bibs here.

    And a sweet little book and a homemade card complete the gift.
    reversible receiving blankets.

    Happy Sewing!  If you make some receiving blankets of your own, I’d love to see them!  Feel free to link up your photos on my Happy Hooligans facebook page!

repurposed denim bibs – from old jeans and tee shirts

repurposed denim bibsGot a messy eater?  A pair of jeans that you’re ready to retire?  A tee-shirt that’s seen better days?  You’ll love these repurposed denim bibs!  Round them up those jeans and tees  (well, maybe put the baby down for a nap first), and head to your sewing machine.  I’m going to show you how to make, what is in my opinion, the best. bib. ever.  repurposed denim bibs

I could go on and on about how much I love these bibs.  But I’m going to keep it short and sweet:  they’re re-purposed (that alone makes my heart do a little flip-flop), durable (hello…denim…), stain-resistant, cheap (read: free!), they look cool, and they make an awesome gift, which is a good thing, because everyone’s gonna want one when they see your little Hooligan wearing one.

I should also mention that flannel shirts and jammies are awesome for backing these bibs with too.

Ok, here we go:

Find a bib in your current stash that you love the size and shape of.  The bigger the better, in my books. Trace it on a piece of newspaper (or waxed paper, wrapping paper etc), adding 1/4 inch seam allowance, and cut it out.

Now, grab your jeans and open up a leg open by cutting all the way up the in-seam.

Cut your tee-shirt open as well.

Everything pinned together, I can cut it all out in one step.

Lay your tee shirt over your denim (right sides together).  Lay your pattern on top, and pin in place.  Cut around your pattern.  Remove your paper pattern, but leave your bib pieces pinned together.  Don’t worry if your denim piece has a seam running across it.  That’s ok.  Look at my finished pics.  My bibs all have a seam running across the front.  It’s all part of the re-purposed look. :)

Now, sew your front and back pieces together, leaving about a 1.5 inch hole (somewhere along one side of the bib) for turning.

Turn your bib right side out and iron it flat.

Pin the hole shut, and stitch it closed

pin the hole together, and stitch it closed, sewing close to the edge of the fabric

top-stitching

Top stitch all around the edge of the bib so that over time, the front and back layers don’t shift.

Last step: sew a couple of squares of velcro to the ends of the bib for fastening, and you’re done.

Do you love it?  Do you?  Do you?  Isn’t it awesome?  Wasn’t it easy?

You know what I do if I’m giving them as a gifts?  I cover that seam with a piece of fabric that co-ordinates with the back of the bib.  You can see what I mean here.  Just cut a strip slightly longer than the width of the bib.  Turn the long edges of the strip under and press flat.  Cover the seam by top-stitching the strip in place before stitching the front and back of the bib together.

So, there you go!  Have fun with it!  And don’t forget to link up your finished product on our facebook wall!  I’d love to see how it turned out!repurposed denim bibsIf you’re looking for another way to re-purpose your old jeans, please check out our AWESOME re-purposed denim aprons!

repurposed denim aprons

Make repurposed denim aprons for your little crafters, using the of the leg of an old pair of jeans…

For your convenience, I’ve included Amazon Affiliate links in this post.
repurposed denim apronsOk!!  I’ve had these repurposed denim aprons on my to-do list for a couple of months!   I went right at it this weekend, and got 8 of them done.  Now, each of the Hooligans will be getting one for Christmas. repurposed denim aprons

I’m gonna start by saying that I LOVE repurposing denim!  It’s soft, it’s sturdy, it doesn’t stain easily, and it washes up really well.  One of my daycare parents brings me all of her family’s jeans when they’ve outgrown or out-worn them.  They’re perfect for this kind of thing, and I also use them to make repurpsed denim bibs.

So, these were really easy to do.  No fancy sewing skills required here (I don’t know how to do the fancy stuff).

Oh, before I start, I want to mention that I use a needle designed for sewing on denim for stuff like this.  It’s a sturdy needle, and is less likely to break when you go over seams and what-not.  If you don’t have a “denim” needle, use the largest, sturdiest needle you have, slowing down and taking care when you go over seams and thicker parts so you don’t snap it.

I borrowed a couple of aprons, a big and a small, from one of the older Hooligans, and traced them for my templates.  Now we’re ready…  

Cutting along the in-seam, open up a leg of a pair of jeans.

Center your template on the open leg (good side up or down – it doesn’t matter), lining up the bottom of your template with the bottom of the pant-leg – this makes a nice finished hemmed bottom for you.  Pin in place and cut out your apron.   *If you have bias tape to trim your edges, super.  If you don’t, then you’re going to have to turn a little 1/4 inch hem to prevent fraying, so cut 1/4 inch larger than your template.

Hem your edges now, if you have to hem, folding denim under 1/4 inch, and stitching all the way around, OR trim your side and top edges with bias tape.

I had a couple of old scarves that were destined for the charity bin, but I decided to use the fleece to make hearts for the aprons.  Then, I discovered this awesome stretchy bias tape all around the edges of the scarf, so I ripped that off both scarves and it was enough to edge 5 aprons!! 

Now rip one of the back pockets off your jeans and center it on your apron.  Stitch in place.

At this point, I also stitched a fleece heart the upper part of the apron.  You could use flannel or felt – whatever you have in your scraps.  I used a zig-zag for this

.Now it’s time for the straps.  You’ll want to measure your child with a piece of string or something so you know how long to make your straps.


Your straps are going to come from the in-seams and the outer side seam of your jeans.  See the picture right above?  See the seam on the left and the seam in the center of the pic?  They’re nice and thick, and easy to snip out.  Just cut right along side the seam all the way up the leg, and then trim it to the right size.  You won’t be turning under any unfinished edges of these seams.  Just leave ‘em as is.  You’ll want a strap for the neck and one for the waist.

Attach some velcro and sew those straps in place.  You’re done!!

Wasn’t that easy?  And how TOTALLY sweet are they?repurposed denim aprons

I can’t wait to give these to the Hooligans.  They’ll get to take them home with their Xmas gifts, but I’m asking that they bring them back after the break.  These are going to stay here, so we don’t have to worry so much about getting messy when we’re…..getting messy! :)

For another super way to repurpose your old jeans, have a look at our re-purposed denim bibs.  They make a great gift for a new baby!

I’m often asked what kind of camera I shoot with.  My “baby” is an entry-level Canon Rebel XS DSLR.  You can check it out here:

homemade baby gifts

Homemade recycled denim bibs and large, reversible receiving blankets:

Some of you may have seen my post yesterday saying I hoped to get down to some sewing this weekend.  homemade denim bibs and receiving blanket

One of the Hooligans became a big sister earlier this week.  A new, sweet, little bundle of joy, the 3rd of three girls, arrived last Tuesday.  Although they knew they were having a girl, I held off purchasing any fabric until Baby arrived, and I knew for sure that I could safely use pink.  As soon as I got the word, picked up my fabric.large reversible receiving blanket

I love these double-sided flannel receiving blankets.  (I’ve rolled the blanket up in a way that you can see the polka dotted fabric that I used for backing), and I also used some for the ribbon).  These blankets are awesome for a couple of reasons: for starters, they’re huge (approx 1 meter (or yard) square), and secondly, because they’re two-ply, they’re really warm and cushy.  I received one, made by a friend, when Andrew was born, and because it was so big, and so cozy, I was still wrapping him in it, after the bath, when he was two years old.  Love love love them!  You can follow my tutorial here.

I also LOVE these denim bibs.  I started making them out of necessity when the Hooligans’ bib supply was running low, and I didn’t want to spend $$ on something that I figured would be pretty easy to make.  Now they are my go-to bib whenever I need more for the daycare, or to add in with a baby gift.  I make these using the legs of old jeans.  One of my daycare moms thoughtfully donates all of her family’s old jeans to us, to use for crafting and sewing projects.  Denim is a perfect fabric for bibs because it’s stain resistant, sturdy, and quite water repellent, so it doesn’t get soaked if you have a messy eater.  They can take a lot of abuse, and they stand up very well.

For a pattern, just trace one of your little one’s bibs.  Sew a couple of pieces of velcro on for fastening, and you’re good to go!  You can find my step-by-step tutorial here.  Happy Sewing!

*just visiting this post 3 months later.  I forgot to mention;  I save the cool coloured tee shirts that my guys outgrow or outwear, and use those to back the bibs.

If this is your first visit to Happy Hooligans, be sure to pop over and LIKE us on facebook.  I update my page daily with easy and affordable arts, crafts and play ideas!follow happy hooligans on facebook

You can follow us on Pinterest too!  Over 80 boards dedicated to kids art, crafts and activities, as well as several personal interest boards. follow the Hooligans on Pinterest!